Success and progress
I passed! Yes, it was three weeks or so ago now, but I’ve been busy, so there you go. I am the proud holder of a Chief Mate (unlimited) certificate of competence, but unfortunately my application to add on the Master (3000gt) ticket has been held up by a quibble about whether or not my 8 years as master of a ship on a lesser ticket should count towards this… I won’t go on; the bureaucratic wheels are slowly turning and hopefully the MCA will see the error of their ways in due course. In the meantime, I shall be off back to sea in a few days’ time, so it’s time I updated you on some definite progress with Serchthrift before I go.
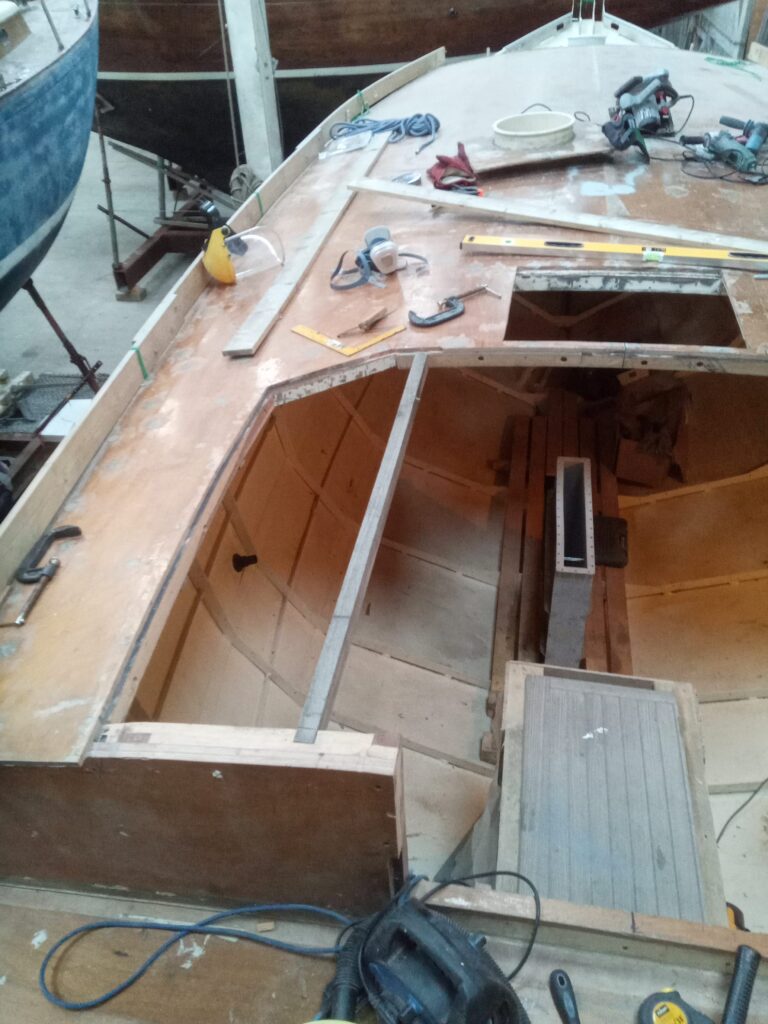
When I last updated you, I had successfully removed the ugly dog of a doghouse, but still needed to remove its roots, so to speak. After a couple of days of recovery and personal admin following my oral exam, I headed back to Kilmelford to start some serious work on the boat at last. The first task was to tidy up around the edges of the doghouse aperture. having identified previously that there lurked some fastenings in the woodwork, I purchased a slightly more superior (but more highly-strung) blade for my circular saw, which promised to be able to cut through steel as well as wood. First, however, to allow enough clearance for the plate of the circular saw to cut along the line I had marked, I had to trim down the remains of the doghouse sides to be flush with the deck. In hindsight I suppose the best tool would have been a grinder with a wood cutting blade fitted might have been the best option, but using what I had to hand, I set about it with Beelzebub’s Bread Knife again, and survived to tell the tale. This done, I could now work around with the circular saw, cutting an almost neat line around the aperture, leaving a portion of the existing carlines in place to build my new framework from. Before I smoothed all the cut surfaces with a plane, I had first to cut out the remains of any screws I had cut through with the saw (with a very impressive shower of sparks indicating whenever the saw found one). This I did by using a plug cutter bit in my hand drill to carefully extract the wood surrounding the screw, before then twisting the remaining screw out with pliers. This has left some holes which will require filling at a later date, but at least I didn’t destroy the iron of my best (only) hand plane…
Once I had tidied all the edges up I had to think about how to remove the redundant mast partners just forward of the doghouse. This was part of the steel structure, being a steel collar welded into a plate, welded between two steel deck beams, all topped with a layer of marine ply. The reason for its redundancy is that I have deviated from Nick Skeates’ original junk ketch rig, which for several reasons doesn’t make sense as much as a junk schooner rig. This means that the big mast is in the middle of the boat, rather than right up in the eyes (with all its weight). The ketch’s mizzen partners and step therefore can be removed, whilst at a later date I will construct new partners and a step for the mainmast, positioned just forward of the centreboard case, almost exactly where the mast is stepped in the original gaff cutter version.
Anyway, whilst I had the circular saw out, I had cut the ply around the partners, leaving just the steel to tackle. This could mostly be done with a cutting disc in one of my 4″ angle grinders, and was a fairly straightforward albeit tedious, hot and smelly job. Again, impressive showers of sparks were produced, and the interior of the boat was filled with steel grindings. However, one edge of the steel plate was quite difficult to get to (if not impossible) with a 4″ disc, especially once it had been partially worn. The only way to cut the last 6 inches was with a bigger grinder, so Dave at the boatyard very kindly lent me their 9″ battery-powered machine. This was a 36V machine, which therefore takes 2 batteries, which all adds to an already fairly weighty bit of kit, and I had to operate this above head height and cutting upwards! It was hard work, but in the end I successfully extracted the structure, which I hope eventually to adjust and re-use for the new mainmast partners.
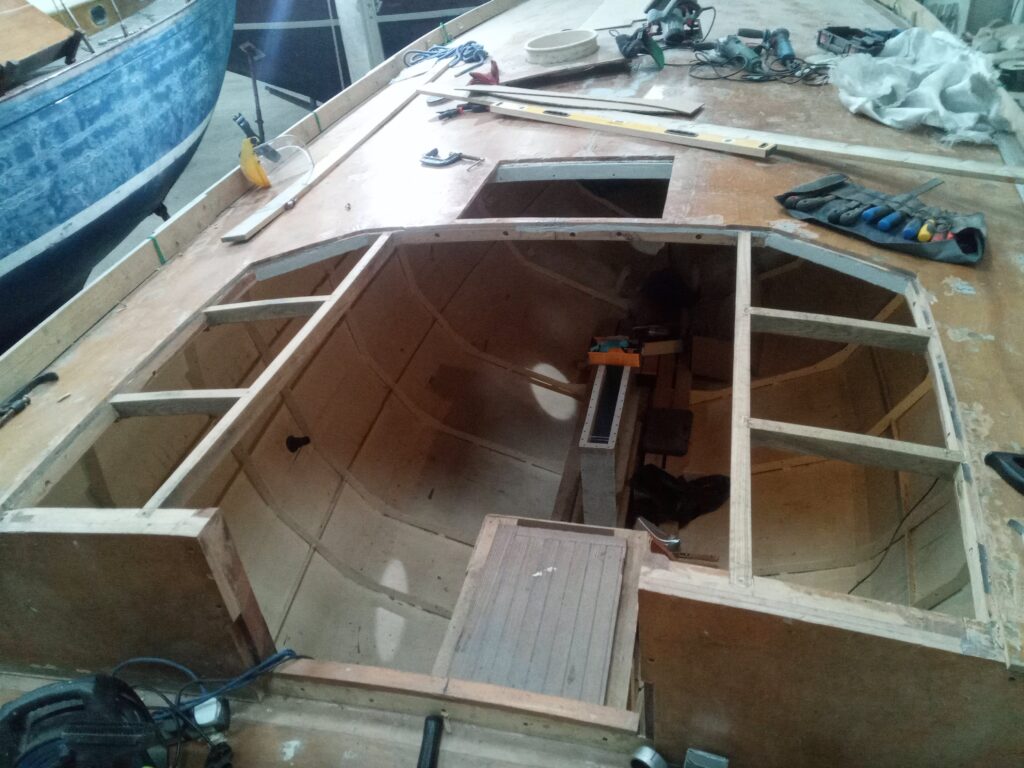
Once all this dirty work had been completed I could start building the new framework within the existing doghouse aperture for my new, smaller and prettier doghouse. From the growing pile of timber I have lying next to the boat, I identified a reasonable, if dirty, length of oak, which was the perfect size to use for this job, so I started by cutting the carlines (the fore-and-aft members forming the “sides” of the new aperture) to length, planing two sides to a chamfer to allow both for the deck camber and for the slight (2 degree) toe-in of the doghouse sides, and cutting the joints in the existing deck beams fore and aft. Slightly contrary to conventional boatbuilding methodology, I decided that the use of dowels on the forward end would be best, given the fact that the deck beam is a composite construction of steel and timber, making the cutting of conventional joints very tricky. Held in slight compression, with two 10mm dowels, plenty of glue and all held together by the ply deck glued and screwed to it, as well as the doghouse sides epoxied in, I’m sure this unconventional approach will be more than adequate.
With the carlines done, I then cut to length four half-beams, which I then had to joint to the new carlines as well as the existing ones from the old doghouse, having first had a slight radius planed into the upper face to allow for the deck camber. The jointing is quite fiddly, and my joints were not perfect, as I’ve not done much fiddly stuff with my less-than-razor-sharp chisels recently. There will be lots more to come, of course, during the internal fit-out, but I think for that I will invest in some new, better quality chisels and keep them sharp from the word go. Nevertheless, I managed four reasonable joints, and the faults will mostly be hidden in the final structure.
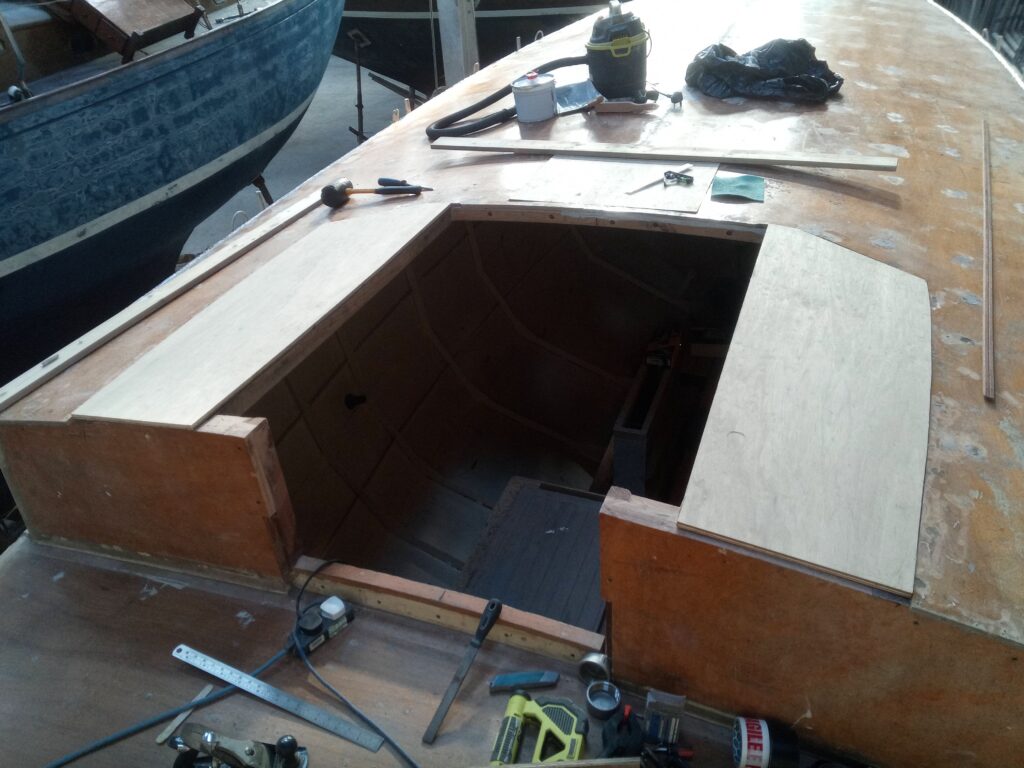
The next stage once this structure was glued together was to fill the apertures with plywood to complete the first (existing) layer of deck prior to laying the second layer. Now, there is a logic to this sequence of work. My priority at this point is actually to finish any steelwork – in particular welding – so that I can paint the entire steel structure in umpteen layers of epoxy before hiding it all behind insulation and some fine internal joinery. However, one of the bits of steelwork I need to fabricate and fit is the mainmast step. In order to get the position of the step, I need to establish the position of the partners in the deck directly above. This bit is slightly more critical, being dependent on the position of the deck beams (one steel, one wood, in this particular case). The space between these is only just larger than the diameter of the hole, so I want to make sure the hole is cut in the right place before then marking out for the mast step directly below and then cracking on with the steel fabrication. There is no point cutting the hole before laying the second layer of ply and subsequently glassing over it, ergo I must complete the deck lay-up first…
Consequently I found a need to order some plywood first, and actually managed to find a local builders’ merchant who stock actual marine plywood for a very reasonable price. OK, so it is not as high a quality as you would get from Robbins in Bristol, but using the logic that the deck is going to be covered in epoxy and glass and then painted, and the interior ply panelling and bulkheads will all be painted, a slightly “cheaper” appearance didn’t matter. What does matter is that it is manufactured to BS1088, so conforms to proper grown-up marine ply standards. It took a while to arrive, but finally on Friday morning the truck turned up with my 21 sheets of 3 different thicknesses, which should suffice for the deck and internal bulkheads as well as a few other bits. In the meantime, after the first shipment went missing, my epoxy resin and glass supplies arrived (together with associated tools and other flim-flam).
I cracked straight on on Friday with glueing in the bits of 12mm ply to fill in the holes, and now I am ready to start with the second, 9mm layer over the entire deck, which is this week’s work.
This should bring me to a reasonable juncture where I can stop for a bit, as the sea is calling, and as it stands, Covid-permitting, I am due to fly out to Madeira on Friday to join Pelican of London with her cargo of German high-school students, to take them to the Canaries, and thence across to the Caribbean and their shore-based school-time in Central America early in the new year. I shall be back in early January to continue with the boat, probably concentrating mostly on steel fabrication and welding, for which I had a little bit of tuition and practice under the expert guidance of Harry Taylor, my god-daughter’s grandfather, for which I am very grateful! I still require some practice, but hopefully I can start tying that in with some basic fabrication before too long.