The Interior Fit-Out Commences
It has now been several weeks since I sat my Master Unlimited oral… and unfortunately failed. It has taken some time to reconcile myself with failure, as it is not something I am accustomed to, but shit happens, and I have the opportunity to resit whenever I can secure another slot for an exam (don’t get me started on the ridiculous MCA booking system!). I did look at the possibility of doing a quick resit in the month between the original exam and going back to sea, but at the same time I needed to have some downtime as the strain of studying, as well as a few other disruptive processes which life had thrown up, was starting to show.
So, on the 30th March, the day after my exam, I was back down at Kilmelford and mulling over what to do next on the boat. More of that in due course, however, as I need to update you first on what I achieved in January before I knuckled down to my studies.
Given that it was the middle of winter and pretty cold in the shed, I needed to call a pause on the work I had been doing on deck, which I covered in my last blog. The cockpit is almost complete now, just needing some capping rails and seat backs, both of which require epoxy work, and some lids for the deck lockers / steps up to the main deck. Cold weather and epoxy do not mix well, nor is there much light to work by in my corner of the shed in the middle of winter, so I decided instead to start some of the interior fit out, which does not require epoxying, and which can be done in temperatures perhaps 1 degree higher than outside the boat, and in plenty of artificial light!
I started at the pointy end, with the forward end of the forecabin. This compartment is going to be divided in two, with cable lockers and stowage forward under the foredeck with a single bunk on the starboard side. To port of the centreline under the fwd end of the coachroof is to be the heads compartment, with a fore-and-aft partition separating it from the passageway and bunk. I decided first to attack the hull lining forward of bulkhead 2, and extending aft into the next section on the stbd side. After some mental sketching of what I would do, I started by manufacturing a patent measuring stick with which I can measure the length and cutting angles for the ends of each lining plank. It is based on the measuring battens used in the RN for cutting damage control shoring timbers to length, and I was very pleased to think of it as a solution for getting the planks right.
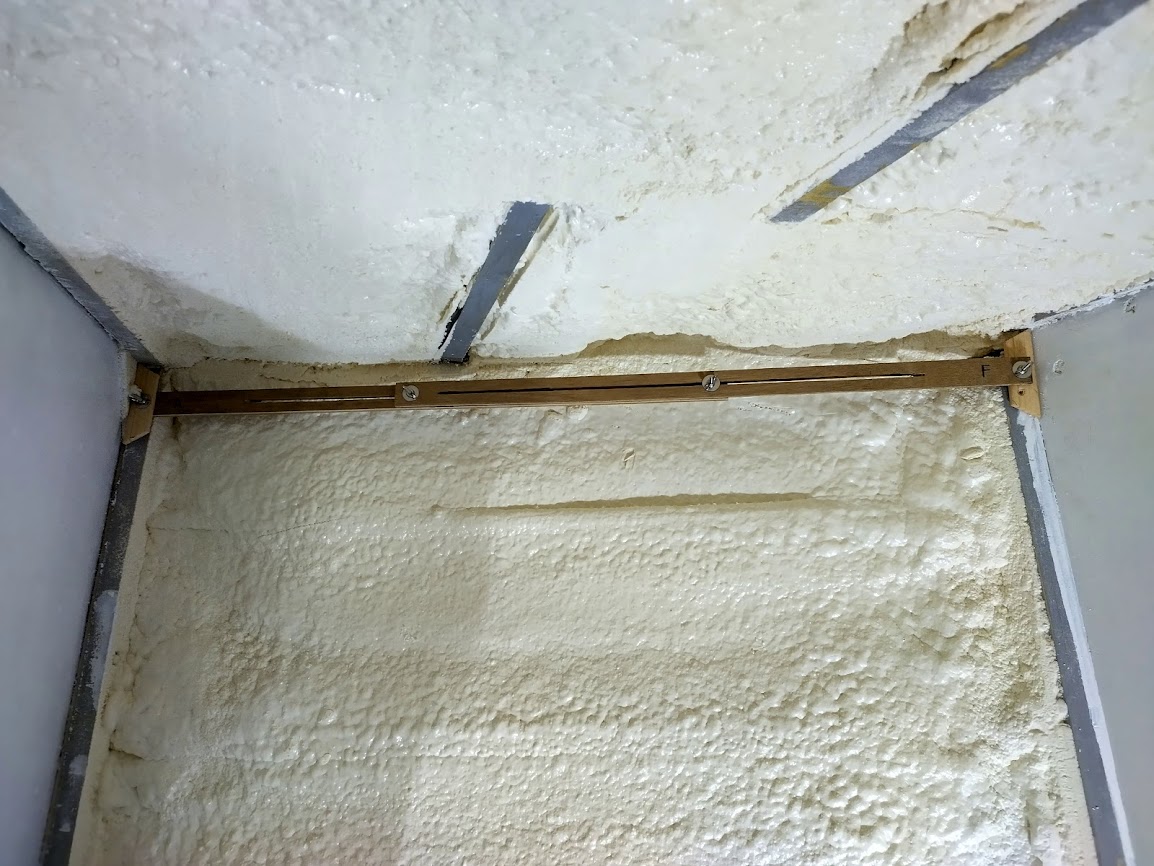
The visible parts of the lining are in tongue-and-grooved Scottish Larch obtained from a friendly sawmill in Fife, and like all the wooden parts of the interior, needs some sort of sealing to prevent staining or moisture ingress. I therefore set up a one-man production line to apply a few coats of quick-drying floor varnish (easy to apply, quick to dry and satin finish) to a number of lengths of plank at one sitting. once varnished, they could then be moved onto the deck ready for cutting to length. I would take the measurement of the next plank with the stick before transferring it onto the timber stock and cutting it to length, remembering to bevel the ends according to the angle of the hull to the bulkheads at either end. This process allowed me to get about 85% of the planks cut correctly first time, reducing waste, although in inconspicuous areas like the fwd store, I am not too worried if the odd plank has a 5mm gap betwixt it and the adjacent bulkhead. Once I’d developed the process, I managed to rattle down the section as far as just below the level of the cable locker lid.
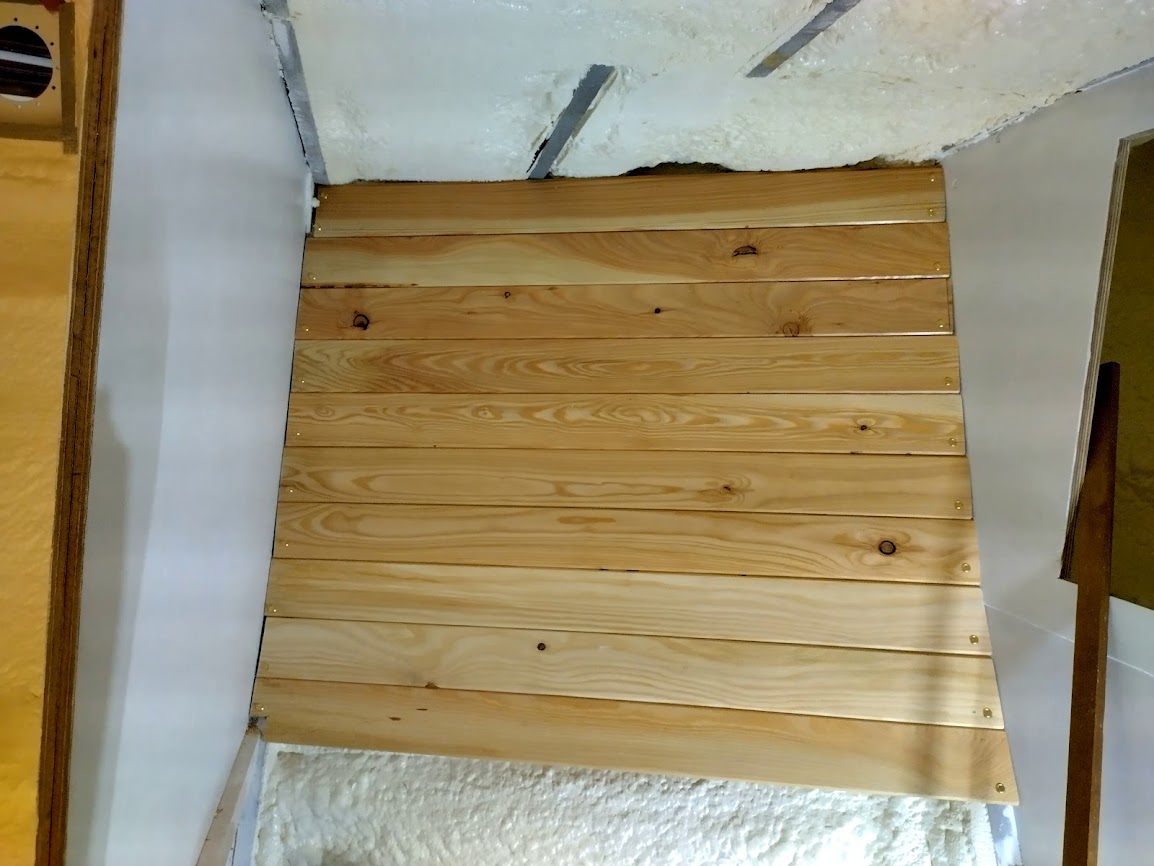
Once I’d got this far, I moved to the stbd side and lined the hull down to the bunk level with T&G before moving onto simple softwood ceiling planks for what would be within the lockers below the bunk. This extended down to the cable locker lid level again fwd of bulkhead 2, but further down the hull in between bulkheads 2 & 3, where there would be under-bunk lockers for tools and the bunk occupant’s effects.
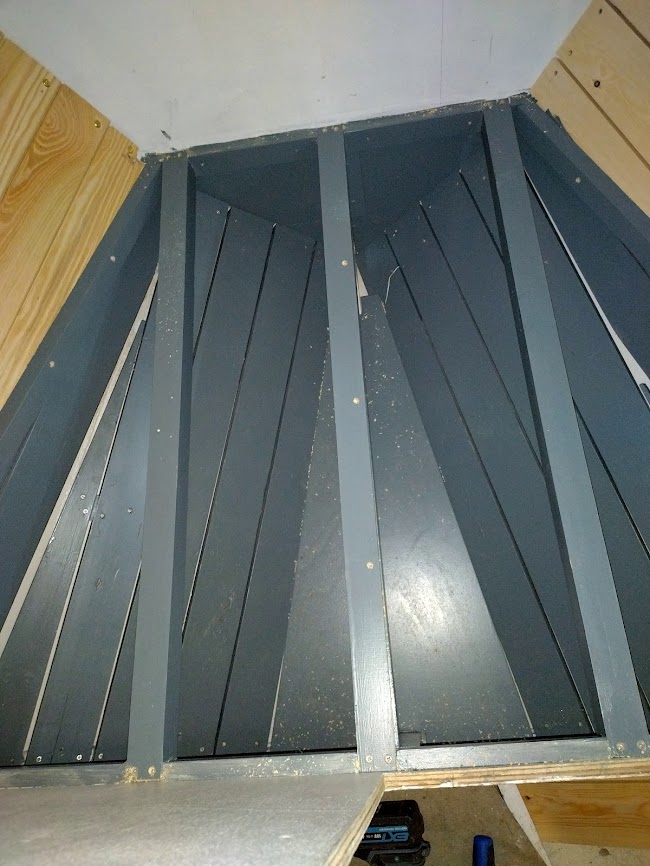
I then moved on to tackling the lining of the cable lockers and the lid. For the former, I again used softwood square-edged planks, but slightly heavier duty, given the weight of anchor cables, and with a solid ply bottom so that chain links wouldn’t get caught in any inconvenient gaps – all heavily built and painted with tough grey garage floor paint to take the expected bashing. There was quite a bit of trimming to shape for all the parts here, as I was working in the narrowing forefoot area of the bilge.
Once the lining in the lockers was complete I could make the framework and templates for the lids which I then cut out of 12mm ply in two halves, each with an access hatch, and the centreline divider. The main anchor cable will come directly down from the windlass gypsy through the deck via an angled spurling pipe (although I haven’t decided what to make this out of yet – could be a simple plastic pipe, or I could make a nice wooden chute like the one I had in Mintaka), to drop into the locker on the centreline, maximising “spreading out space” as it piles up in the locker. The port cable will remain normally disconnected from the anchor and attached to a hook on the underside of a small plug in the spurling hole in the locker lid. This can then be unhooked and the end passed up the deck spurling pipe (which is also normally capped with a stainless steel screw cap) to be connected to the second anchor, which is stowed in chocks on the foredeck. To port above the cable locker lid will be shelves for bosunry stuff and spares, whilst to stbd between bunk and locker lid will be a couple of cave lockers for more stuff.

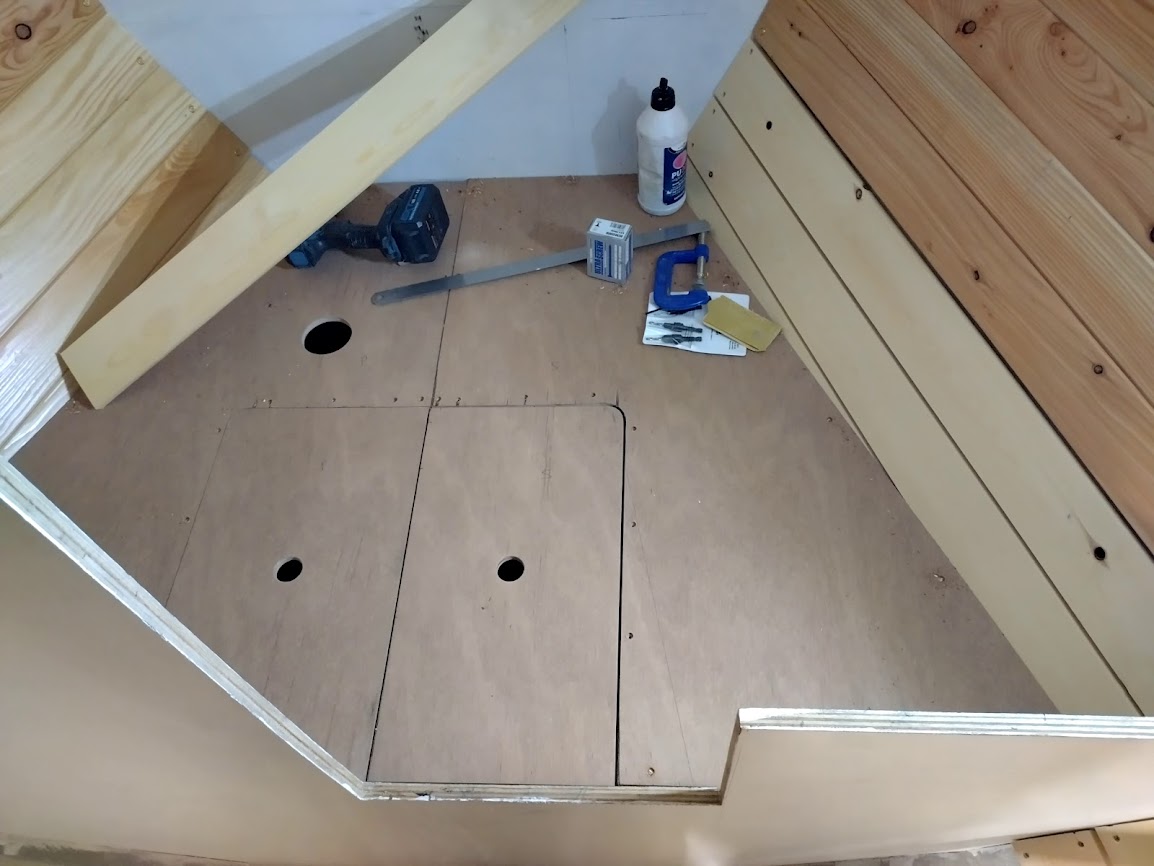
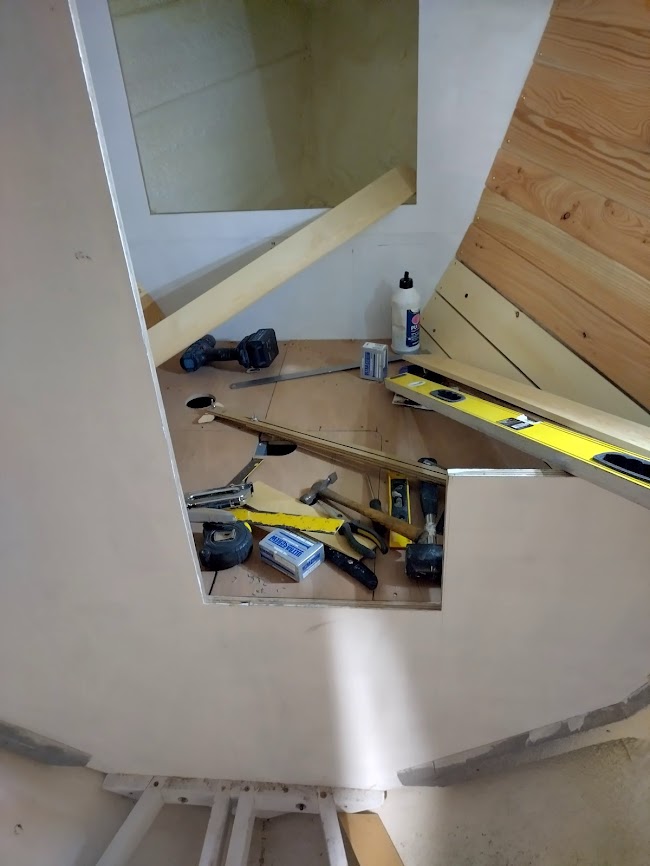
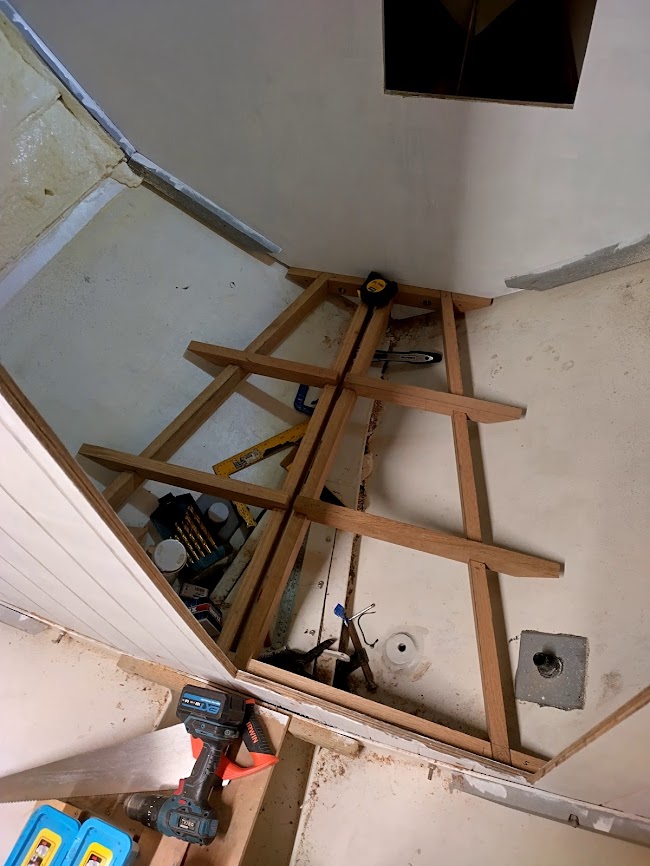
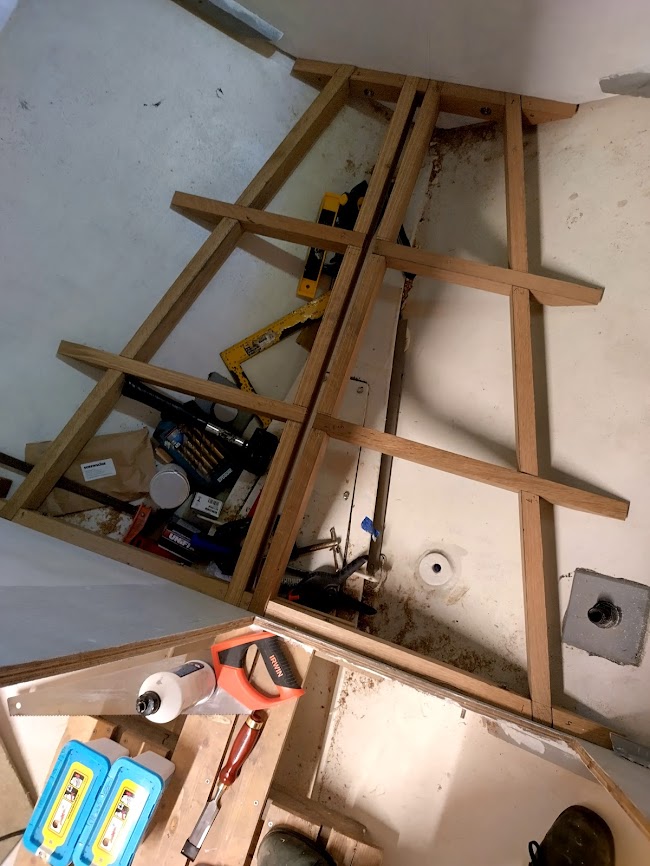
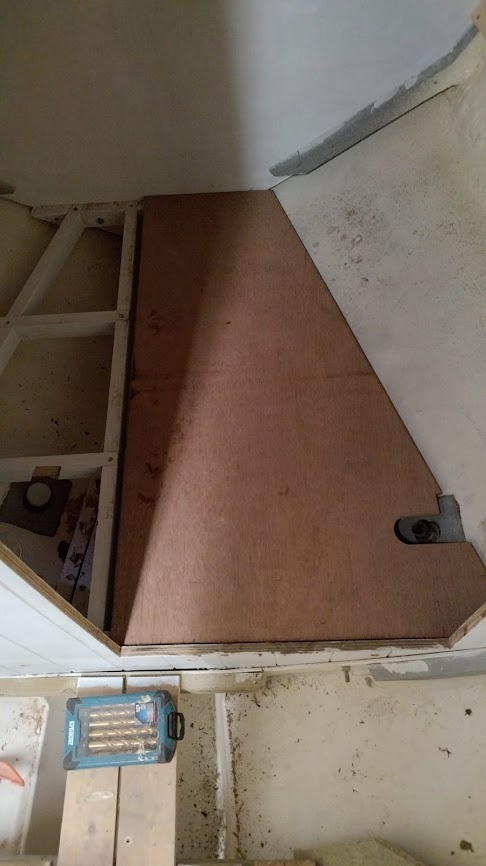
Whilst working on the cable lockers I had also been making the sole beams for the next compartment aft – the heads to port and the passageway to stbd of the centreline. These sections will be partitioned with an 18mm ply bulkhead in due course, and you can just see in the photos that there is therefore a pair of fore-and-aft beams which will sandwich the bottom of the bulkhead and secure everything together in a solid structure. Making these beams was my first proper test at actual accurate joinery, and although my cutting of joints is not yet perfect, my accuracy with saw and chisel is improving with each one I do, so by the time I get to the fine joinery required in the visible cabin furniture, I should be pretty good at it! Once the beams were all in place, I could template and cut the sole boards. The port side will remain painted and is therefore 18mm ply, whilst the stbd side will be covered in a nice attractive 6mm cork-based flooring product (driven by aesthetics and insulative needs), so is cut from 12mm ply in anticipation of the extra thickness of the flooring. Neither part has been secured yet, as I still need to determine the positions of cut-outs for the heads plumbing and, on the stbd side, a lift-out hatch for access to the bilge and holding tank lid.
This then was the stage I got to before I had to stop for the duration of my exam revision, and was a logical place to pause proceedings.
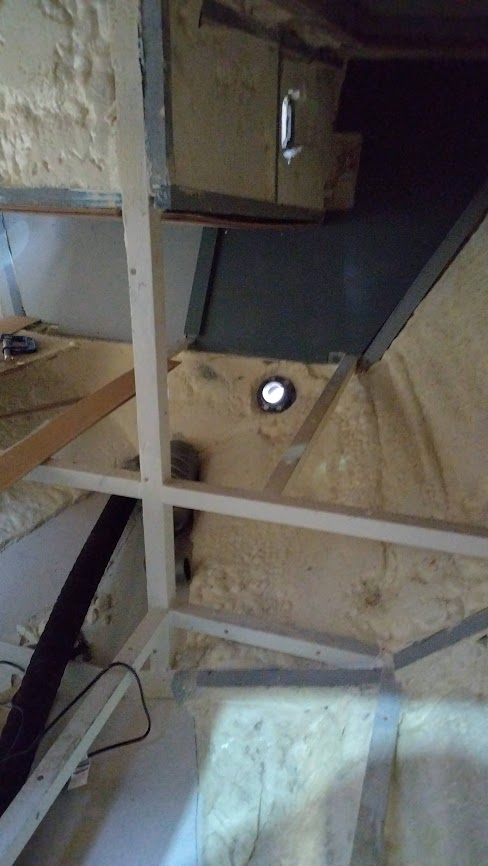
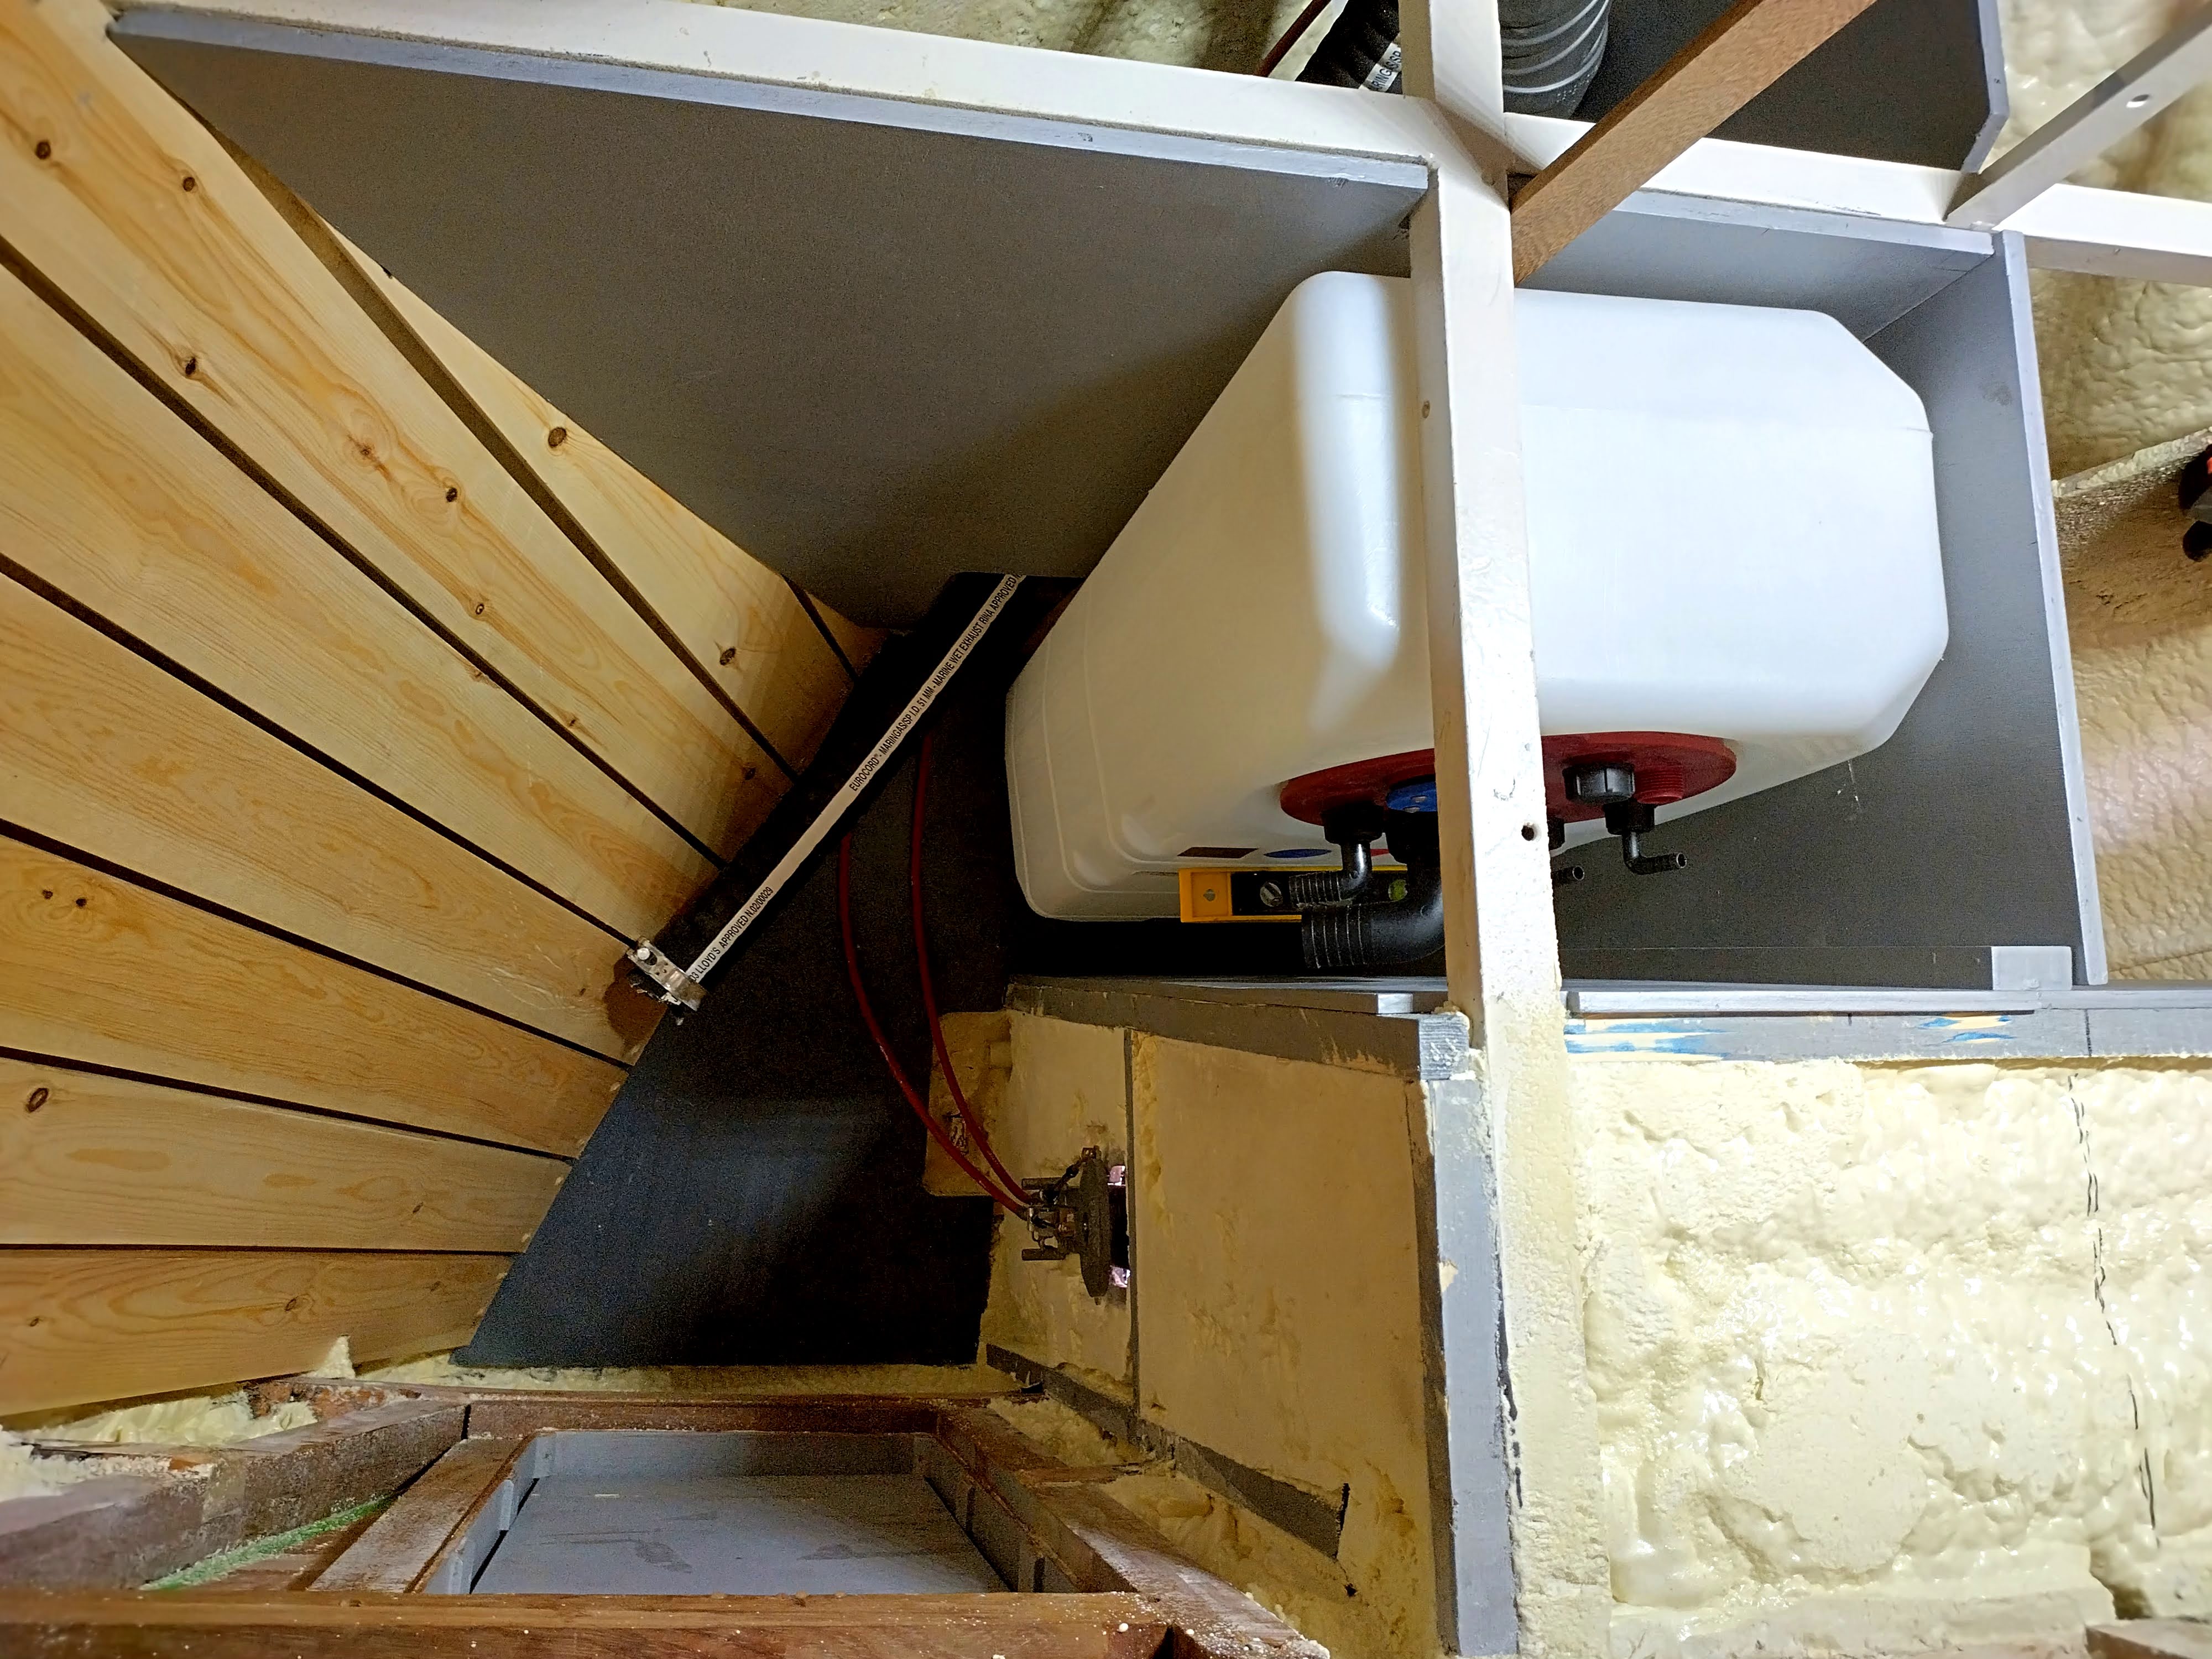
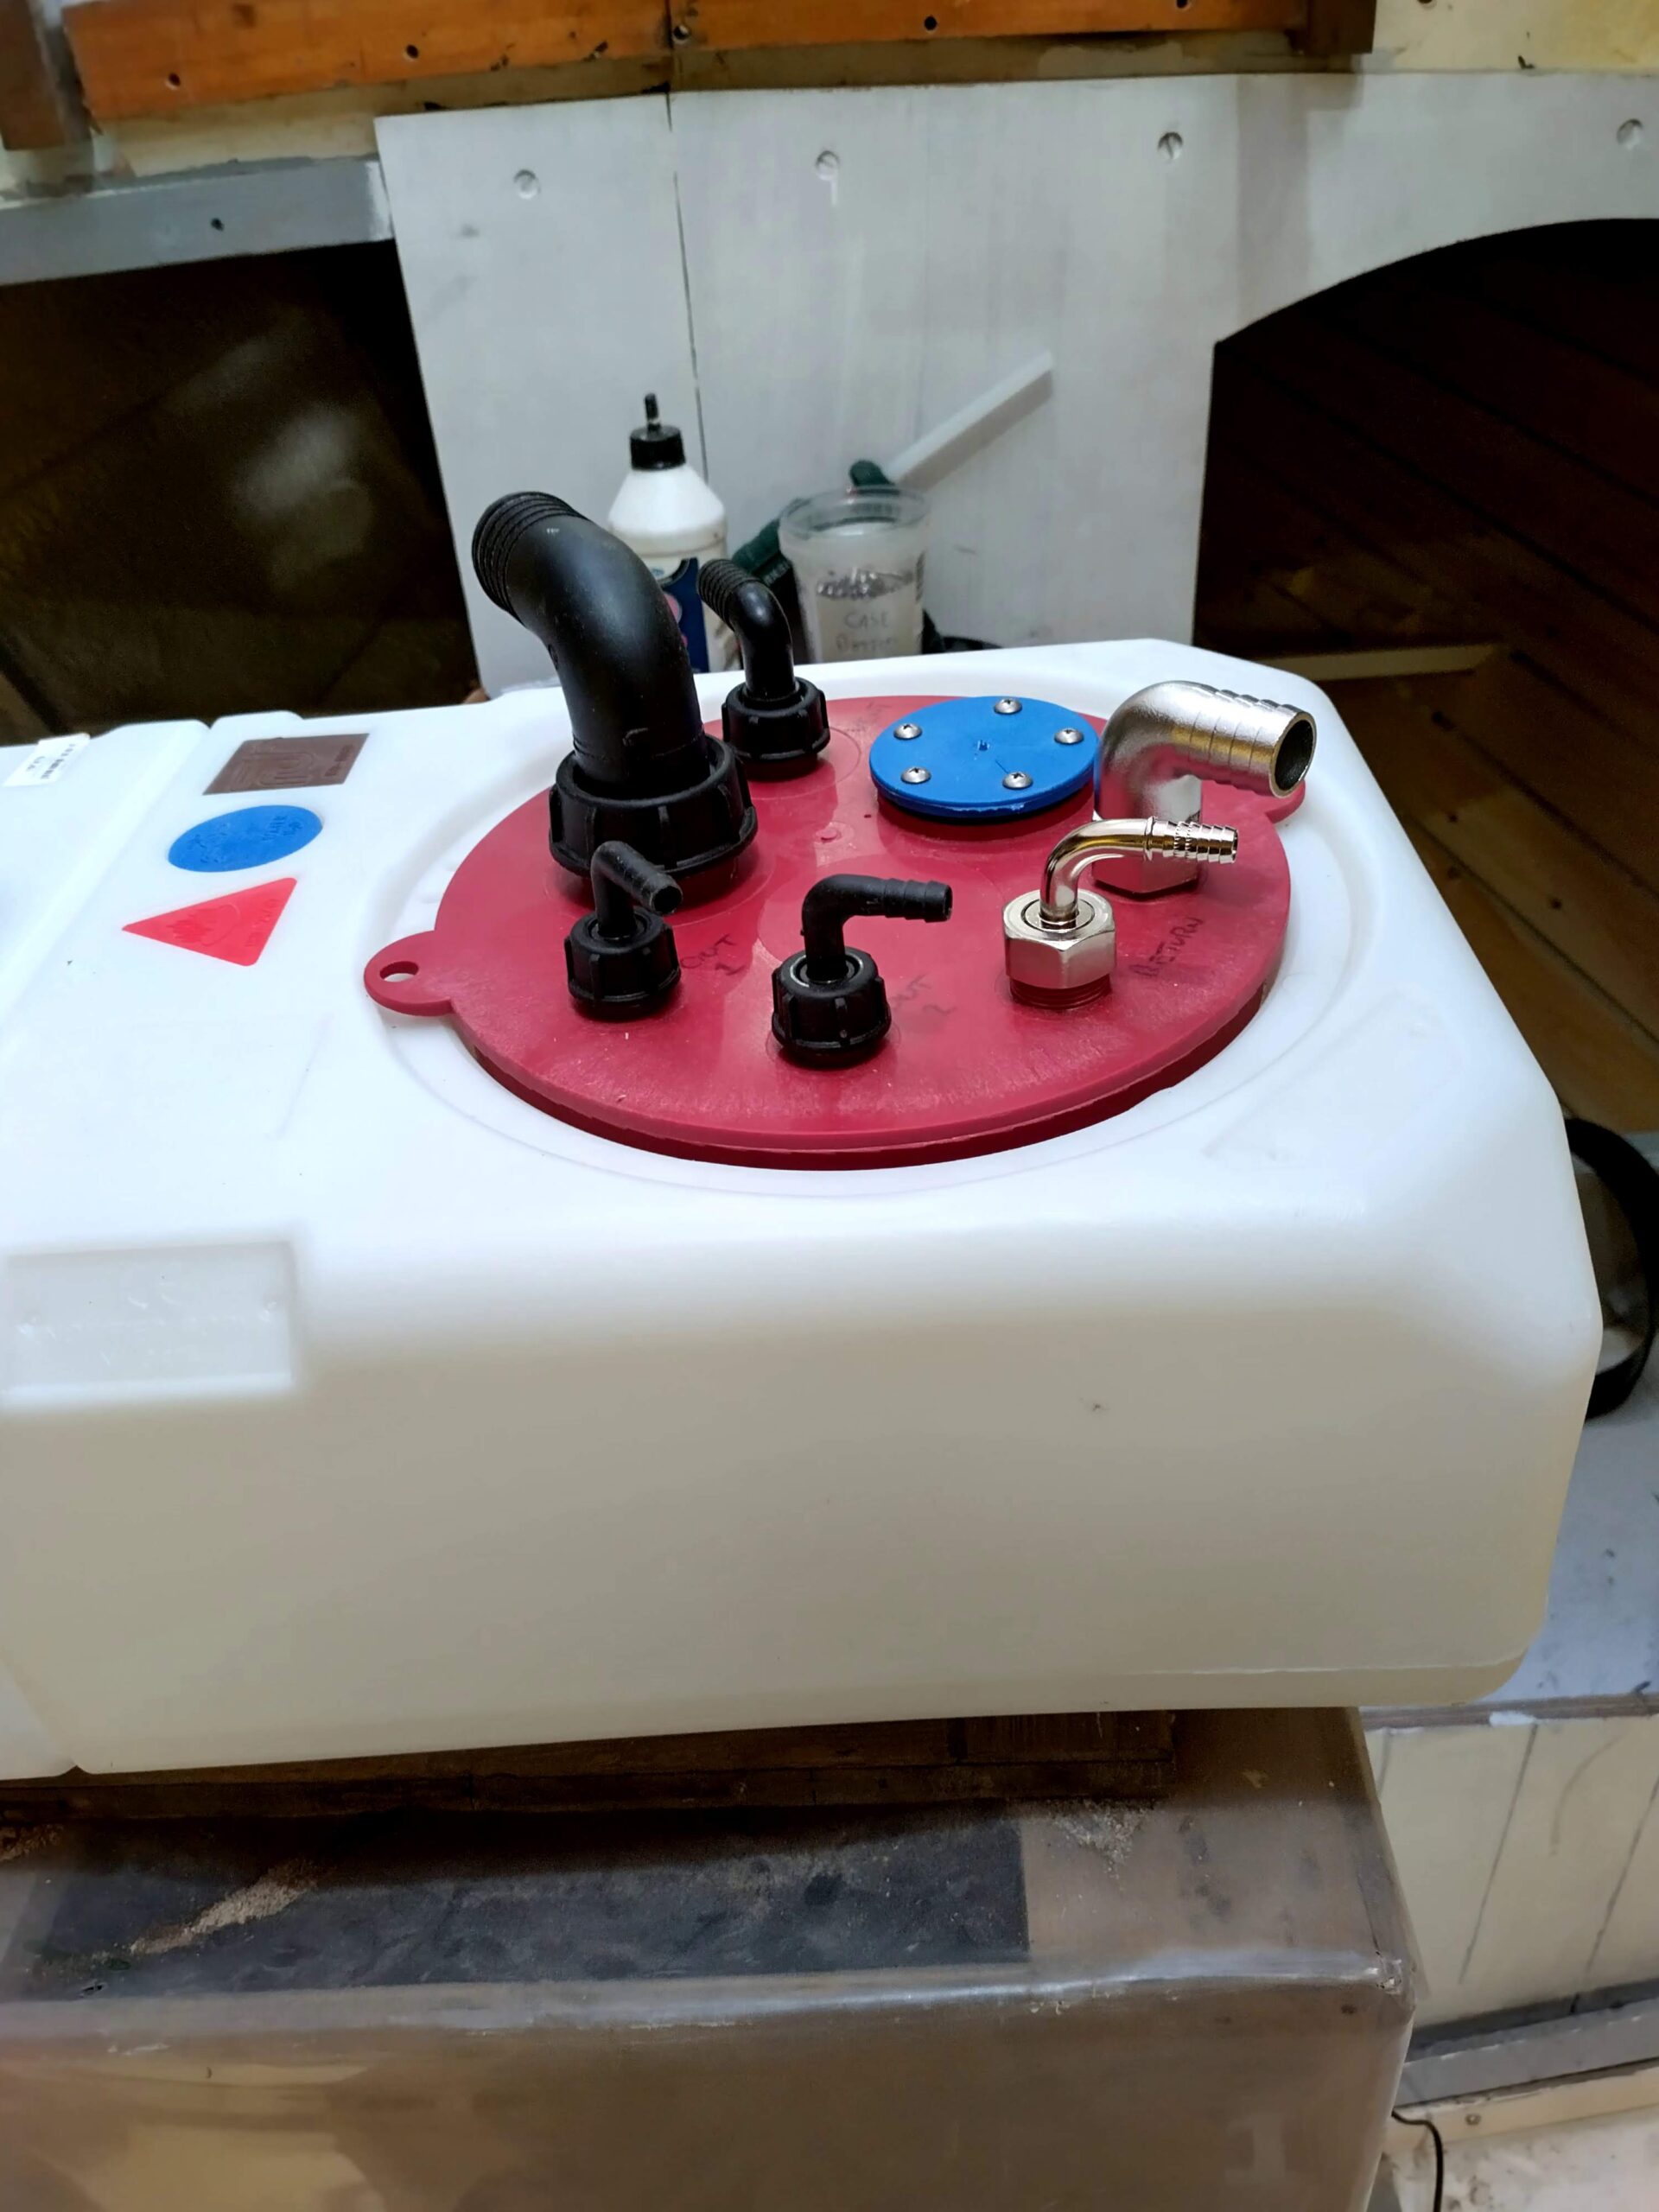
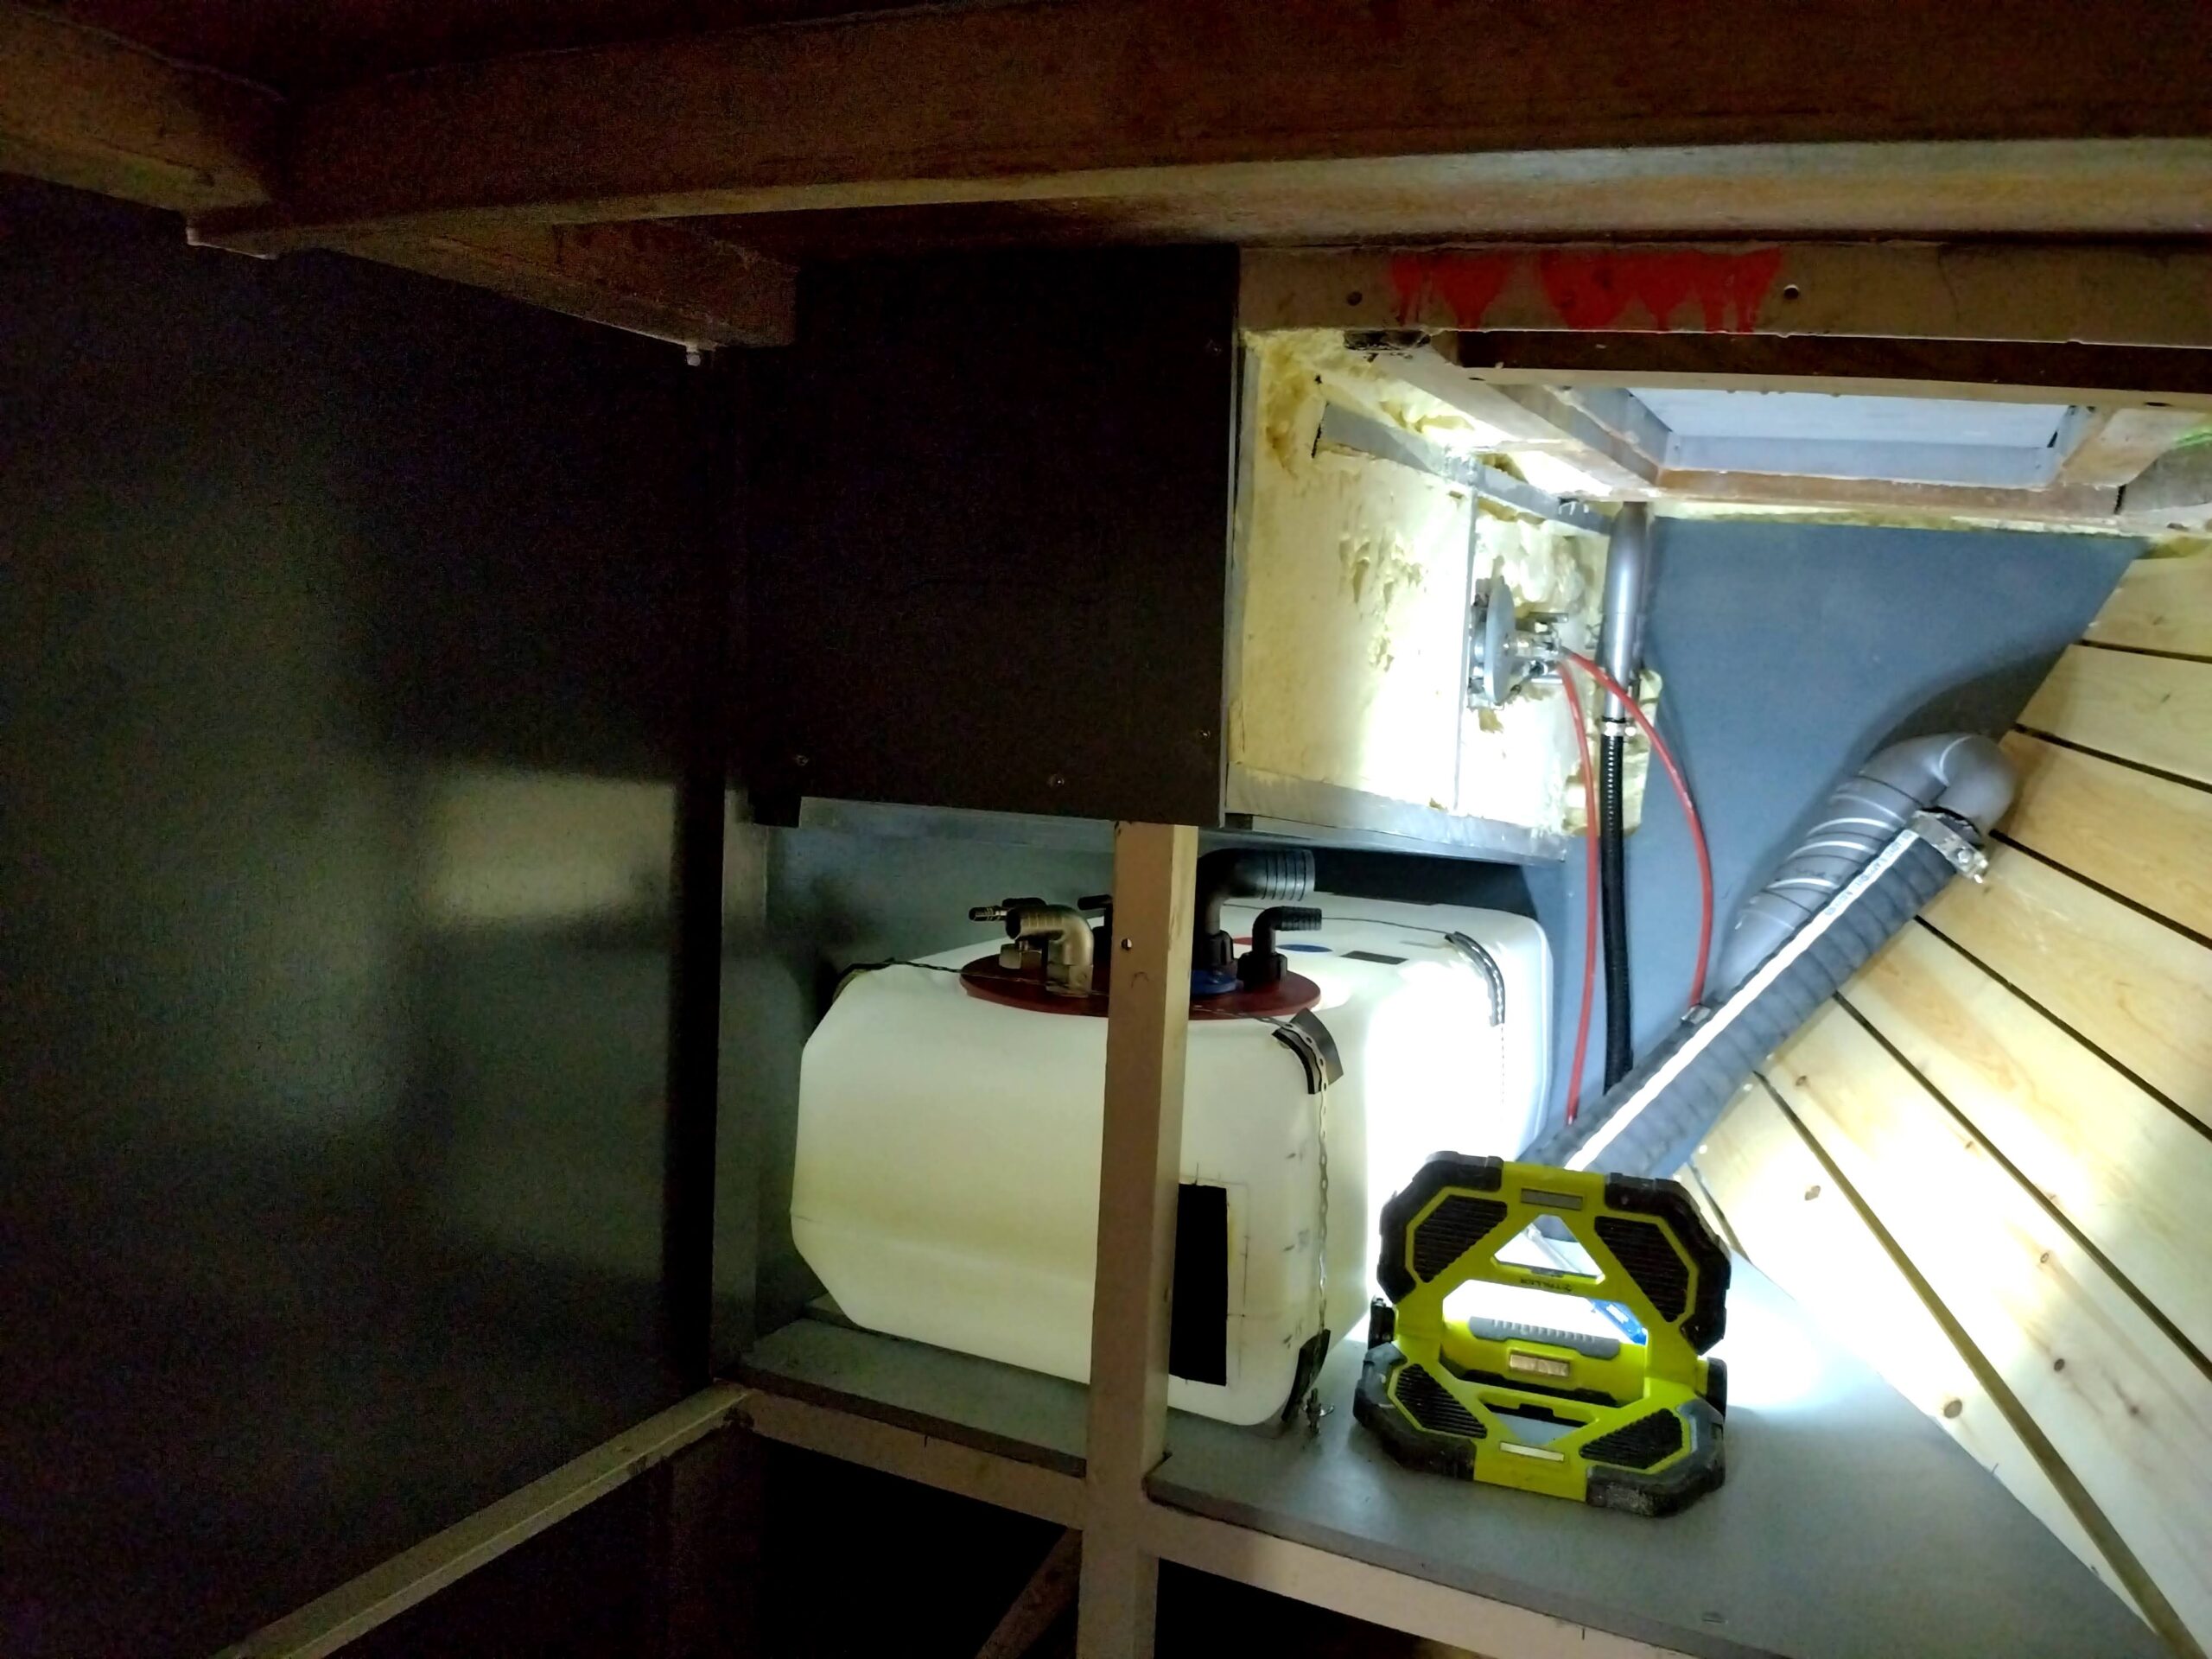
Once the exam was over (at least for now), I had to decide how to proceed next. Given that finishing the cockpit is reliant on some of the systems being at least partially in place (e.g. fuel fillers, engine control lever, fuel vents, deck bilge pump), the logical next step was to start fitting out the aft peak, particularly the port side, where many of these systems will be located and accessed. For the systems to be installed, I had first to start lining the compartment, so I started right aft at the transom, which is an awkward place to work, given that it’s not ultimately intended to fit my six-foot-one frame and rugby / swimming shoulders that way round in either side! Because neither aesthetics or ruggedness are particularly important on the inside of the transom, I chose 4mm ply to line this, which is quick to cut and fit, and easier to manoeuvre into position. I did the transom in two halves, incorporating a timber cleat on the centreline to stiffen things up and provide an anchor for the centreline partition board. With the underside of the cockpit well projecting into the space, and a partition planned right along the centreline, there is a lot to think about when considering the lining, and an awful lot of panels to cut and shape to do this. Of course, the cockpit locker side does not need to be particularly pretty, but needs to provide solid anchorage for the various systems running through the compartment, in particular fuel and bilge hoses (two fuel tanks with separate fillers and vents, plus fuel transfer line and pump, supply and return for the engine via twin filters, and supply to the diesel heating stove via its own filter; then two manual bilge pumps and respective hoses (one on-deck pump and one down below) and the smaller electric bilge pump hose running all the way back to the transom, alongside the exhaust hose and associated boxes). Whilst considering the position and shape of all the linings, I have also to consider the various hose runs and partially install them before finally fixing the lining boards in position. So far, at the time of writing, I have fitted the lining to the hull side (port side), the transom, and the underside of the cockpit well, whilst the main locker sole, aft part of the centreline partition and fwd locker sole are all cut and shaped awaiting painting. The exhaust is almost complete, and the engine control lever mechanism and cables in position (cables still waiting to be secured), and I have just ordered another few hundred pounds worth of stuff to continue fitting the systems. In between all this fun I managed to clean, sand, clean (again), fill and fair the irregularities and thin resin on the main deck. Unfortunately I haven’t caught up photographically with my progress as yet, with only a quick snap of the transom lining and main deck to show, but I will include more photos in an edit soon. I have five more days available to continue progressing this compartment before I go back to sea in the new job with Scenic, but it definitely feels like I’m making progress.

In the meantime, the mast I procured last August is finally going to make its way to Kilmelford from Forteviot in Perthshire, and I will see that delivered on Tuesday, so that is exciting. There is a little adjustment required to the mast before it fits my hull, but it will ultimately save me a lot of work in building a whole main mast. Photos again will follow in due course.
In the meantime, I look forward to my new job, sailing as First Officer Safety on board the brand-new Scenic Eclipse 2, starting in the Med before heading north to Arctic waters later in the summer.