LOCKDOWN!
Having spent a busy and slightly stressful 2 months at sea in the Pelican of London, successfully navigating the seas and Covid restrictions from Madeira to the Pacific coast of Costa Rica (wherein lies an entire post in itself), I returned to Argyll in the midst of Lockdown 3 in the middle of January, so I was mentally prepared to be making little physical progress with Serchthrift during my month ashore.
I spent the first 8-9 days recovering physically and mentally from my trip, and entertaining myself at home, before I eventually got round to calling Dave at the boatyard to see how things were and ask after my baby. After establishing that I could at least go down to check on the boat myself, I did exactly that and to my disappointment found that the newly laid ply on the coachroof deck had been sitting under a handful of leaks in the shed’s roof, which, whilst small, were persistent, and had soaked areas of the ply layer despite my efforts to cover it up, leaving very wet patches and some areas of developing mould. This obviously was not a welcome development, and could not be allowed to continue, or my investment in time and materials would go to waste by the time lockdown restrictions were lifted, and I would have to tear the entire layer up and lay it anew. Therefore I made the decision that completing the next stage of construction, i.e. laying the glassfibre / epoxy sheathing was an essential job to complete, and Dave agreed that it would be acceptable for me to do this.
The first job was to fill and fair the new ply to make a smooth and seamless substrate for the glass, so after planing and sanding any obvious unevenness, I went round with a mix of epoxy fairing compound and filled all the screw holes and any gaps left between the sheets. The first mix was left to cure and then sanded before another mix was required for final fairing, and again this was sanded to a nice even finish.
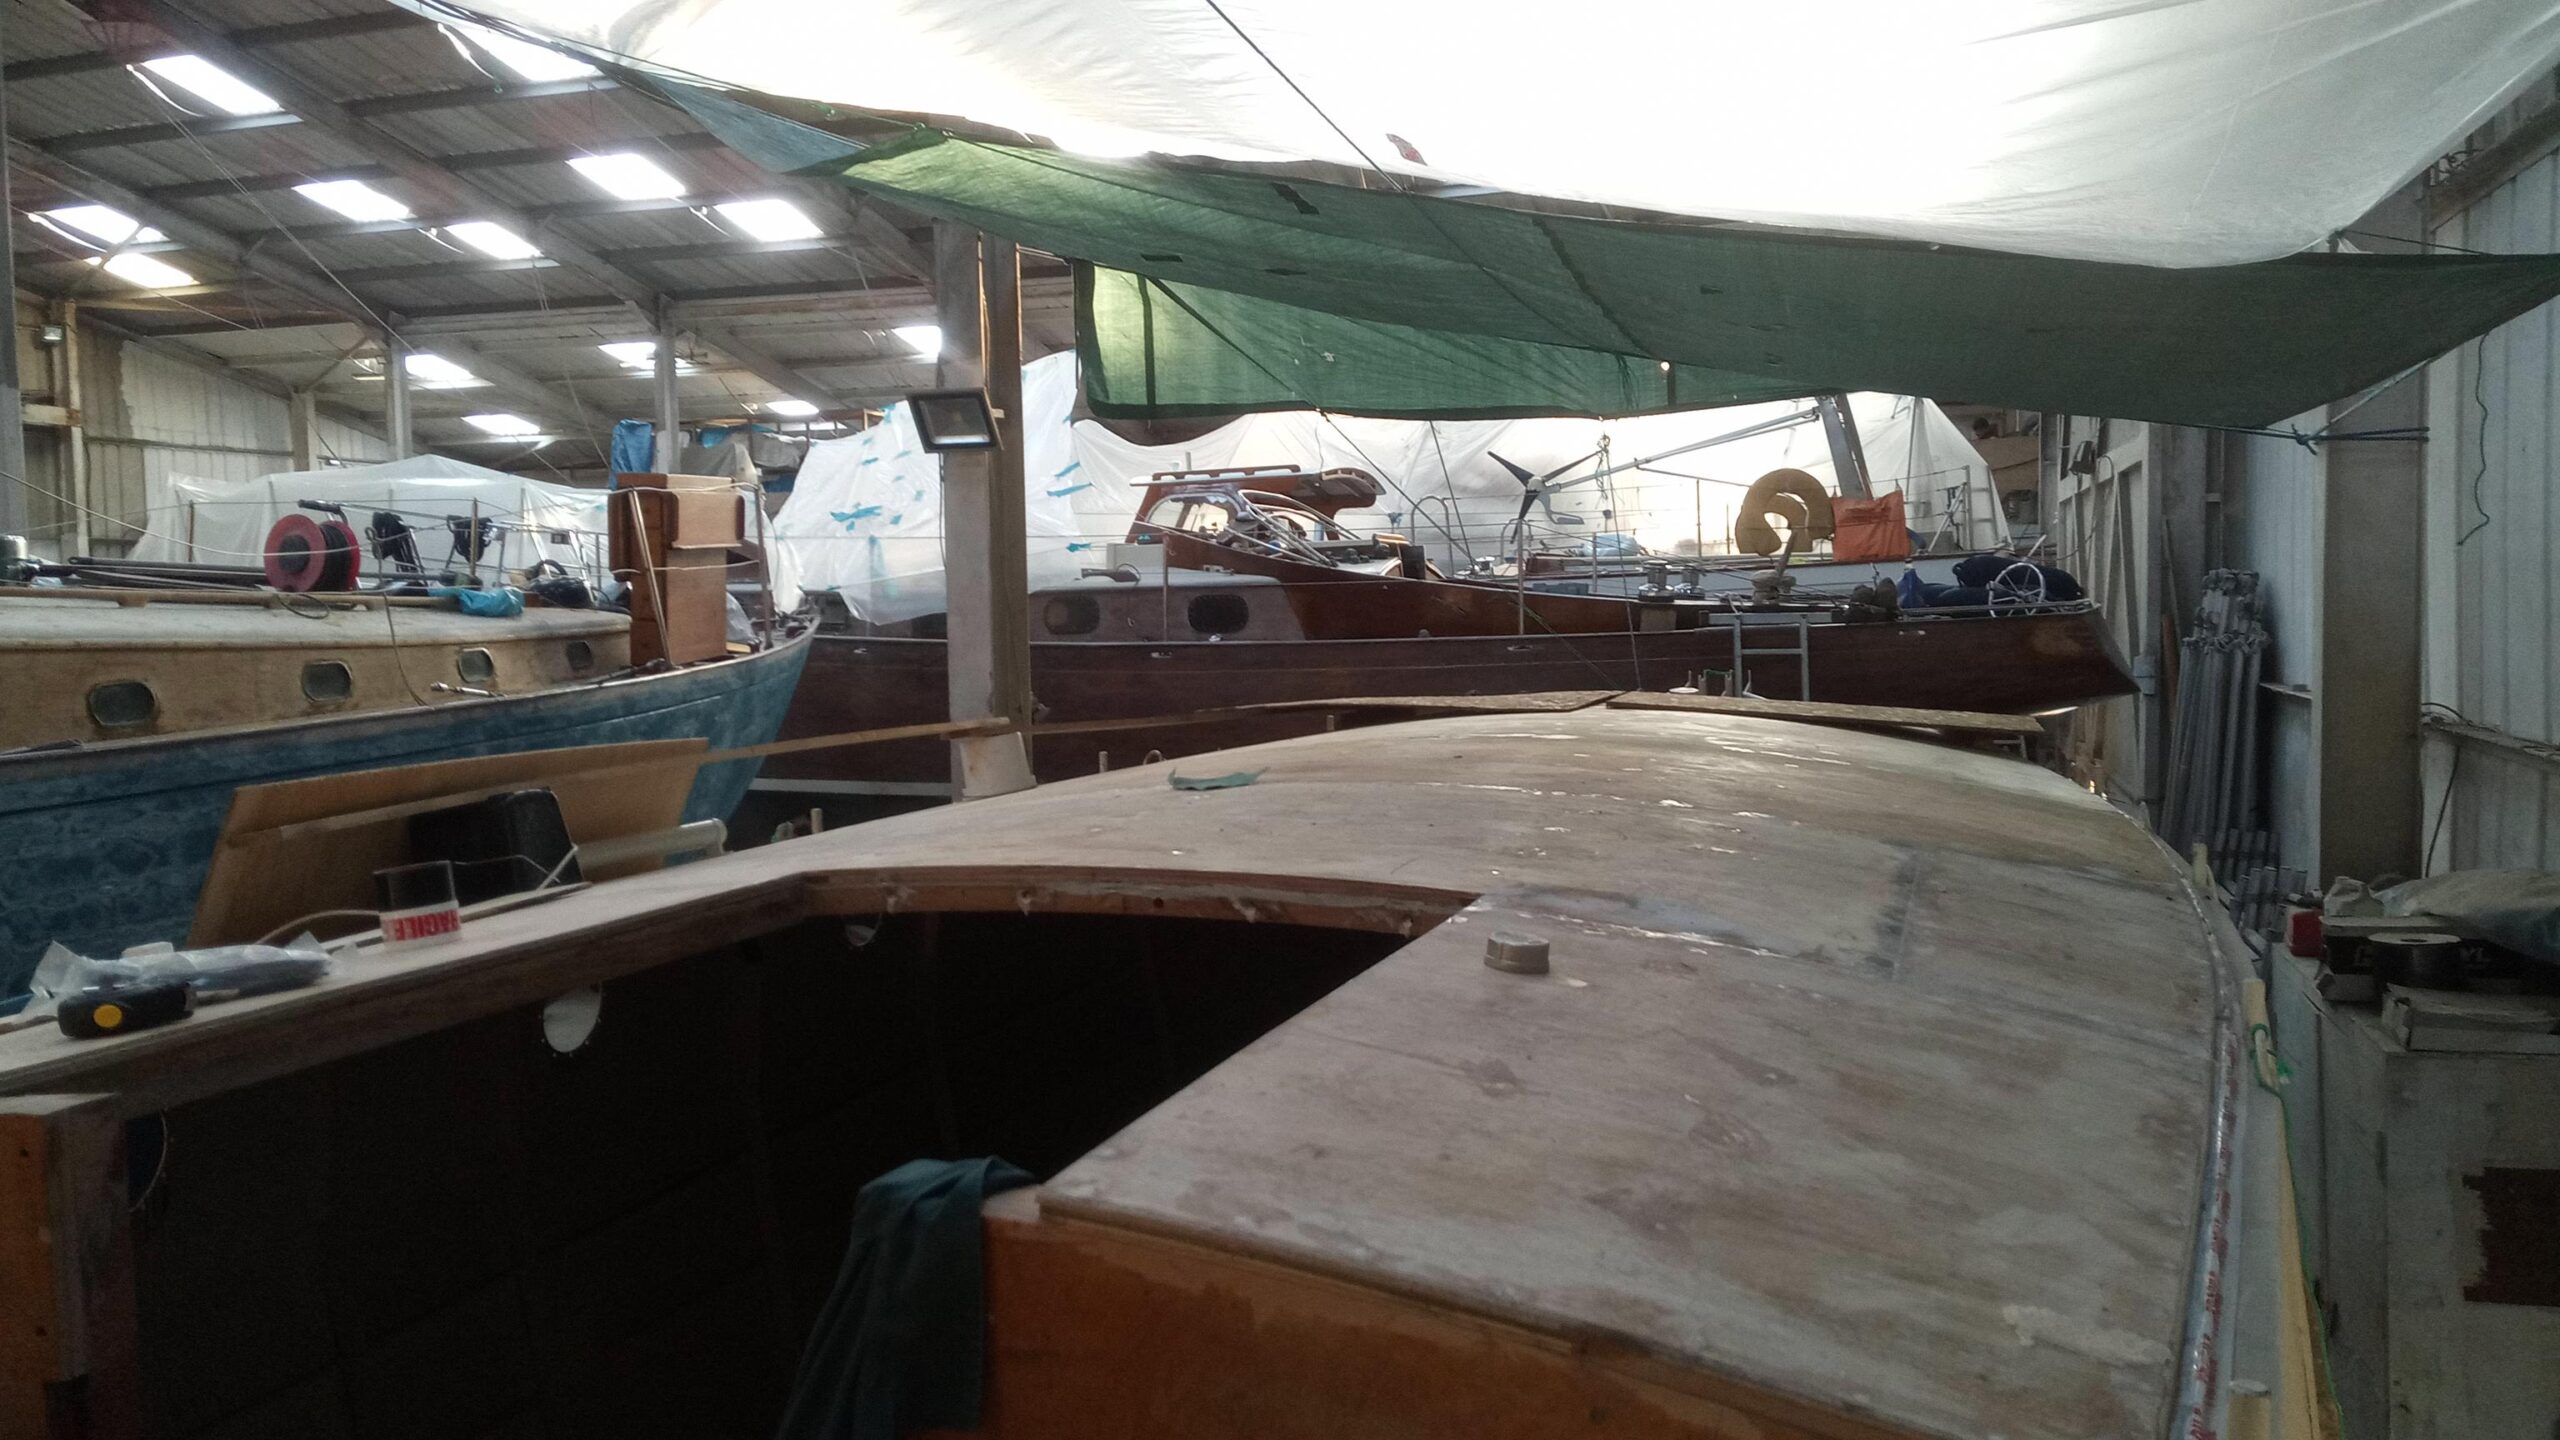
Having attempted the first coat of filler under a still-drippy roof, with strategically-positioned buckets to catch drips, I realised that a more permanent drip-deflecting solution would be required to ensure the integrity of the glass and resin layer, so I ended up rigging a mix of tarpaulin and plastic sheeting as a secondary “roof” over the boat, so that any drips would run off them and drip harmlessly either side of the boat, rather than onto it. This done, I was able to locally warm the ply to ensure that all areas were completely dry before completing the filling and fairing, and starting the sheathing.
I then cut the glass cloth roughly to size and laid the first sheet in position at the forward end, before impregnating it with resin and laying a peel ply over the top, repeating the operation for each sheet (laid athwartships I could just about reach across the whole 1m width of a sheet without feeling tempted to put a hand down straight into fresh resin!) until the whole area was covered. I found with the first couple of sheets that if there was too much spare cloth hanging over the edge of the coachroof the weight meant that the cloth which ran over the rounded edge of the ply would not stay stuck over the edge, so subsequent cloths were trimmed closer to the edge to ensure a smooth runover into the “gutter” between ply and steel structure (later to be filled with a seam of Sikaflex).
The peel ply was a bit of an experiment, as I had never used it before. Its purpose is to create a slightly roughened finish, suitable for whatever the next coating might be, as well as preventing the formation of amine blush, which is a waxy surface which develops as a by-product of the curing process of some epoxies. This is a bit of an inconvenience, as it has to be washed off with Scotchbrite and soapy water before sanding the fully-cured resin, or you risk your sandpaper clogging very quickly, and it is not good for the adherence of any other finish. Unfortunately, one has to get the peel ply absolutely flat and smooth on the wet resin, which I didn’t manage with the first couple of sheets, and when peeled off it revealed some exciting topographical features on what should have been a smooth surface! My technique developed and improved, however, and by the time I had got back to the companionway the finish turned out much better. Once the peel ply was removed, after allowing the resin a couple of days to cure (I was doing this in temperatures not far above freezing, which made for a slow cure), I had to sand the first coat of resin to remove the imperfections, having already gone round the edges to trim off any excess cloth with a sharp knife the day before, whilst the resin was still relatively soft.

I had only bought enough peel ply for the first coat of resin, which was probably a mistake, but because of the low temperatures this fact did not really make much of a difference to my progress, as I was able to apply the next two layers of resin on consecutive days, without peel ply, because the second coat had not cured sufficiently to produce amine blush overnight before applying the third coat straight on top. I then left the third coat to cure for several days before setting foot on it, by which time there was a lovely slithery coating of blush on top!

Finally I went round the edges to remove the parcel tape masking. Before applying any paint (I will be using a high-build epoxy primer before a two-pack topcoat with non-slip additive (eventually)), I will need to wash off the amine blush and then sand the cured resin to provide a bit of a key for the paint, but for now the ply is protected from any further damage.
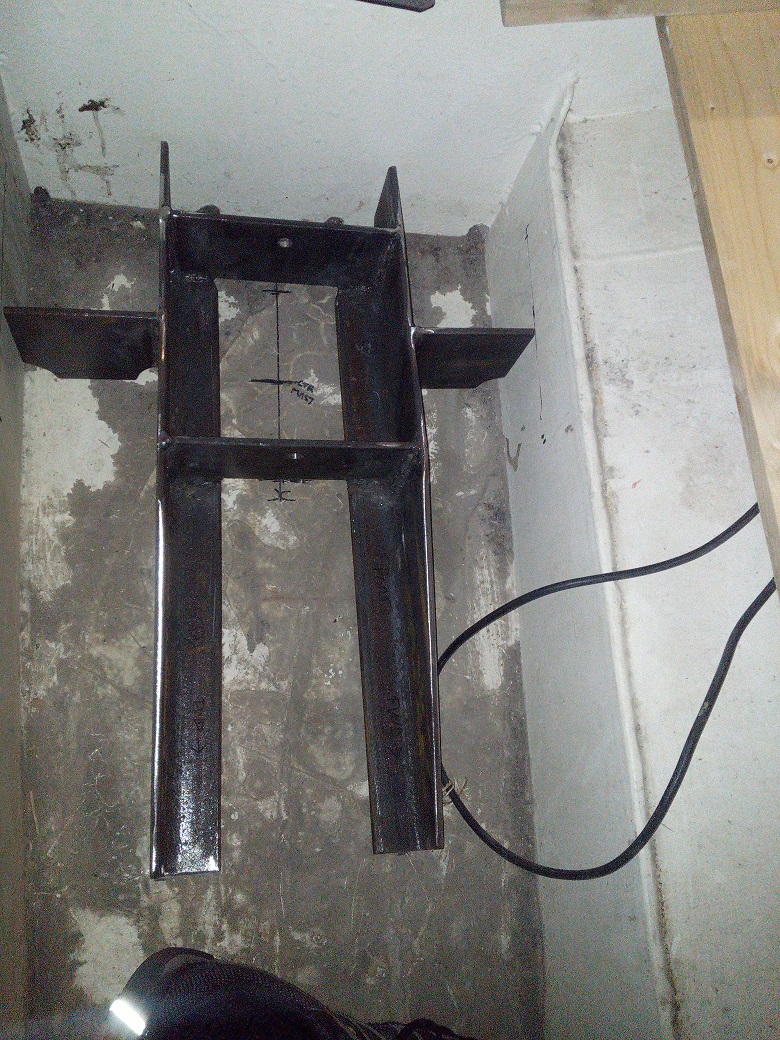
The other major progress I have made in the last month is to start on some of the steelwork I have assigned to myself. Having had a productive couple of days in September with an expert to learn the rudiments of welding, I boldly ordered some steel to fabricate the mast steps. These need to be made for both masts, as the mainmast is in a completely different place to the mizzen mast in the original junk ketch sailplan, being just forward of the centreboard case, as opposed to just abaft it; the foremast meanwhile is slightly further forward than the ketch mainmast, but also raked forward 6 degrees, so the mast step needs to be adapted from the existing structure.
The mainmast step was the easiest one to start with, having come up with a suitable design which will be man enough and spread the weight across the plating over the ballast in the keel and into the floor at frame 4 at the step’s aft end, and through webs into the keel side plates on the mast’s centreline. Fortunately I remembered before I started cutting steel that the plate on which it sits is angled slightly downwards as it runs aft, in order to ensure it drains back into the bilge sump, so on one of my trips to the boat I checked the angle of slope, and was able to adjust the design accordingly.

I spent one fun afternoon at home revising my welding techniques by sticking together a bunch more scrap steel, using both butt welds and lap welds, as well as some fillet welds, then another afternoon cutting all the pieces of the jigsaw, and dry fitting them together with the aid of my magic right-angle magnets. The next day, in sub-zero temperatures, and with a forecast for snow and then rain over the weekend, I set up the welder on my patio, and gingerly started to weld the bits together. Whilst my welding is by no means perfect at this stage, the first couple of joints were encouraging, and my confidence increased as we carried on welding it all together. The good thing about being able to fabricate the structure outside the boat is that the work could be positioned so that all the welding was downhand (i.e. always welding along a horizontal seam), so no tricky vertical or uphand welding was needed. When it comes to welding it into the boat, there will be a number of vertical seams which require a bit more care to ensure all the weld metal doesn’t just run downhill and form a big blob!
Whilst the finished step has a couple of faults (a very slight twist, which shouldn’t be crucial, and one of the cross pieces at a slightly greater angle from the vertical than required), I am very pleased with my first efforts at steel fabrication, and when I took it to the boat and dropped it into its final position, it fitted almost perfectly (the twist being so small as to be unimportant).
My next fabrication will be the foremast step, which will be very similar to the mainmast step, but is complicated in that there is already a mast step structure in the same position. The options are to cut the original out, and weld the new one in its place, but this is complicated by its position right up in the forefoot, therefore leaving little space for a grinder or even a gas torch to get access, and certainly making welding the new structure in almost impossible. My guess is that the original was probably fabricated as part of the framework before the hull was plated, thereby allowing all-round access from outside the hull. With this in mind, I hope to be able to design a fabrication, which, as with the mainmast step, can be fabricated out of the boat, and then welded in place. I have concluded that either only partially removing the existing structure and using it as part of the new, or indeed just welding the new structure on top of the existing one will be the way ahead, and by placing the mainmast step in that position I was able to conclude that this can be done and both provide enough strength, mostly downhand welds and enable prefabrication.

In between all the practical stuff, I’ve been quite busy doing more planning, sketching, and estimating quantities of materials, in order to push on next time I’m home with some of the following:
Foremast step; tabs for bulkheads where needed; cutting holes in steel for through-hull fittings; modifying the log and sounder orifices; building a steel framework under the cockpit for the planned shelves and stowage; cutting off redundant fittings on the hull, welding on the sampson post to the foredeck, etc., etc., with a view hopefully to getting all the steelwork weighed off so I can then progress with painting and then insulating the hull – lots to look forward to for the spring!
Hello Chris,
Found your blog from your post on the Wylo II Facebook group. Congrats on your purchase of Searchthrift….I had made an inquiry of her on the original advertisement.
I am real interested in your ketch rig and the development of the rig itself. Was it designed by Nick in the original drawings? Do you have a print of your sail plan that you could post?
Thank you for posting your progress……I for one will be following your work on her.
Best Regards
Steve Denton
Hi Steve,
Thanks for logging in and leaving your comment. As you know, the hull was fitted for Nick’s junk ketch rig, which he drew in order to appeal to the growing enthusiasm for junk rig. He admits himself that he wasn’t that familiar with junk rigs and that his sailplan had its flaws. To my knowledge only one other example has been built, Passepatout, which was featured in an article in Practical Boat Owner a while ago, written by Annie Hill (of Badger fame) after she sailed her on a delivery voyage in NZ.
I decided fairly early on in proceedings that I would prefer a junk schooner, for various reasons, which I think I have explored somewhere earlier in my blog. Principally with the ketch, the weight of the mainmast up in the eyes of the ship could be detrimental to her handling and motion, and I would prefer that weight to be concentrated more amidships. The ketch’s mizzen step was also quite disruptive to the accommodation arrangement aft. Having read on the Junk Rig forum of another Wylo, Asmat Downey’s Branwen, which he converted from the original gaff cutter rig to be a junk schooner, then sailing her transatlantic with great success, I was encouraged to go ahead with the changes, so I drew a new sailplan based on hers. This I may have already posted, but if not I could do when I have a landline broadband connection (I’m currently about 200nm east of Bermuda on the tall ship Pelican of London). It places the mainmast step just forward of the centreboard case, whilst a much smaller foremast is slightly forward of the original ketch mainmast position, and raked forward (in a jaunty junk rig manner) by 6 degrees. This distributes the sail area in much the same way as the gaff rig, and keeps the weight amidships. As you can see in the latest blog, I’ve fabricated the mainmast step, and need now to modify the foremast step. Once I’ve completed the last remaining bits of steelwork I can crack on with the fit-out proper, who his very exciting!