Adventures in Steelwork
Once again, dear Reader, here appears before you a much overdue update on my progress (and yes, although you wouldn’t know on outward inspection from the shed floor, definite progress) with fitting out Serchthrift for a life on the chilly oceans of the world.
I returned from sea (and I will post separately about my winter adventures, honest) in the second half of April, having left the good ship Pelican in Bristol and travelled north after a couple of days catching up with my folks in a southern bubble. At this stage things were just starting to relax a bit in England from the strict Covid restrictions over the winter, and even Scotland had announced a plan to get the country moving again, so I was able to travel with relative ease from the ship back home, again fortunate that seafarers are exempt from quarantine except in the case of Red List countries. (I’ll be reading this in ten years’ time hopefully trying to remember what all the fuss was about). After taking the customary few days to decompress and recover from another long trip, as well as accustoming myself to the weirdness of being back on land in the Time of Covid and buying a new car, I started looking at the job list and planning the weeks ahead.
The list included the design and fabrication of a step for the foremast, welding tabs in place for additional bulkheads (where they don’t coincide with frames), welding a mooring post to the foredeck, and cutting holes for further skin fittings in the hull plating. Over the weeks at sea my plans had also been developing in my head, and I now had a reasonable idea of how to lay out the aft end of the boat under the cockpit, which was to be given over mainly to stowage, as well as the exact layout of the foredeck, and once I was back in the shed and able to plan what to do, which inevitably would involve more welding.
Whilst cogitating on this further, however, I would get cracking with the design of the foremast step. Having experimentally plonked the newly-fabricated mainmast step assembly on top of the existing foremast step, it turned out that they were identical in width, and a very similar design could be used for the new step, which would then weld directly on top of the existing structure, thereby negating the need for any serious cutting, which was great news. I checked and double-checked measurements, particularly given the complication of the 6 degree forward rake of the mast, and the consequent need for accurate positioning of the step slightly aft of the partners. It all seemed to drop into place, and so I set about fabricating the new piece back at home in the garden.
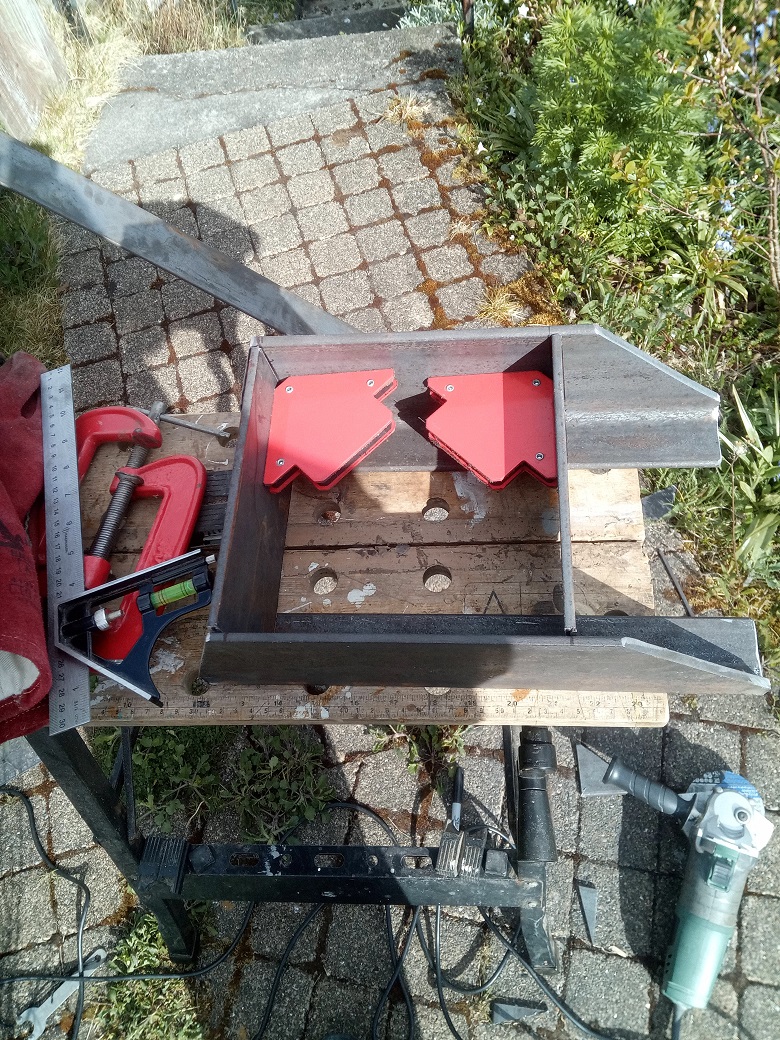
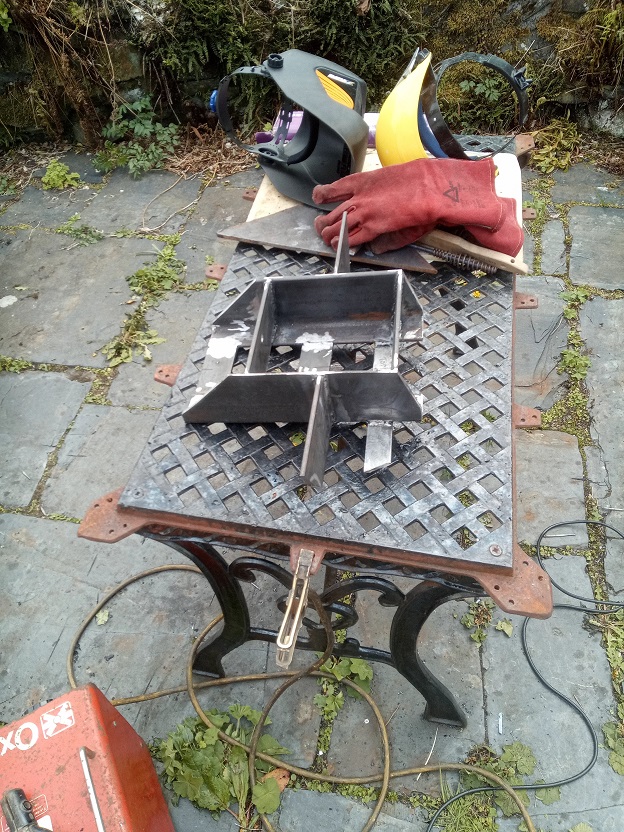
Once the step was fabricated, it was time to move my welding equipment to the shed. Fortunately this was achievable in one carload, and I started setting up for welding the new steps in place. This of course was a milestone, as most of the rest of my welding would be on the boat itself, and therefore the preference was to get it right first time! In order to give myself a little practice on something easier to start with, I first tackled the bulkhead tabs. The welds I produced seemed reasonable (although not perfect), and my confidence was boosted.
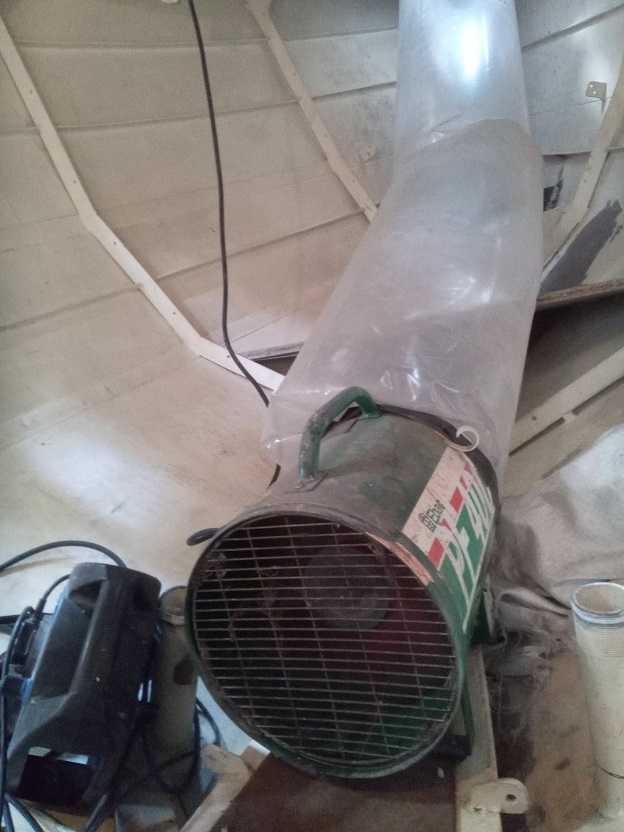
For those H&S nuts amongst you, you’ll be glad to hear that for any hotwork inside the boat, I had been very kindly lent a large fan and trunking by Dave at the yard, which I was able to rig up to suck fresh air through the boat and remove any fumes quickly to the outside. This of course is very noisy when running, so to do anything inside the boat, ear protection was vital, as well as eye protection, overalls, gloves, welding mask, etc. etc….
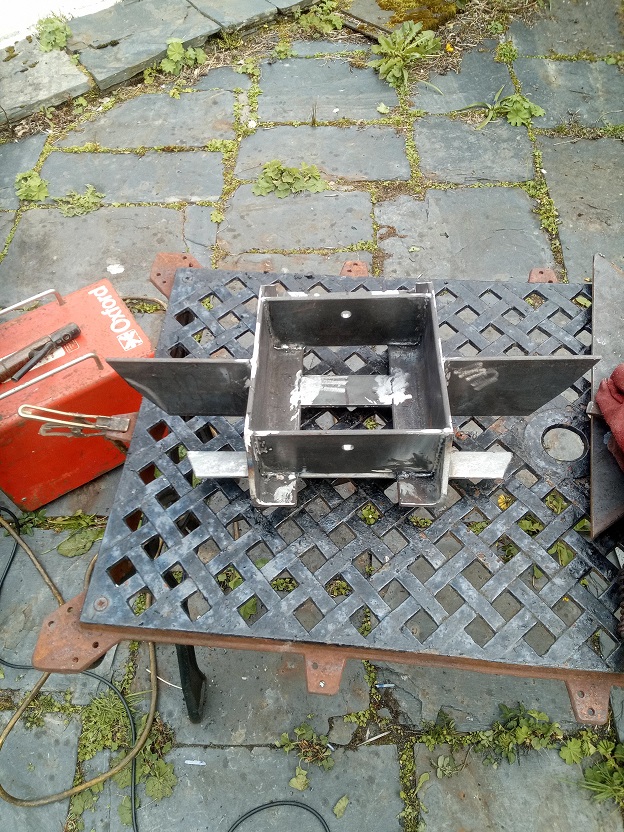
The next job was the mainmast step, which, although in the bilges, was reasonably accessible all round, so proved fairly uncomplicated to weld in, and produced some reasonable welds, although the vertical joints proved more difficult to achieve neatly – a technique I would hone gradually as time went on.
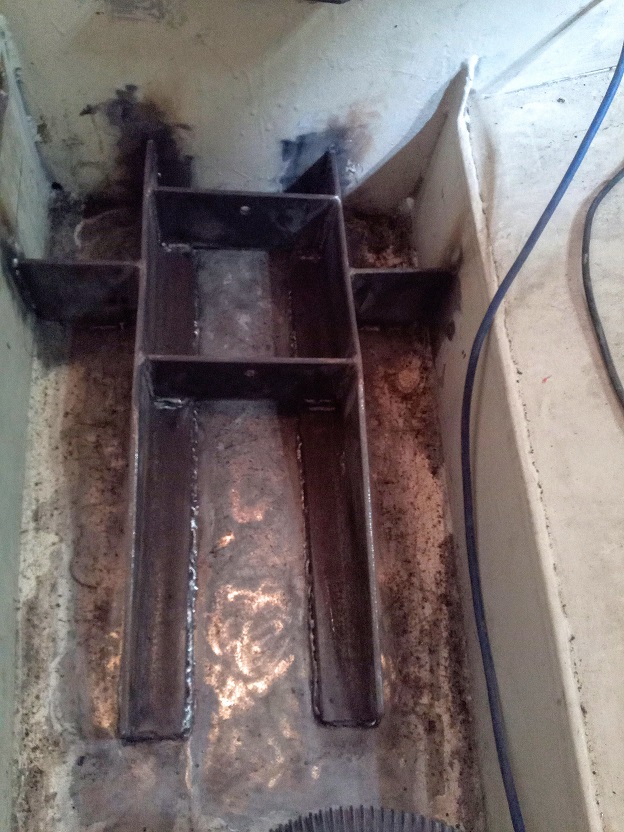
The foremast step proved a little more difficult, due to its position in the forefoot, and the limited space around it, particularly the foremost part. I had also not cut the athwartships webs terribly accurately, so there were some quite large gaps to fill with weld between the edges of the webs and the shell plating, but again, with a bit of swearing and experimenting, these chasms were bridged, both figuratively and literally. It’s a shame my welds didn’t end up a bit neater, as it is impossible to get a grinder in to smooth them off.

With these jobs tackled, it was time to think about the aft peak. I had by this time decided to frame out the stowage in the aft peak in steel, as it would be a very workmanlike space and did not need to be pretty, so had ordered some lengths of angle iron with which to fabricate the framework. Once I started to think about this, I also started to think again about the uses of both this space and the forecabin. Up until now, I had pretty much had a fixed idea of the entire arrangement of the accommodation, where there would be a double berth and stowage forward, in my “stateroom”, whilst the aft peak would be given over to stowage, as previously mentioned, with a good-sized heads compartment to stbd of the engine box. The more I thought about this, the more I started to consider that my bunk might be better off aft under the cockpit, and started looking at various different possible configurations both forward and aft, and was inspired by some photos I had seen of another classic boatbuilding project. It was quite common in traditional boats to have stowage, the heads and maybe a pipecot (for the paid hand) in the forepeak, whilst I had had the niggling feeling that putting the heads aft might have been wasting real estate which might have been better employed. Conversely, my supporting theory for an aft heads compartment is that if the convenience is situated adjacent to the companionway, the wet sailor can avoid trudging and dripping through the accommodation to go forward for a pee. The more I thought about this, remembering that part of the philosophy of sailing Serchthrift will be that one can pretty much do everything whilst sitting in the relative shelter of the companionway, under a spray hood and out of the rain / spray, the more I became persuaded that the need to trudge, dripping wet, to a forward heads, should be minimal.
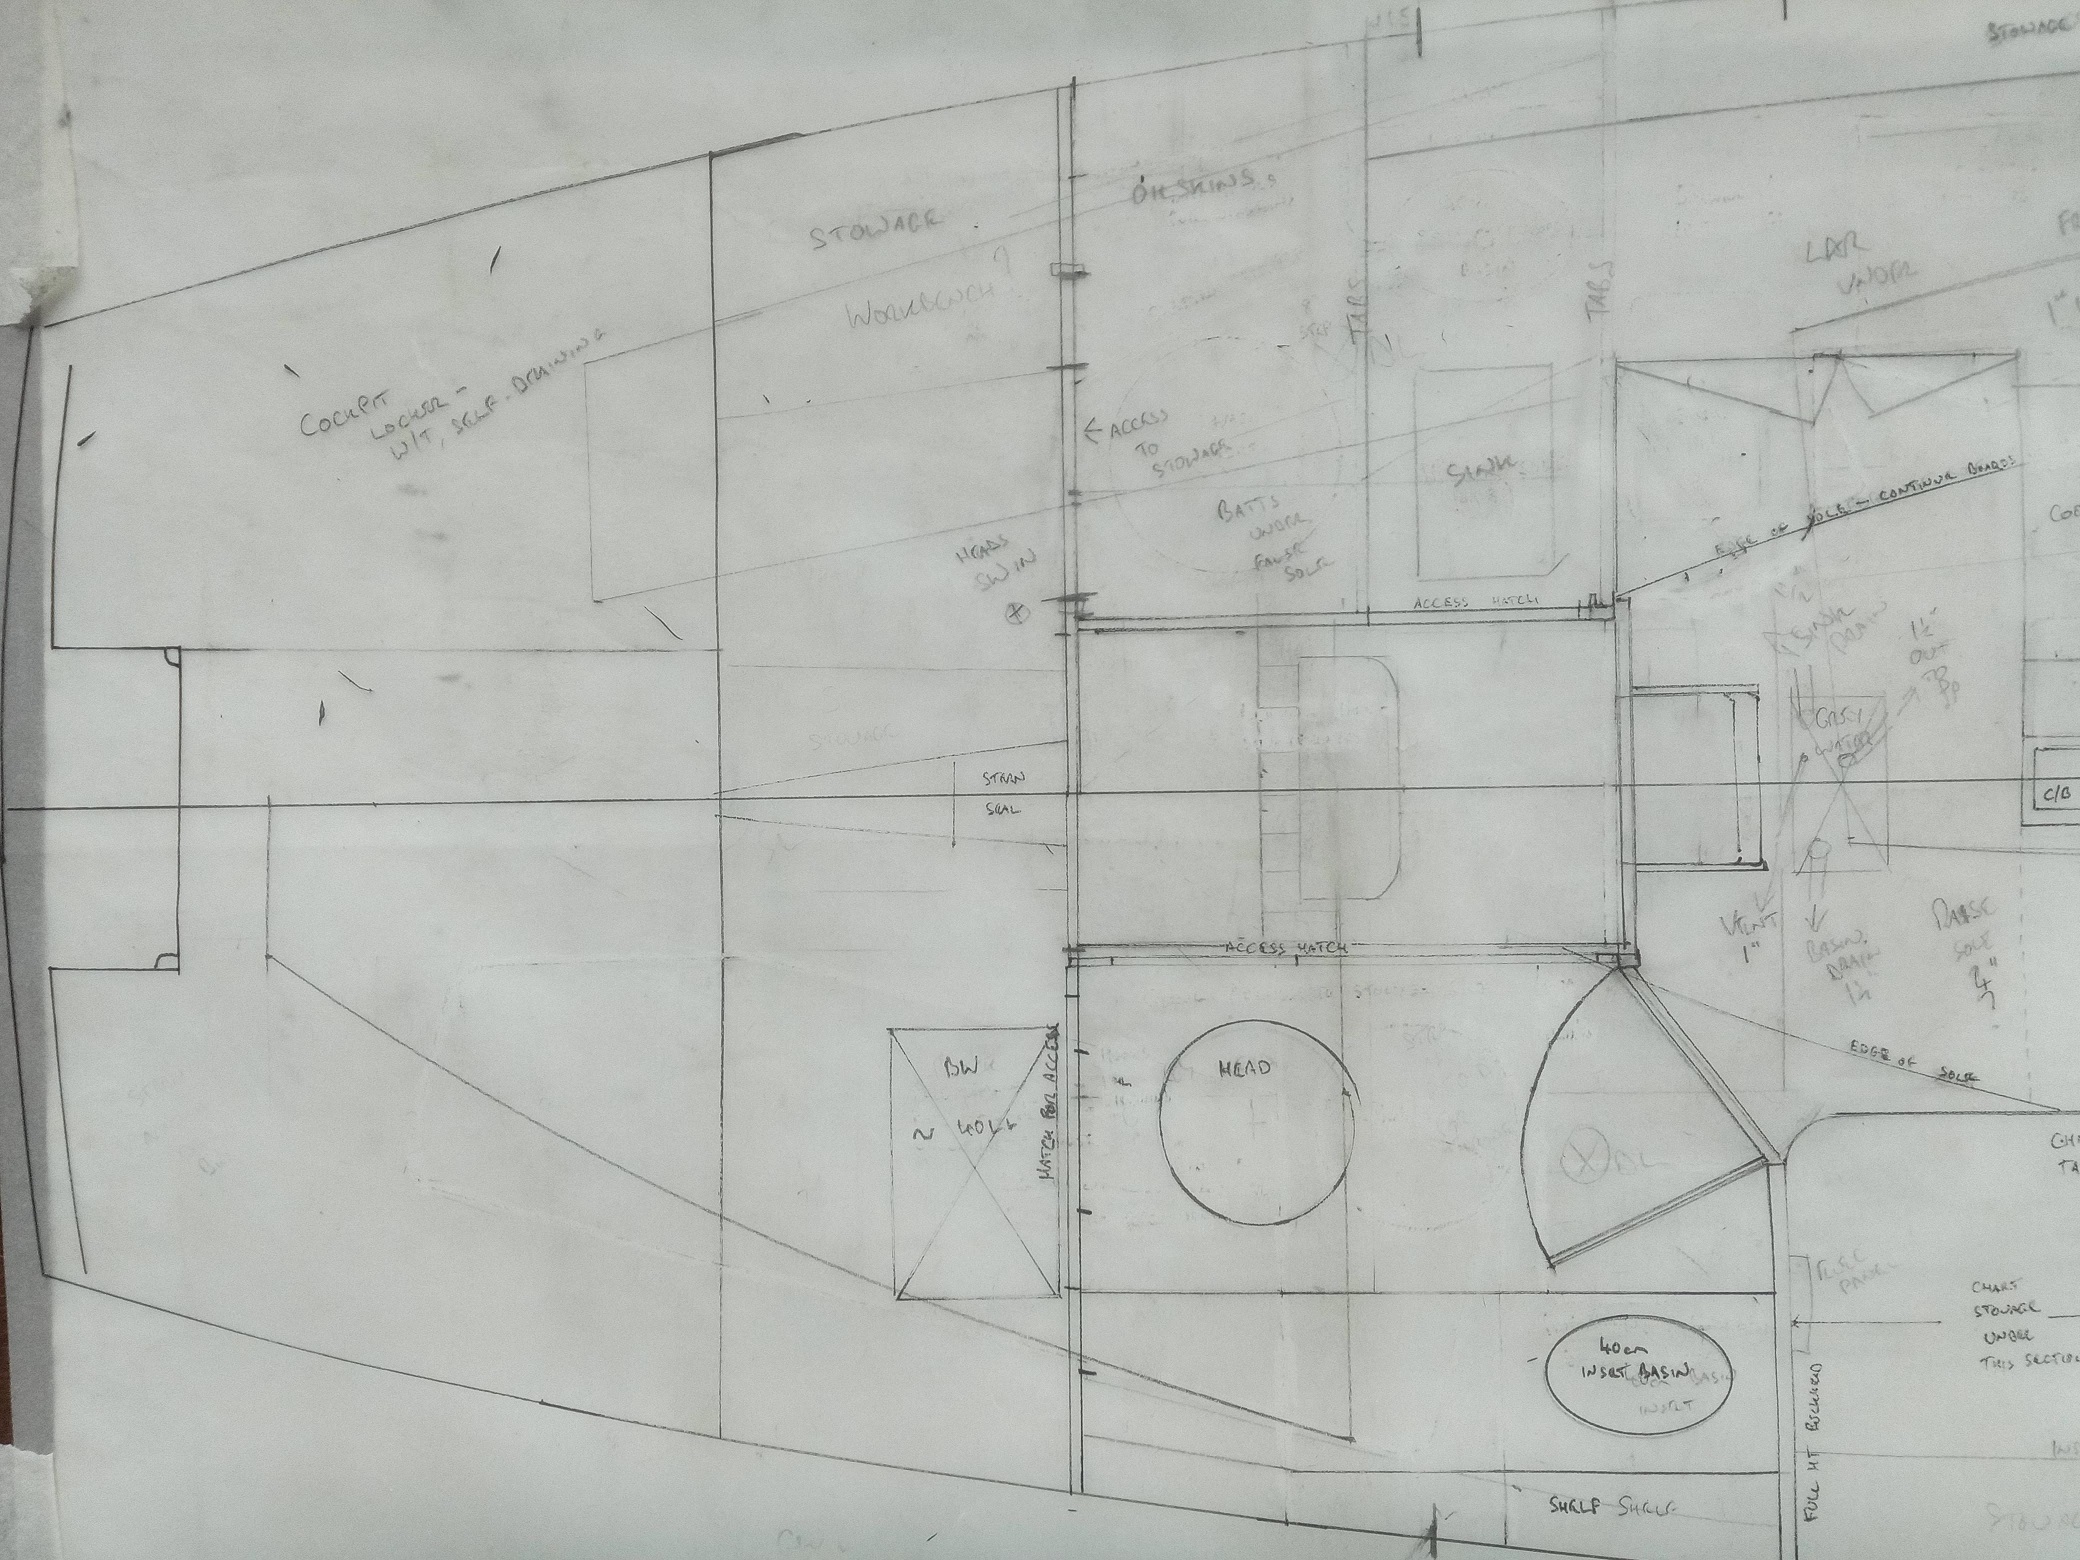
Thus came about my final iteration of the general arrangement, whereby the main bunk was moved aft to the stbd quarter, and the heads went fwd, under the forwardmost metre-plus of the coachroof to port, affording full headroom as well as allowing for the use of the existing outlet through-hull, and this could either be left open to the rest of the forecastle as often happened in the past, or could be boxed in to form a still-reasonably-spacious separate heads compartment. To starboard I would then have a good-sized proper workbench (which was lacking in my previous iteration, but was high on the “desirable” list for The Next Boat), and maybe a pipecot or other stowable extra berth for when I have big parties on board (!). A further distinct advantage of this arrangement is that I then have a berth tucked aft, still of “small double” size, which will be less bouncy than the forepeak and completely enclosed, therefore far more suitable as a sea berth. It is also adjacent to the cockpit and the nav station so enabling faster action in the event of a problem, and more situational awareness whilst akip.
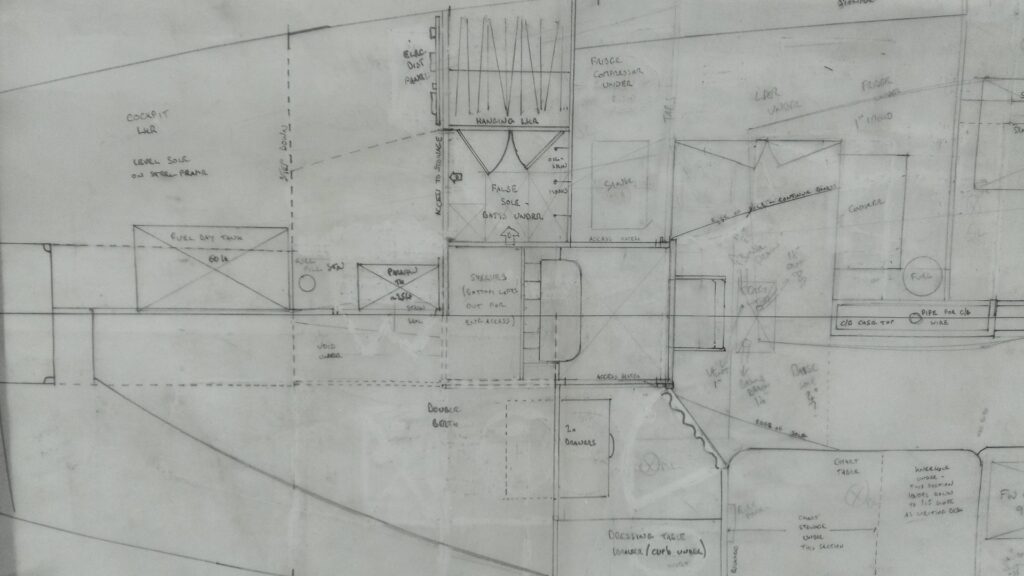
This decision led to a slight rethink of the framework I needed to fabricate in the aft peak, but only slight, because as luck would have it, the height that a bunk would have to be nicely coincided with the height I had planned for the shelving – it would just need to be extended further forward at the same height on the stbd side. Before cutting and welding in earnest, I just needed to make sure that I could accommodate the fuel day tank, the exhaust hose run, bunkering station, paraffin tank and access to the back of the engine and stern tube / stern gland, as well as ensuring that providing sufficient headroom for the inboard side of the new bunk would not mean that the companionway steps would not be too far into the doghouse to allow for adequate head / shoulder room as one climbs up and down over the already capacious engine box. This was achieved by a combination of drawings and physical mock-ups.
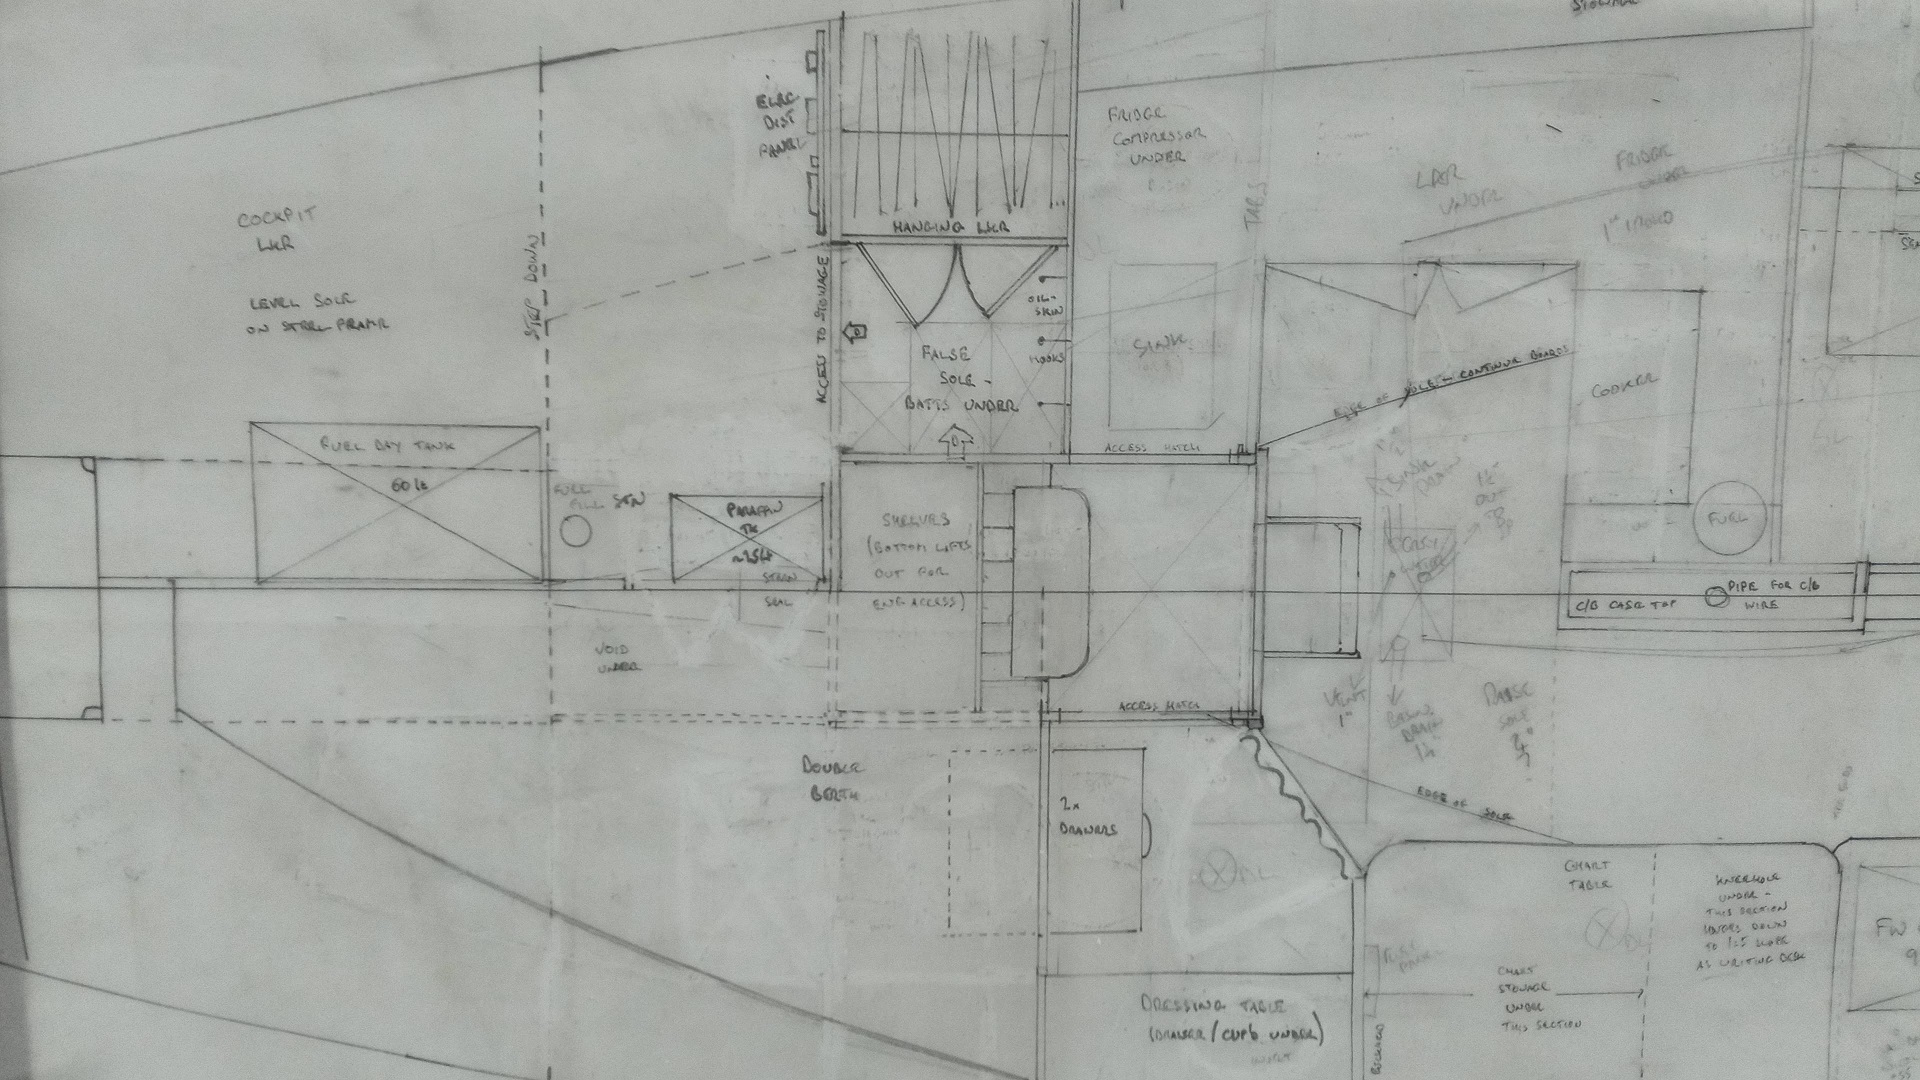
Modified drawing of aft peak arrangement 
Mocking up the companionway steps 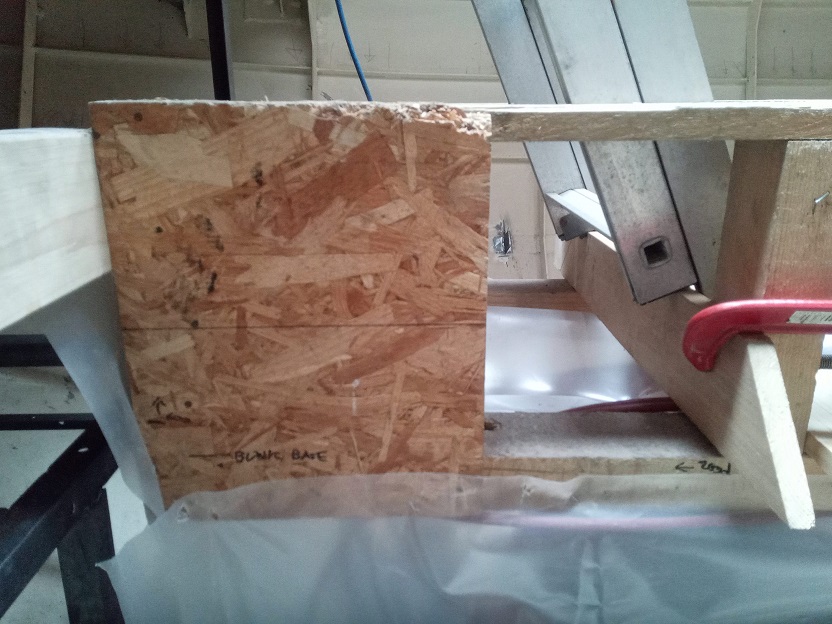
Mocking up the companionway steps 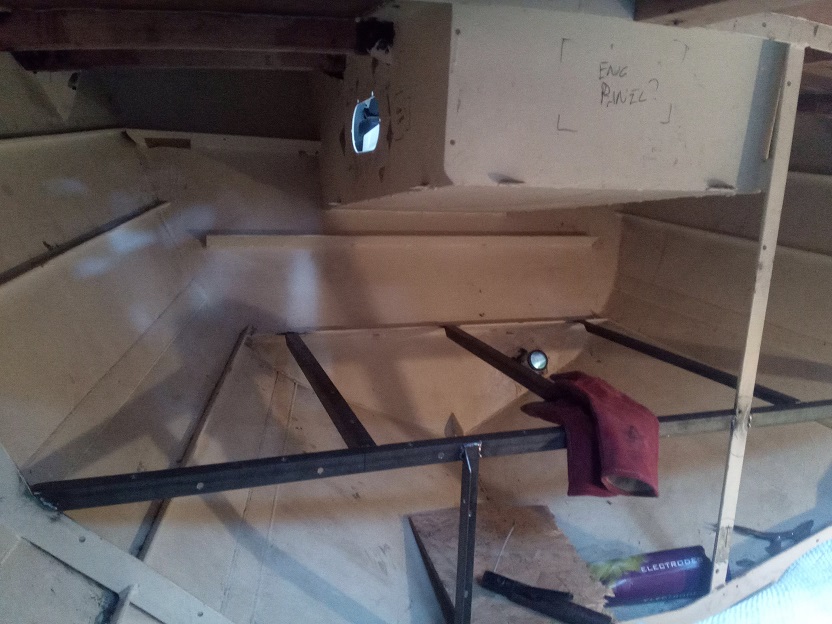
Framework under construction 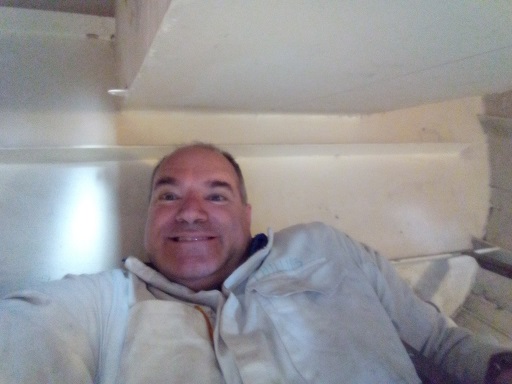
It’s a bit of a squeeze back here… 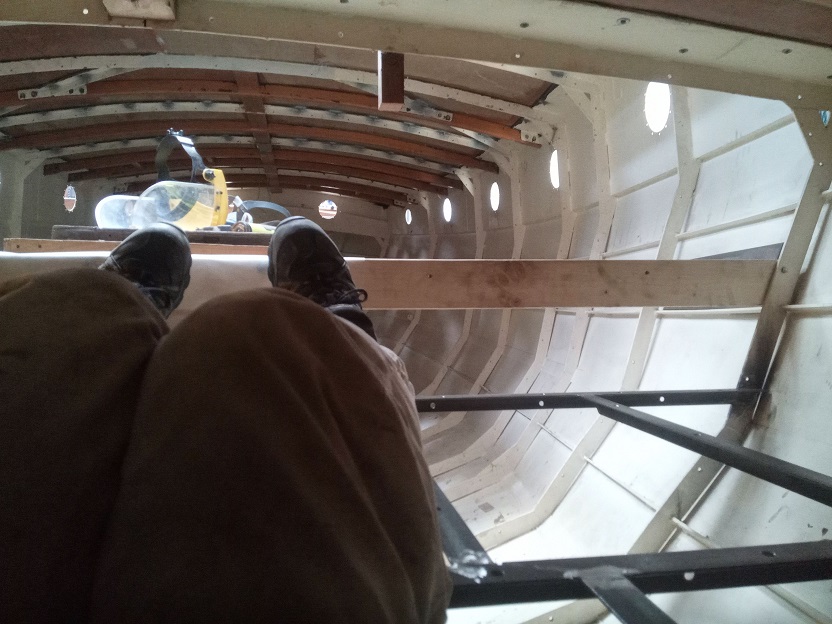
… but a great view! 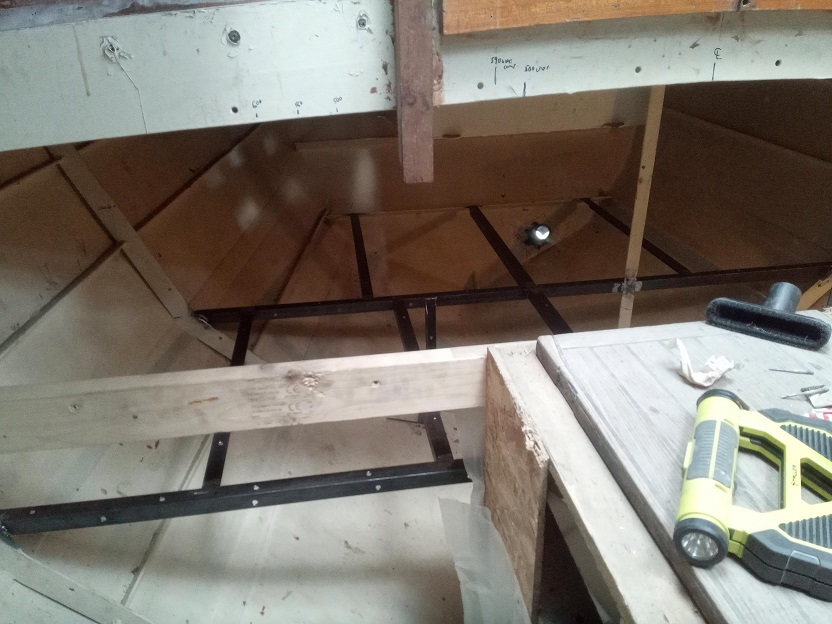
Stbd side completed – 4/5 of the bunk length, which extends into the centreline and out over the back of the engine (good insulation required!) 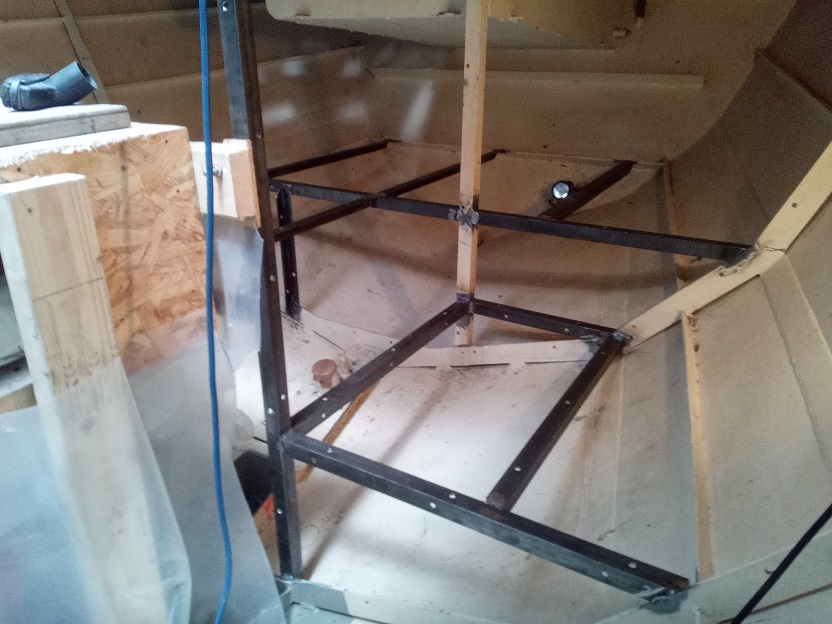
Port side completed, with aft shelf beneath the cockpit seat and step down fwd, with access amidships into the shaft and gearbox, as well as space for the exhaust system.
Once these adjustments had been made, I set about fabricating said framework, which led to some more fairly straightforward welding practice in a place where mucky welds wouldn’t be seen once the fit out was complete. Of course the more framework I welded in, the more confined the space I was working in became, and some adjustments to the temporary engine box were required to allow continued access. I could have kept welding more framework in around the engine box, and forward into the main cabin space, but made the executive decision that any further carcassing for furniture would be out of timber and fitted at a later date, once bulkheads were in place.
Aware that this is becoming a lengthy post, I will adjourn for now, and continue in a second post in just a wee minute…