The Saloon continues
In my last post I had built the bases for both settees in the saloon, one with sliding extension for sleeping, and the other simple ply. I had also started the seat back lockers, with the starboard side boxed in, and the port side framed out but still to be completed. I have now been back on board the Lord of the Glens for a week, and have just had the chance to sit down and write about the next stage, which occurred during the last week of March, before the season started, and over the four weeks of my May leave period. This latter involved only just over two weeks of actual boatbuilding time, as I made a trip down south to see friends and family in various parts of the UK.
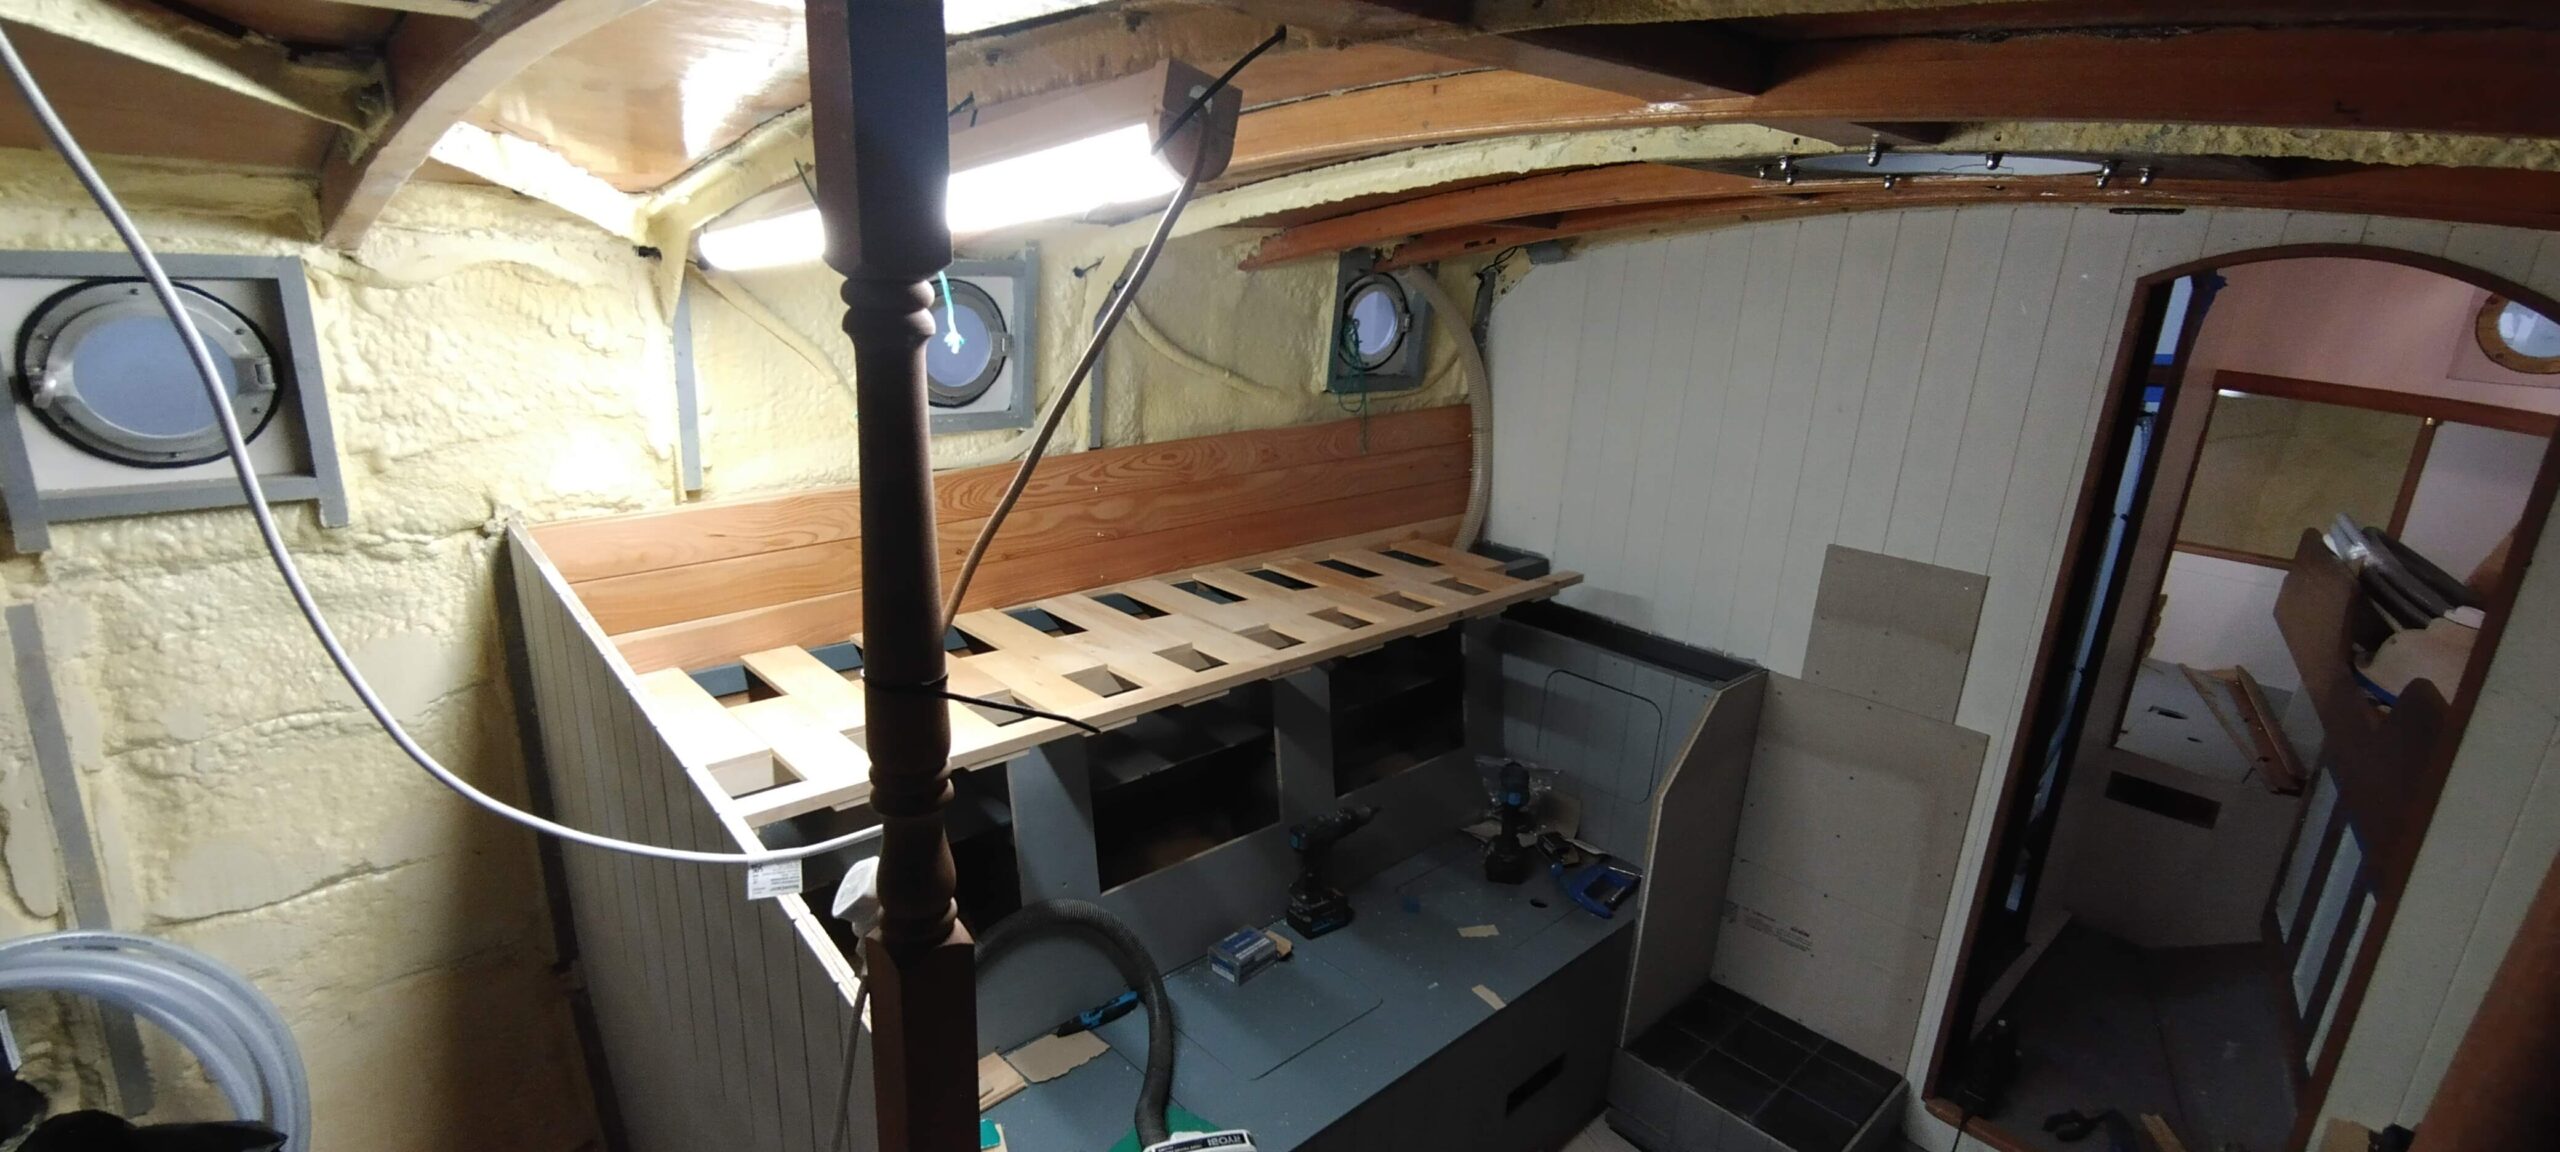
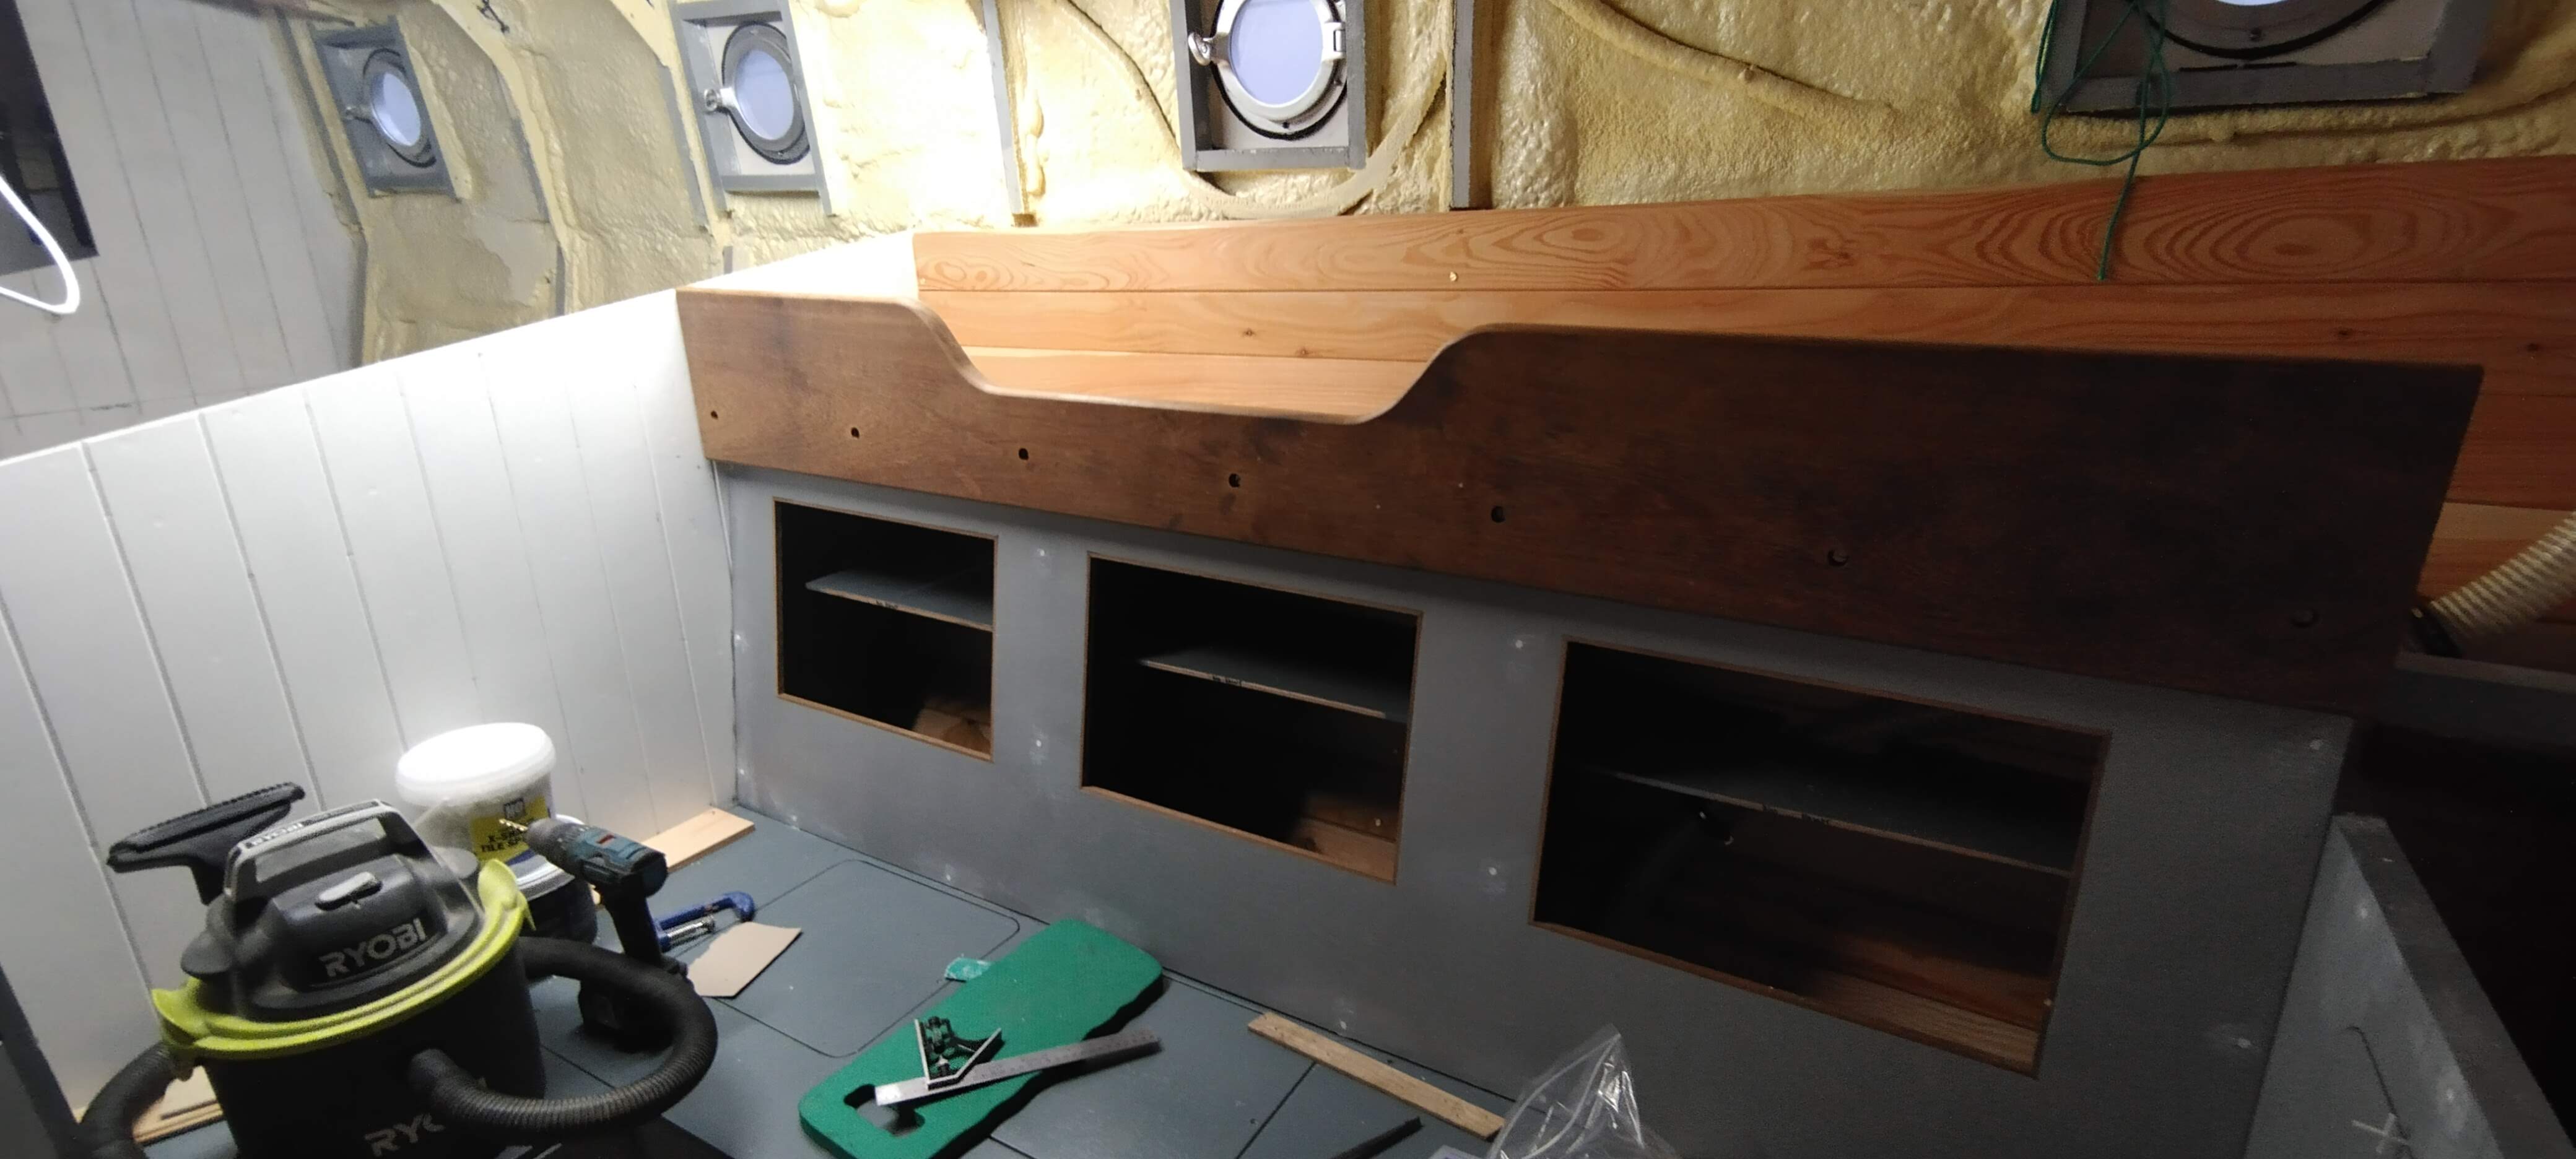
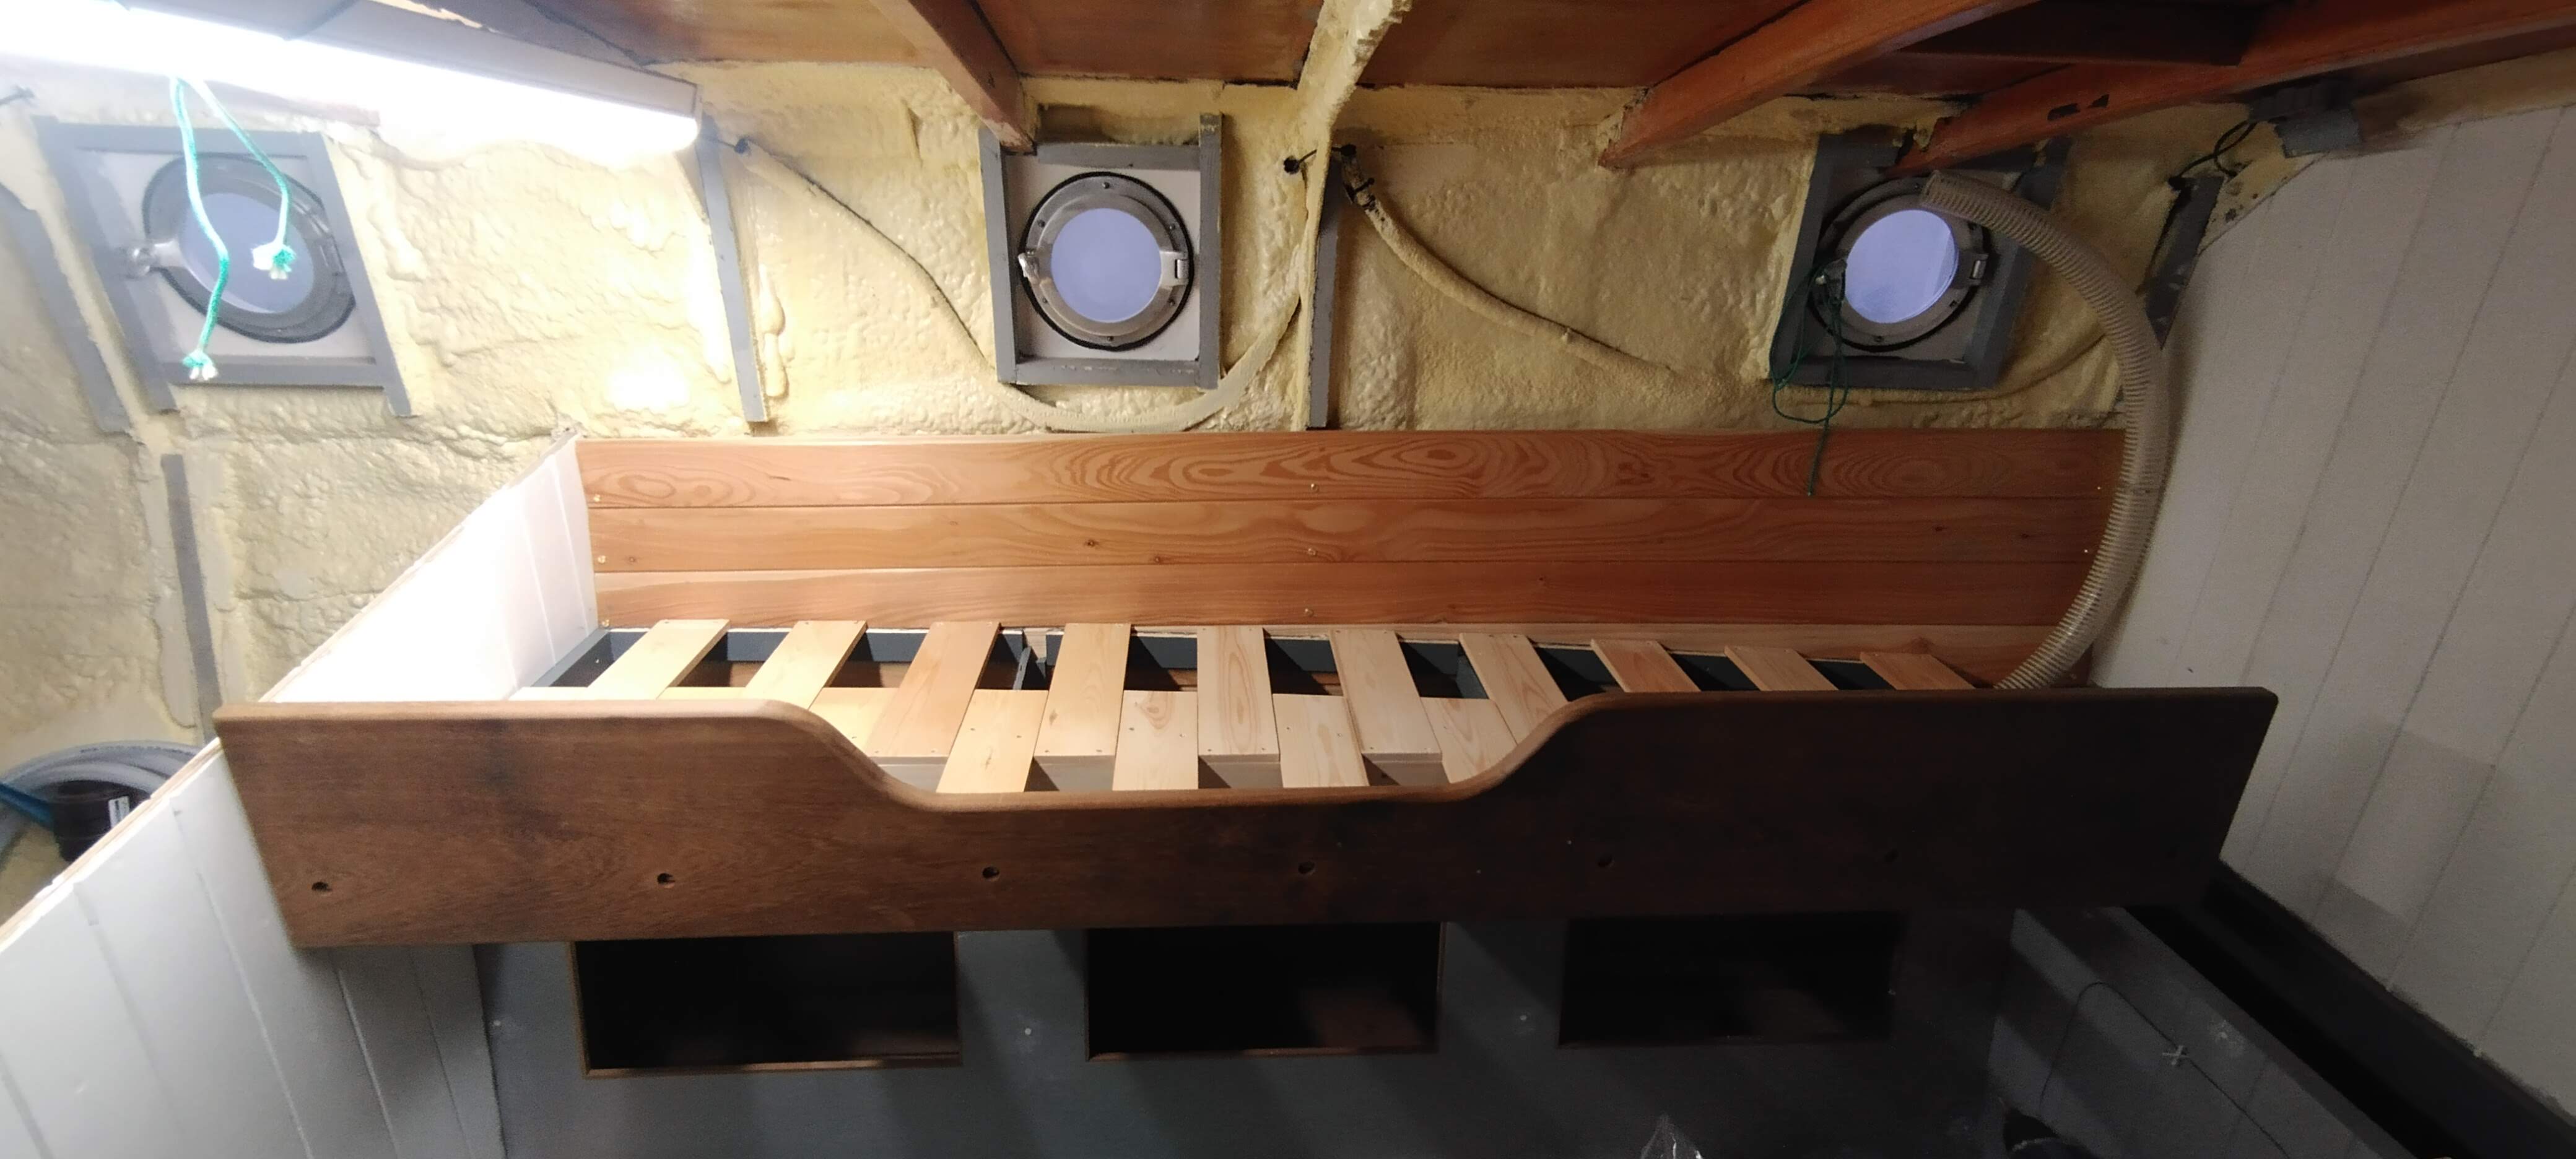
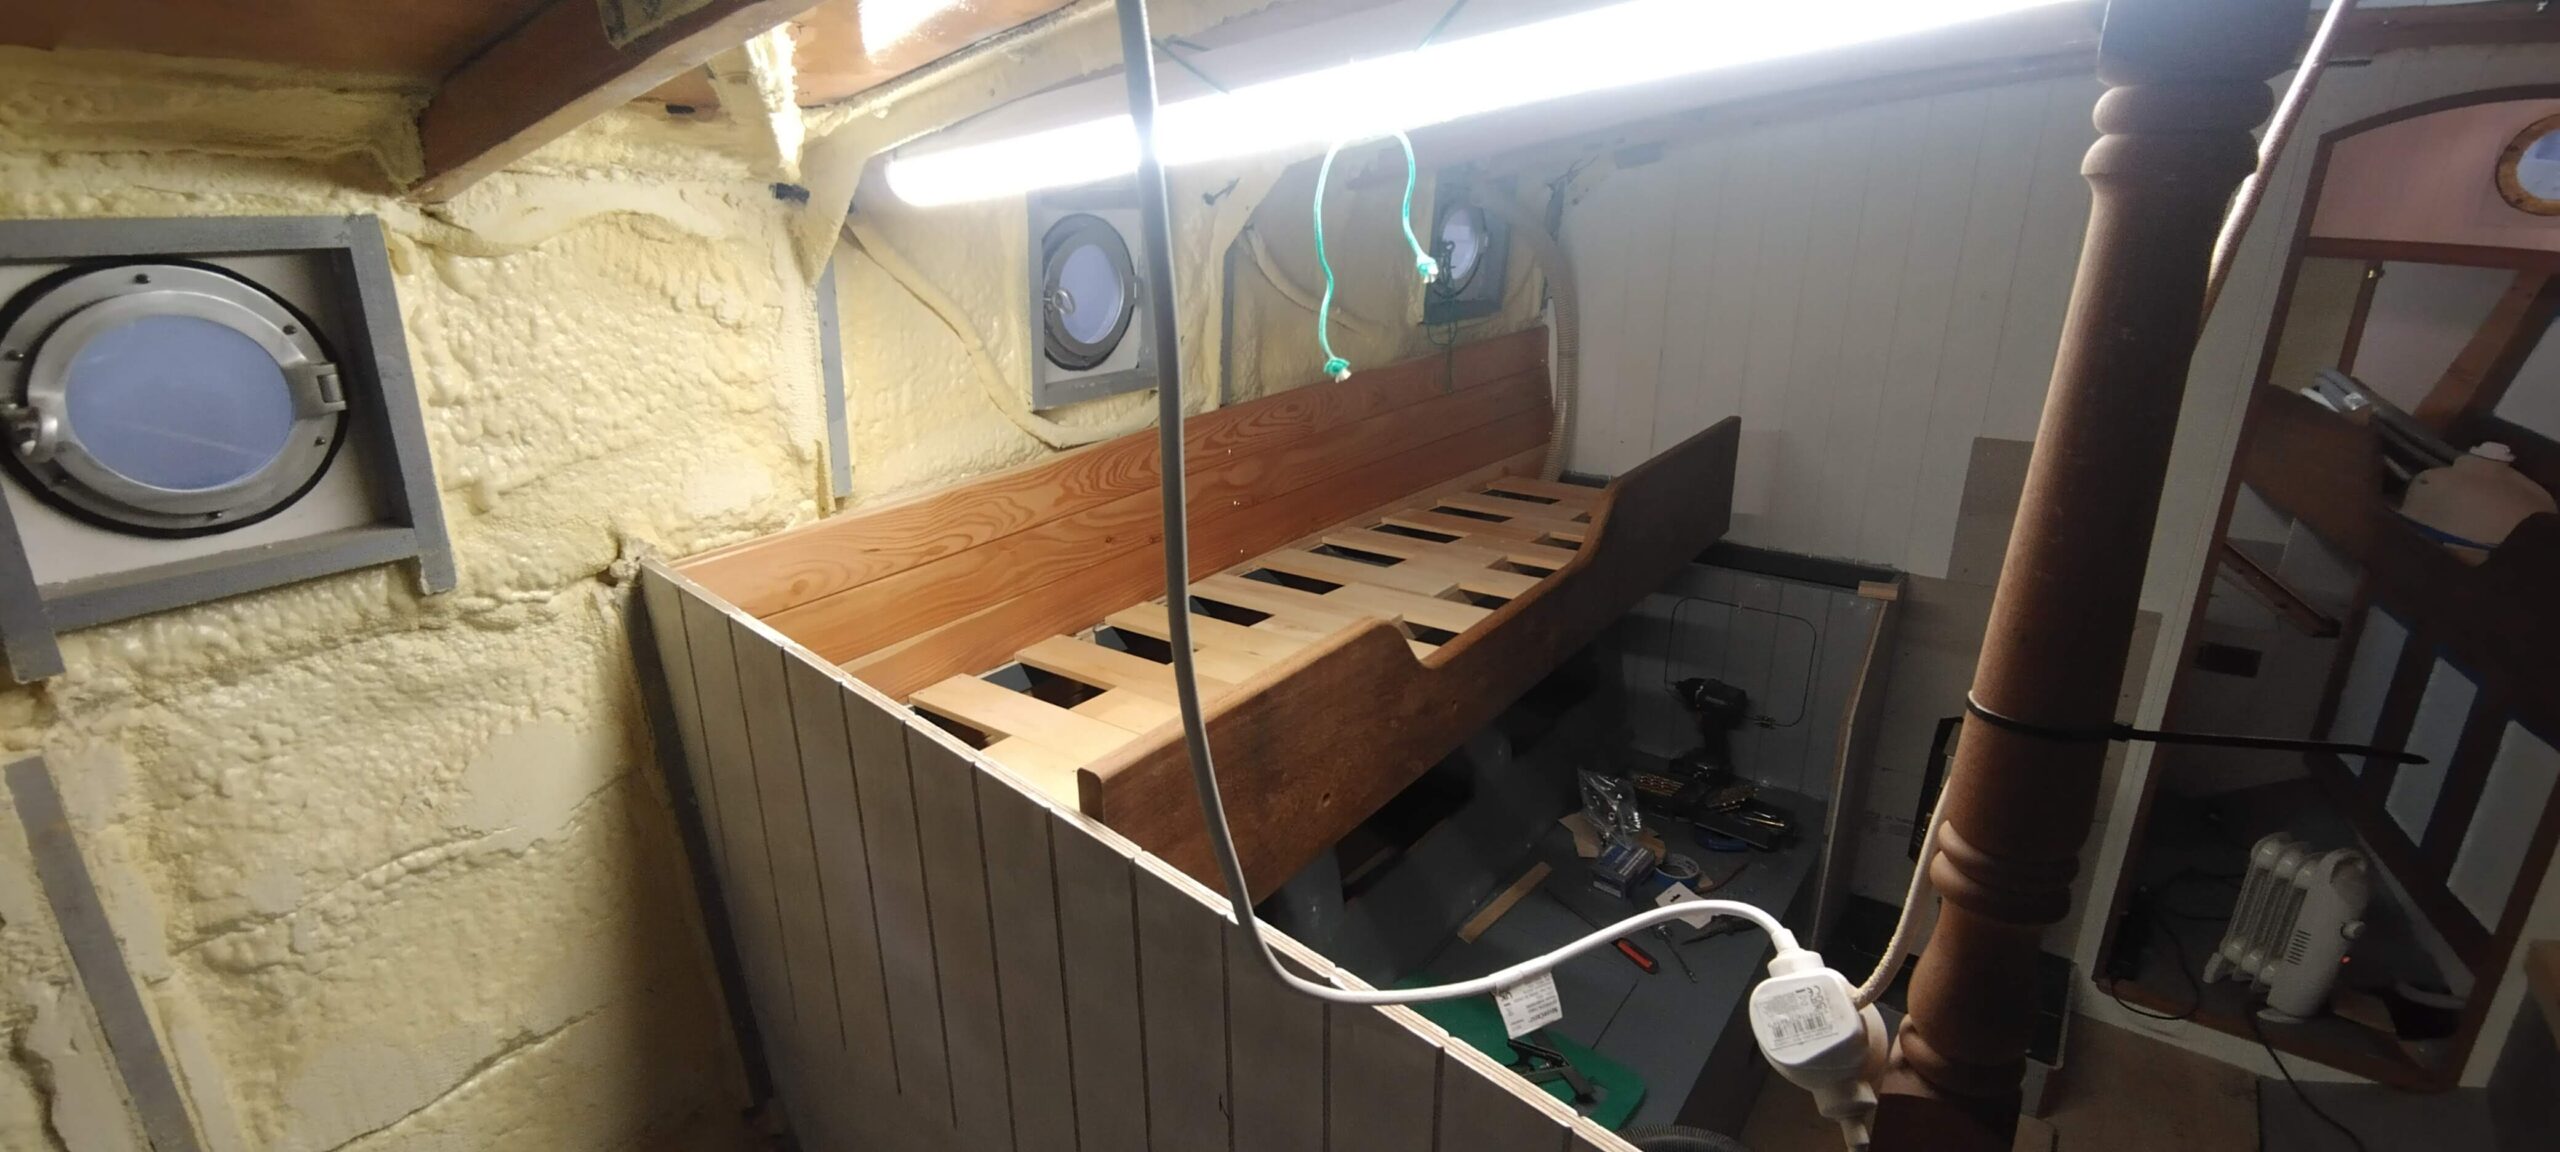
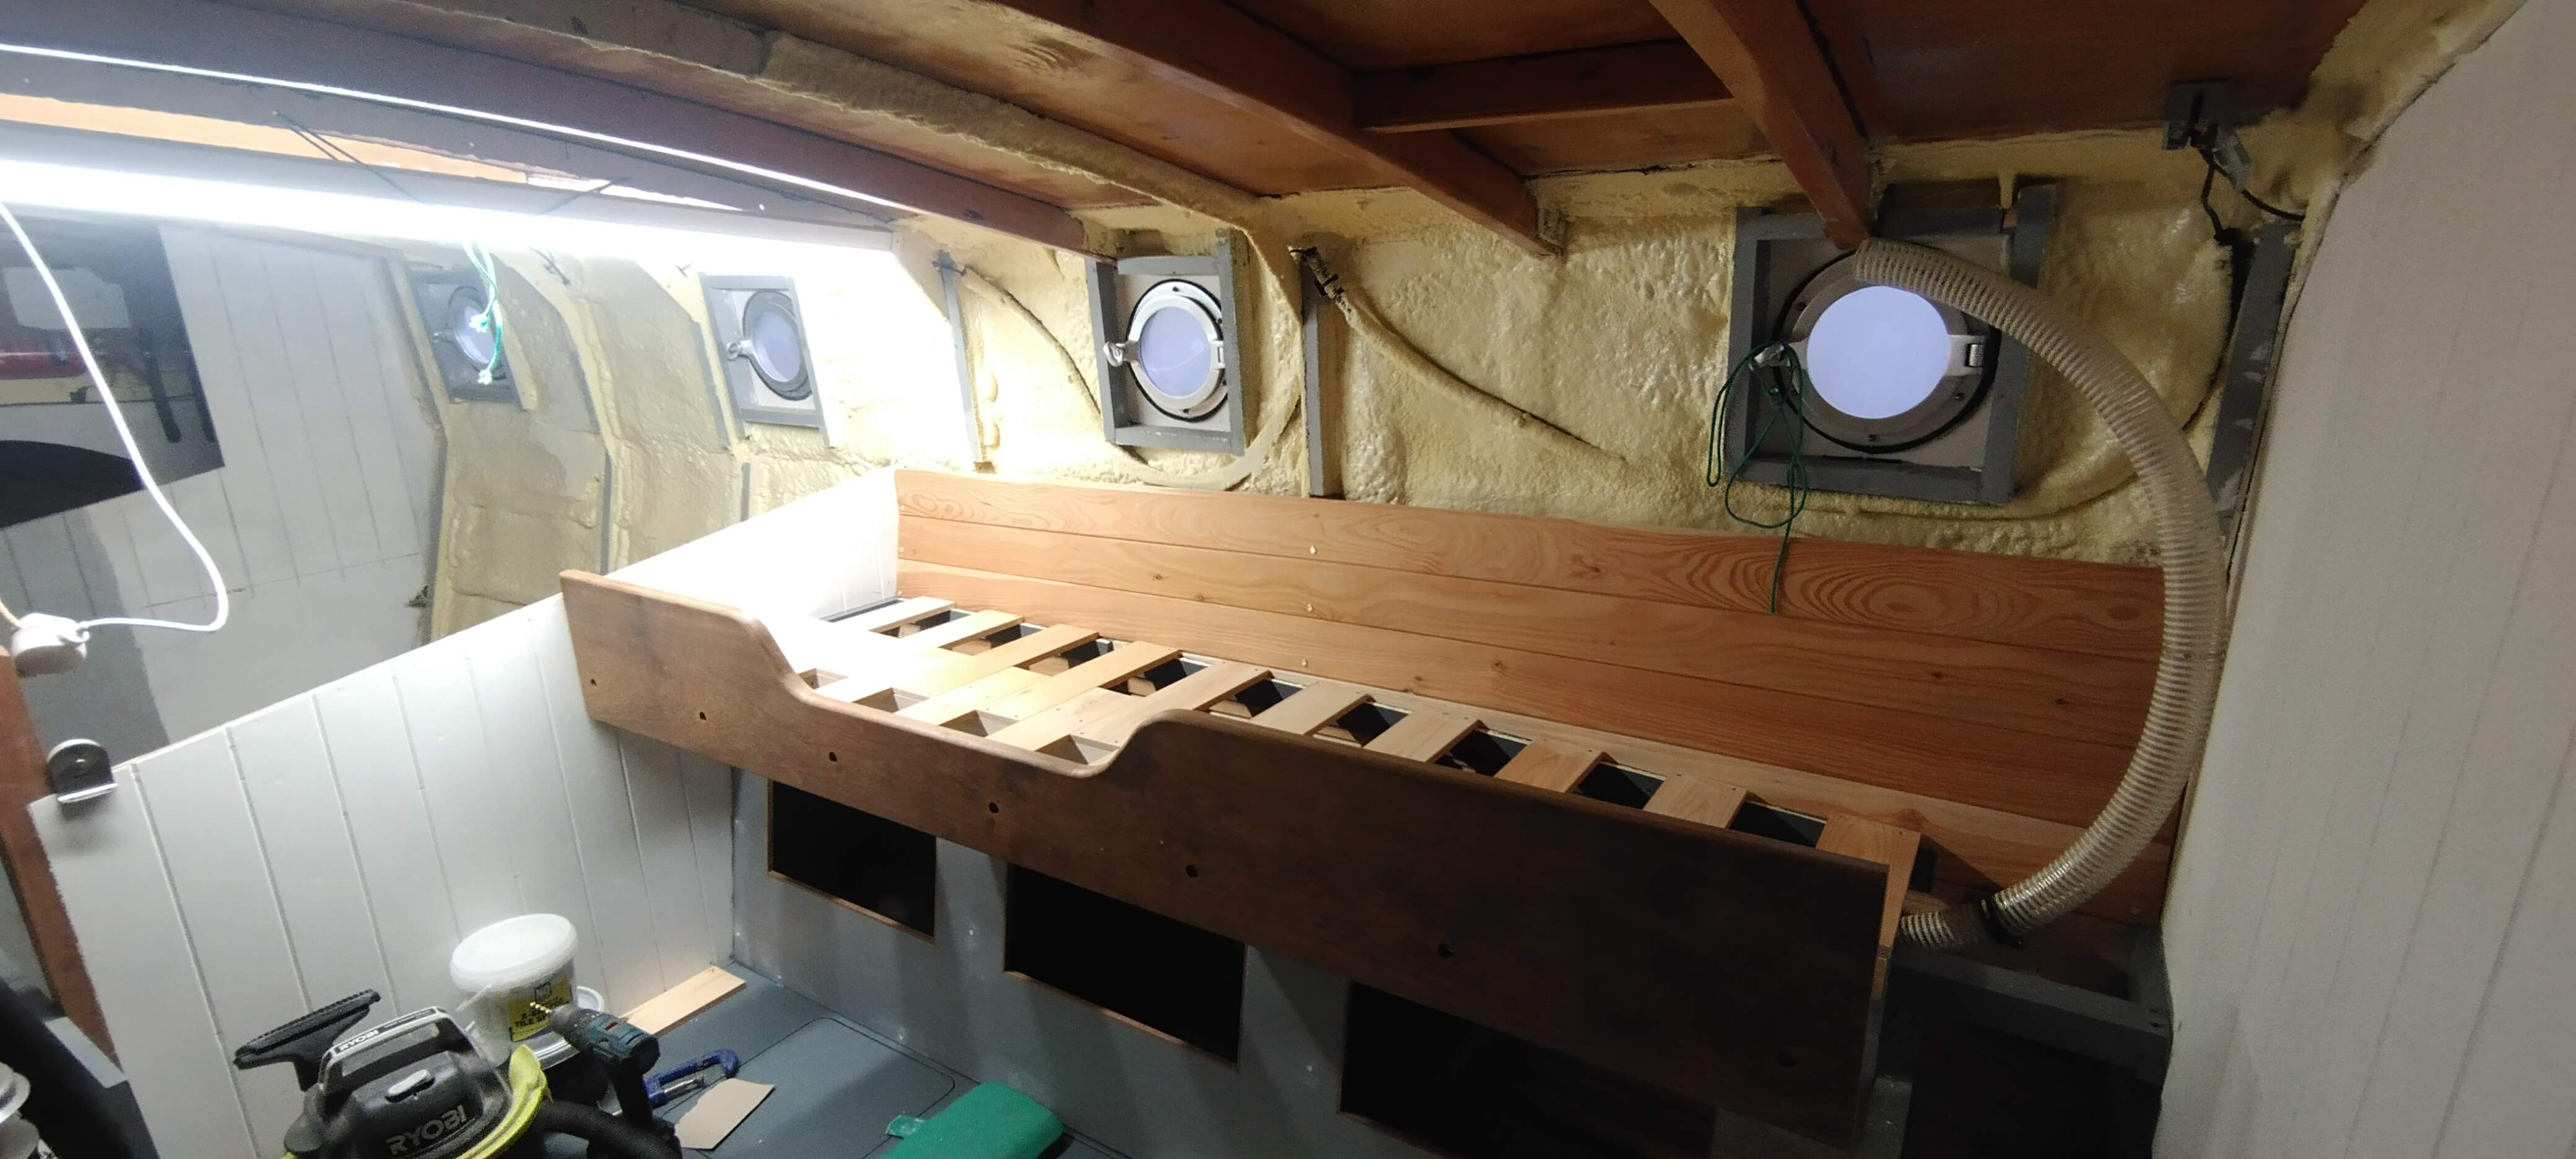
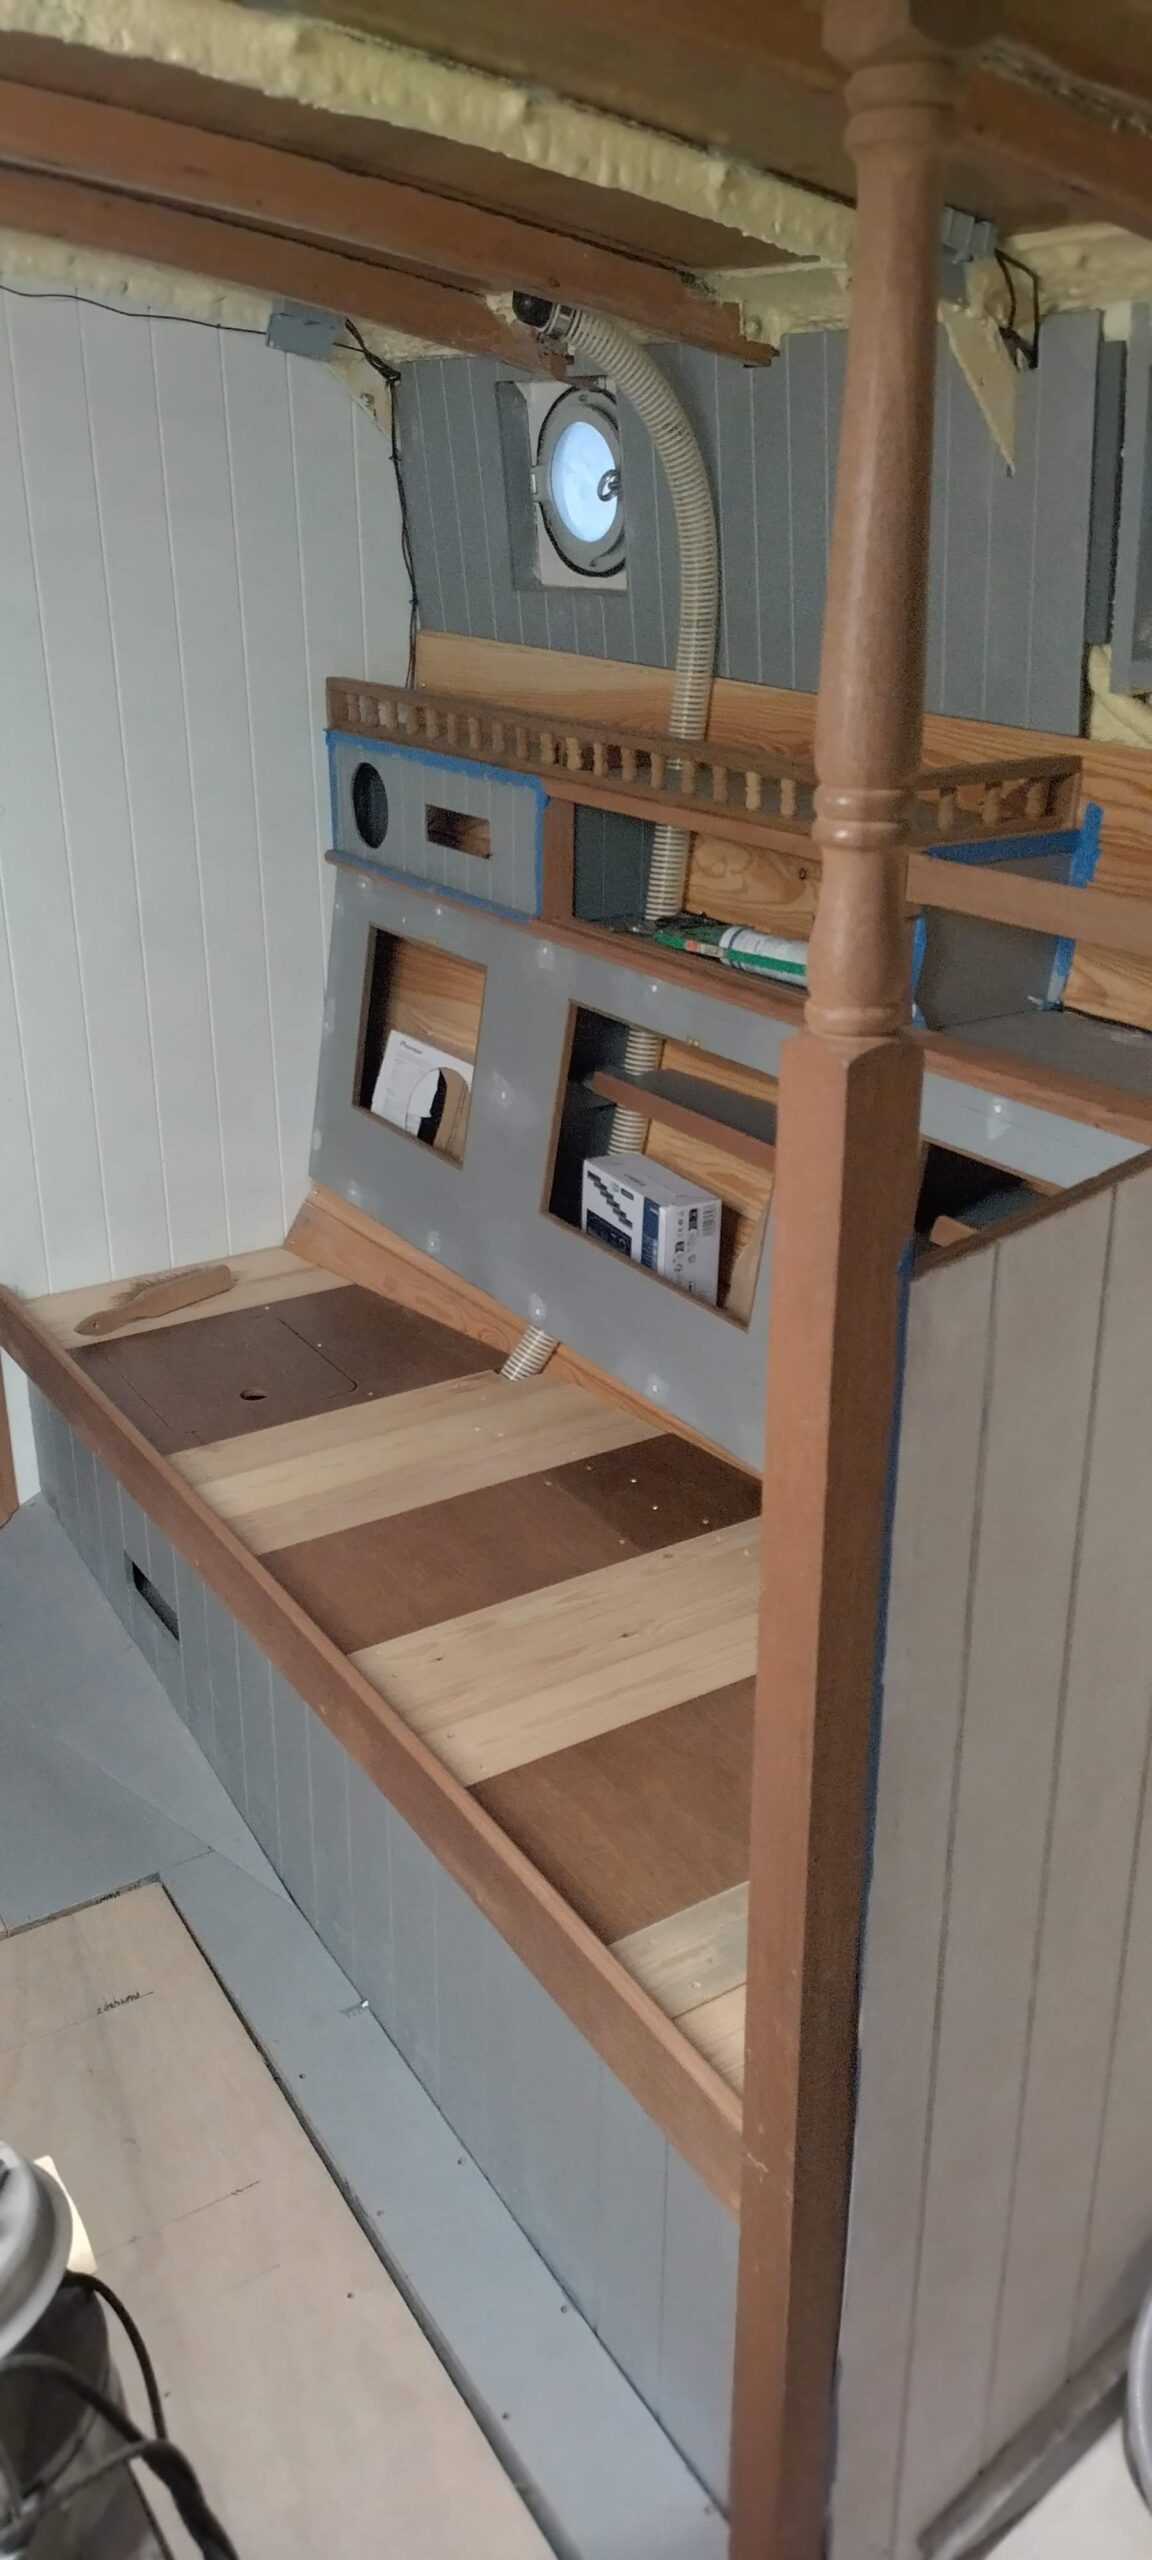
On the port side, having built the framework for the settee back, it was a fairly quick job to cut out the ply panel to form the seat back itself, with three cut-outs for locker access as per the starboard side. These lockers were each fitted with a shelf and then the panels and locker interior painted before screwing the back in place. The next, and most complex element on this side of the saloon would be the pilot berth. Because of the boat’s beam and trying to maximise floor and sitting area, this would also need to be an extending berth. By creating a base which would pull out by approximately 8 inches, I would get a bunk which comes out at 22 inches wide at the head end – a very good width for an effective sea berth. First I screwed a reinforcing batten along the top edge of the 9mm ply seat back, to bear the load when the bunk is in use, and to act as a nailer to provide enough meat to screw the bunk slats into. A nailer batten was also screwed into the hull lining panelling, taking great effort to ensure that these were all level with each other to avoid the slats jamming when sliding in and out. I then screwed the slats down, alternating slats which are fixed to the bunk base nailers, and slats which are screwed to two mobile longitudinal battens, one which travels under the fixed battens, transferring the cantilever loads from the sliding portion to the fixed portion; the other screwed to the tops of the sliding slats along the inboard edge, to keep them all parallel and provide something into which the bunk board will screw. Once this assembly was all complete and tested, adjusting were necessary with a chisel to ensure full travel of the extension, I set about cutting the bunk board from another 2m length of reclaimed laboratory worktop. The cut-out section of this board was cut to match the curves on the fo’c’sle berth, just in case any pedants should inspect and wish to compare them. Having rounded the edges, I also routed a couple of scallops on the inside (non-visible side) of the lower edge, as finger grips for pulling the berth out, and then drilled and screwed it to the bunk edge.
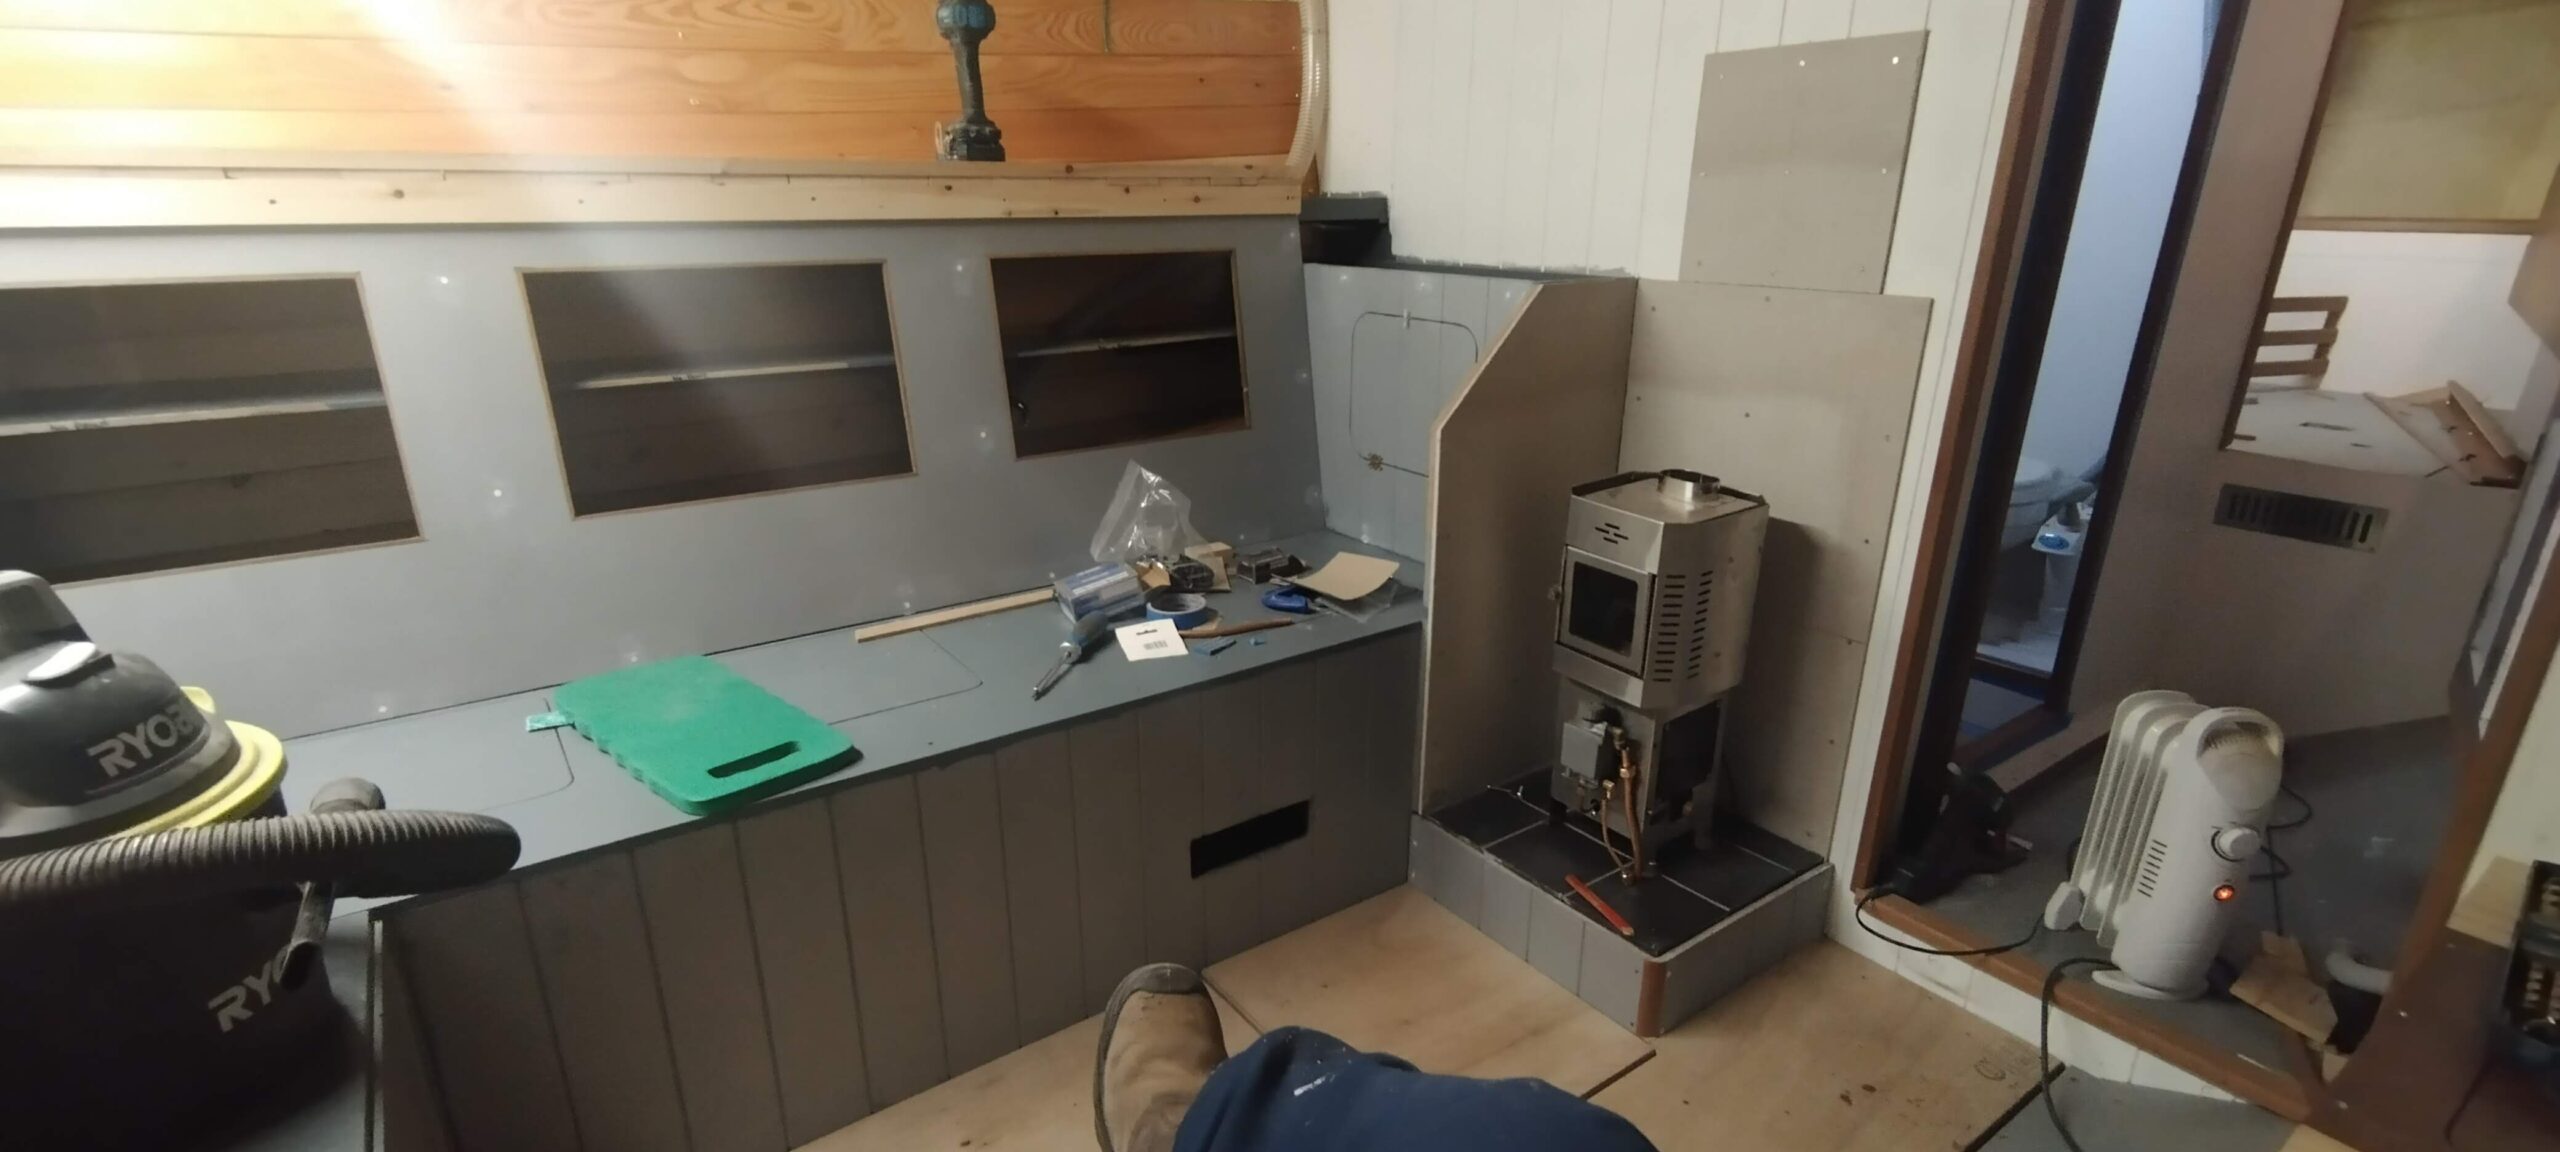
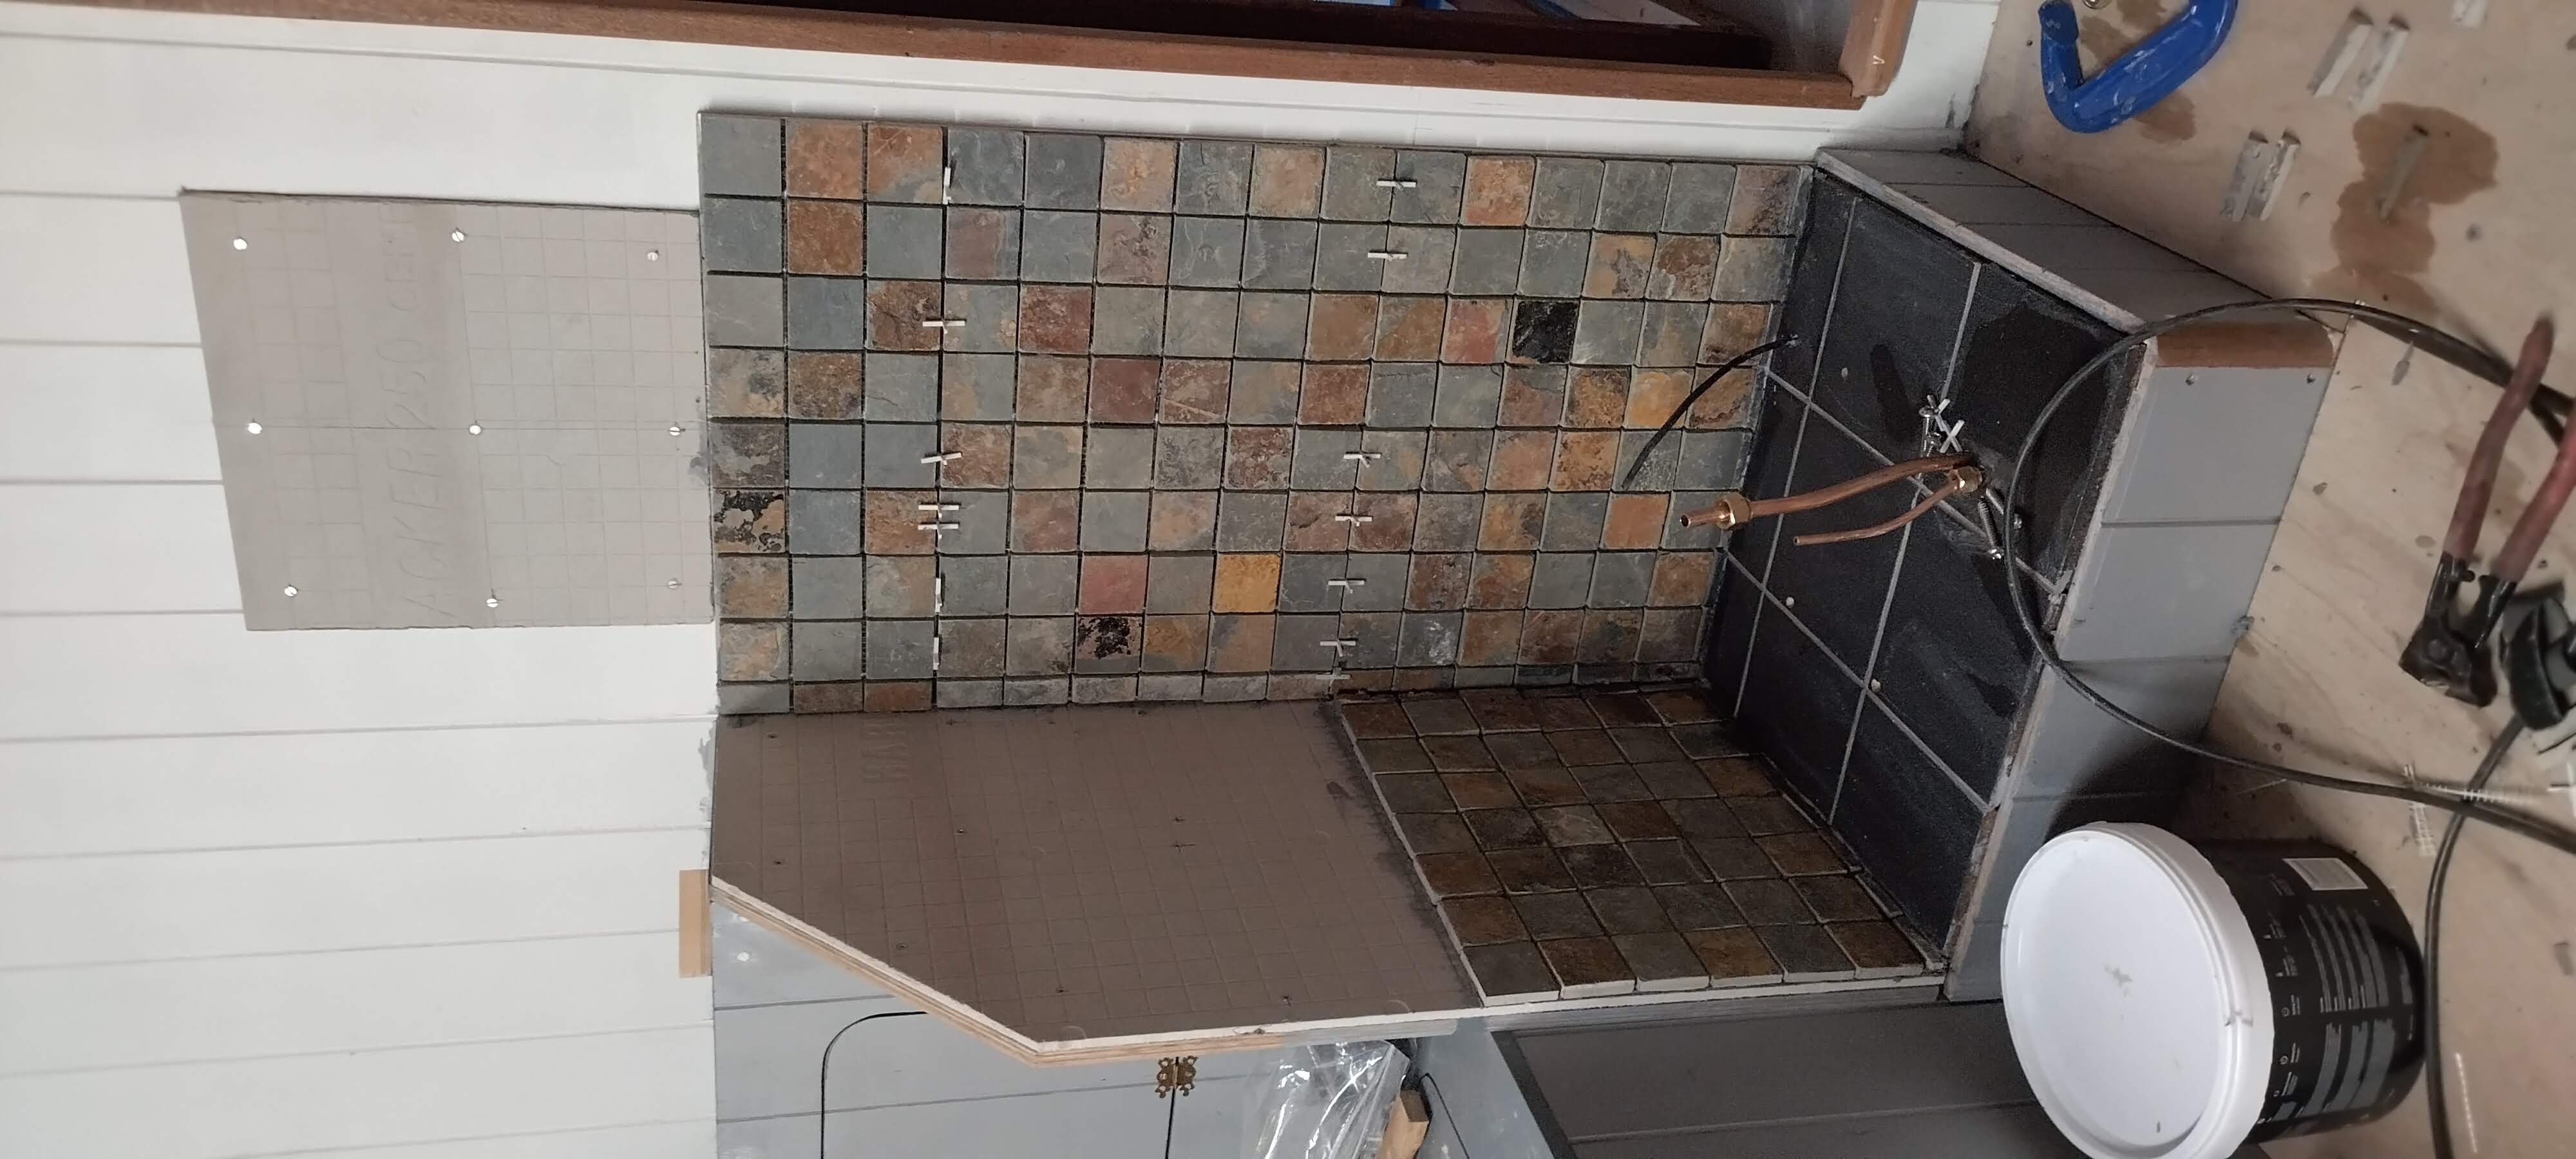
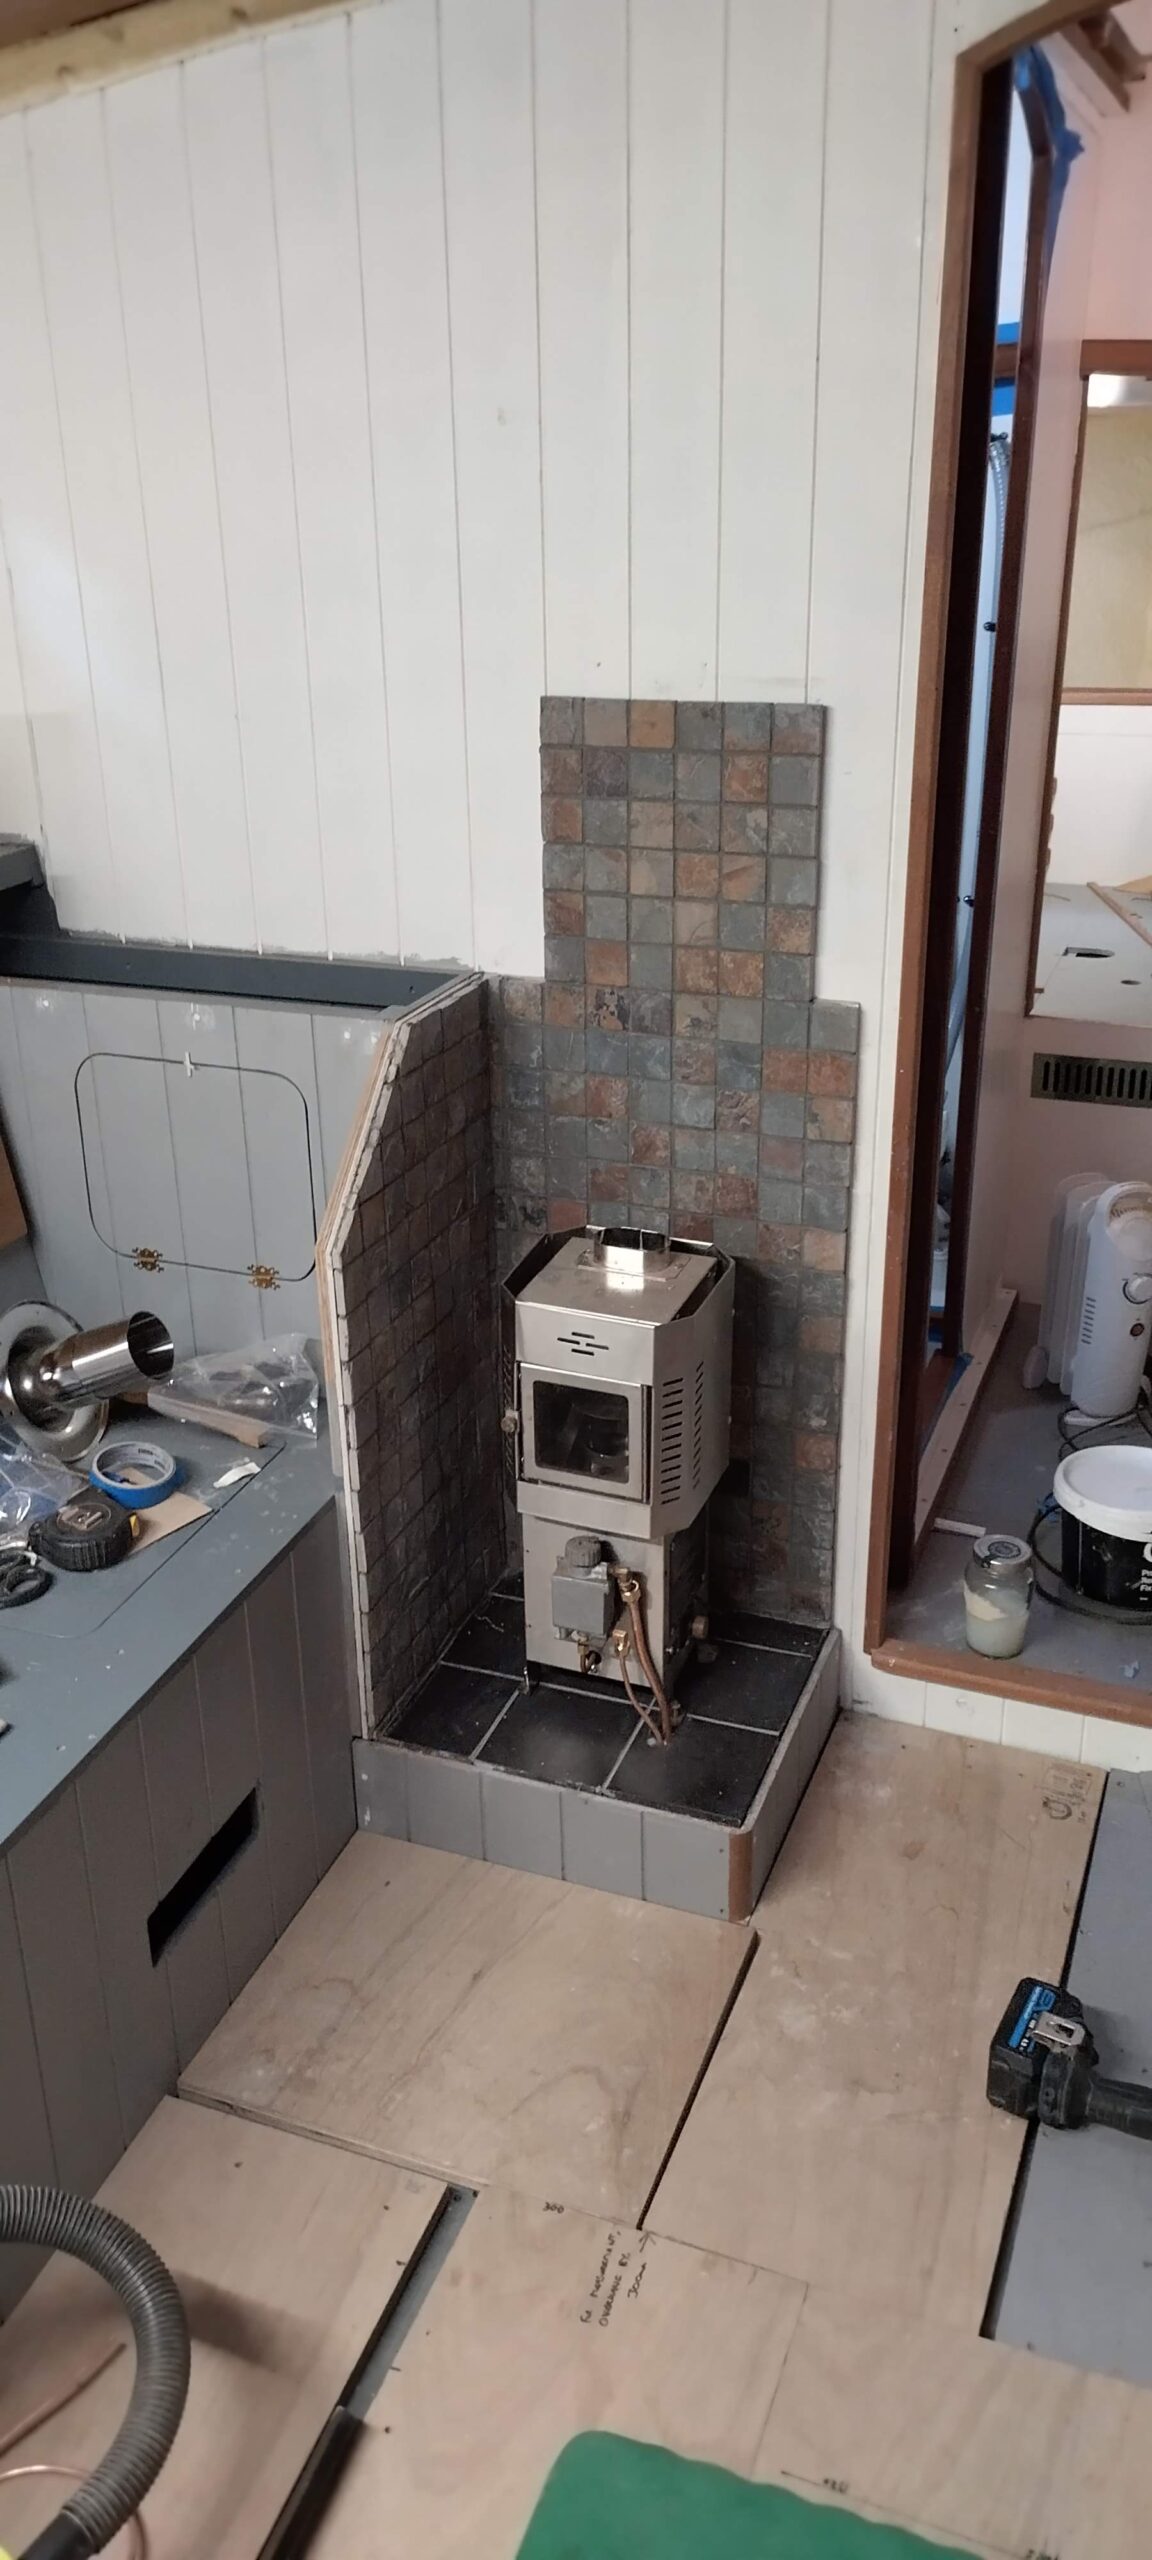
Meanwhile, in between joinery and painting jobs, I started the tiling of the fireplace. For this I had ordered a small quantity of black quarry tiles for the hearth, and some nice Moroccan-style tiles for the surround. Unfortunately, the Moroccan tiles were large square tiles, 45 x 45 cm in size, and when I tried cutting the first of these to fit, it cracked in the wrong place, and therefore the whole tile was written off. It seems the large tile score-and-break cutter I had borrowed was not suitable for this sort of tile. I hadn’t ordered a spare tile, so I had to go back to the drawing board. After a bit more time on the interweb, I found a nice slate mosaic tile made up of 5cm squares, and decided that this would look good, as well as reflecting the fact that the boat is being fitted out in a part of the world famous for its slate production in the past. I was slightly taken aback when told that delivery of the tiles would be on a pallet, and would cost more than the tiles themselves! A quick discussion with the supplier persuaded him that I was happy to take the risk of having them sent in a box, as I considered it highly unlikely that small mosaic tiles on flexible sheets would sustain significant damage during carriage. I was proven correct, and these arrived just after I went back to sea for my next stint, so fitting would have to wait.
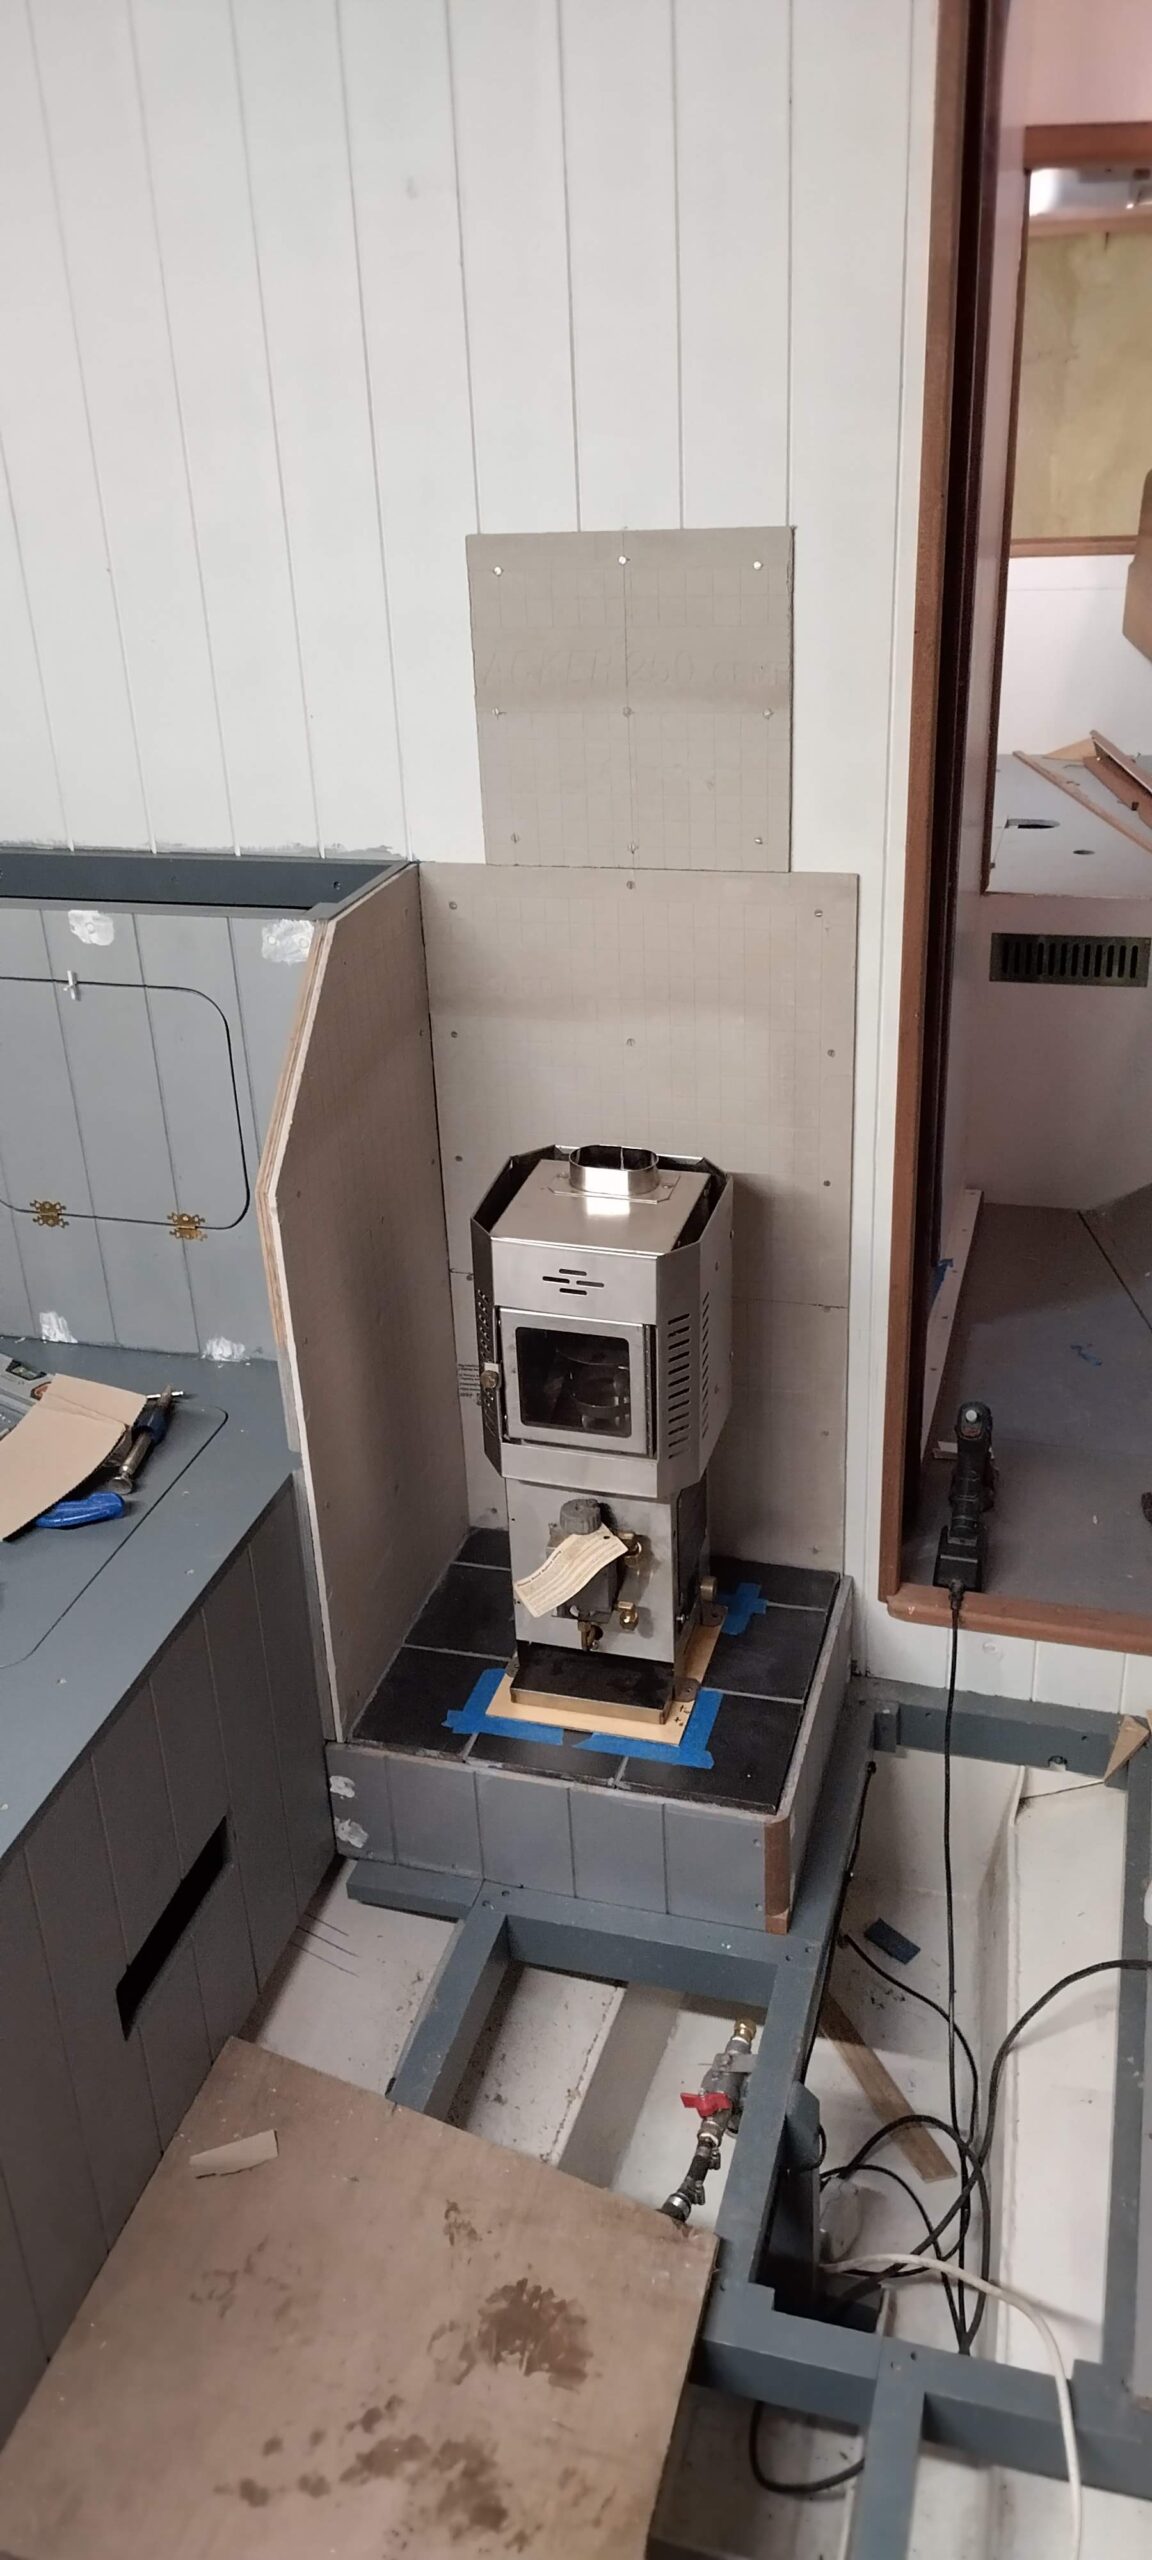
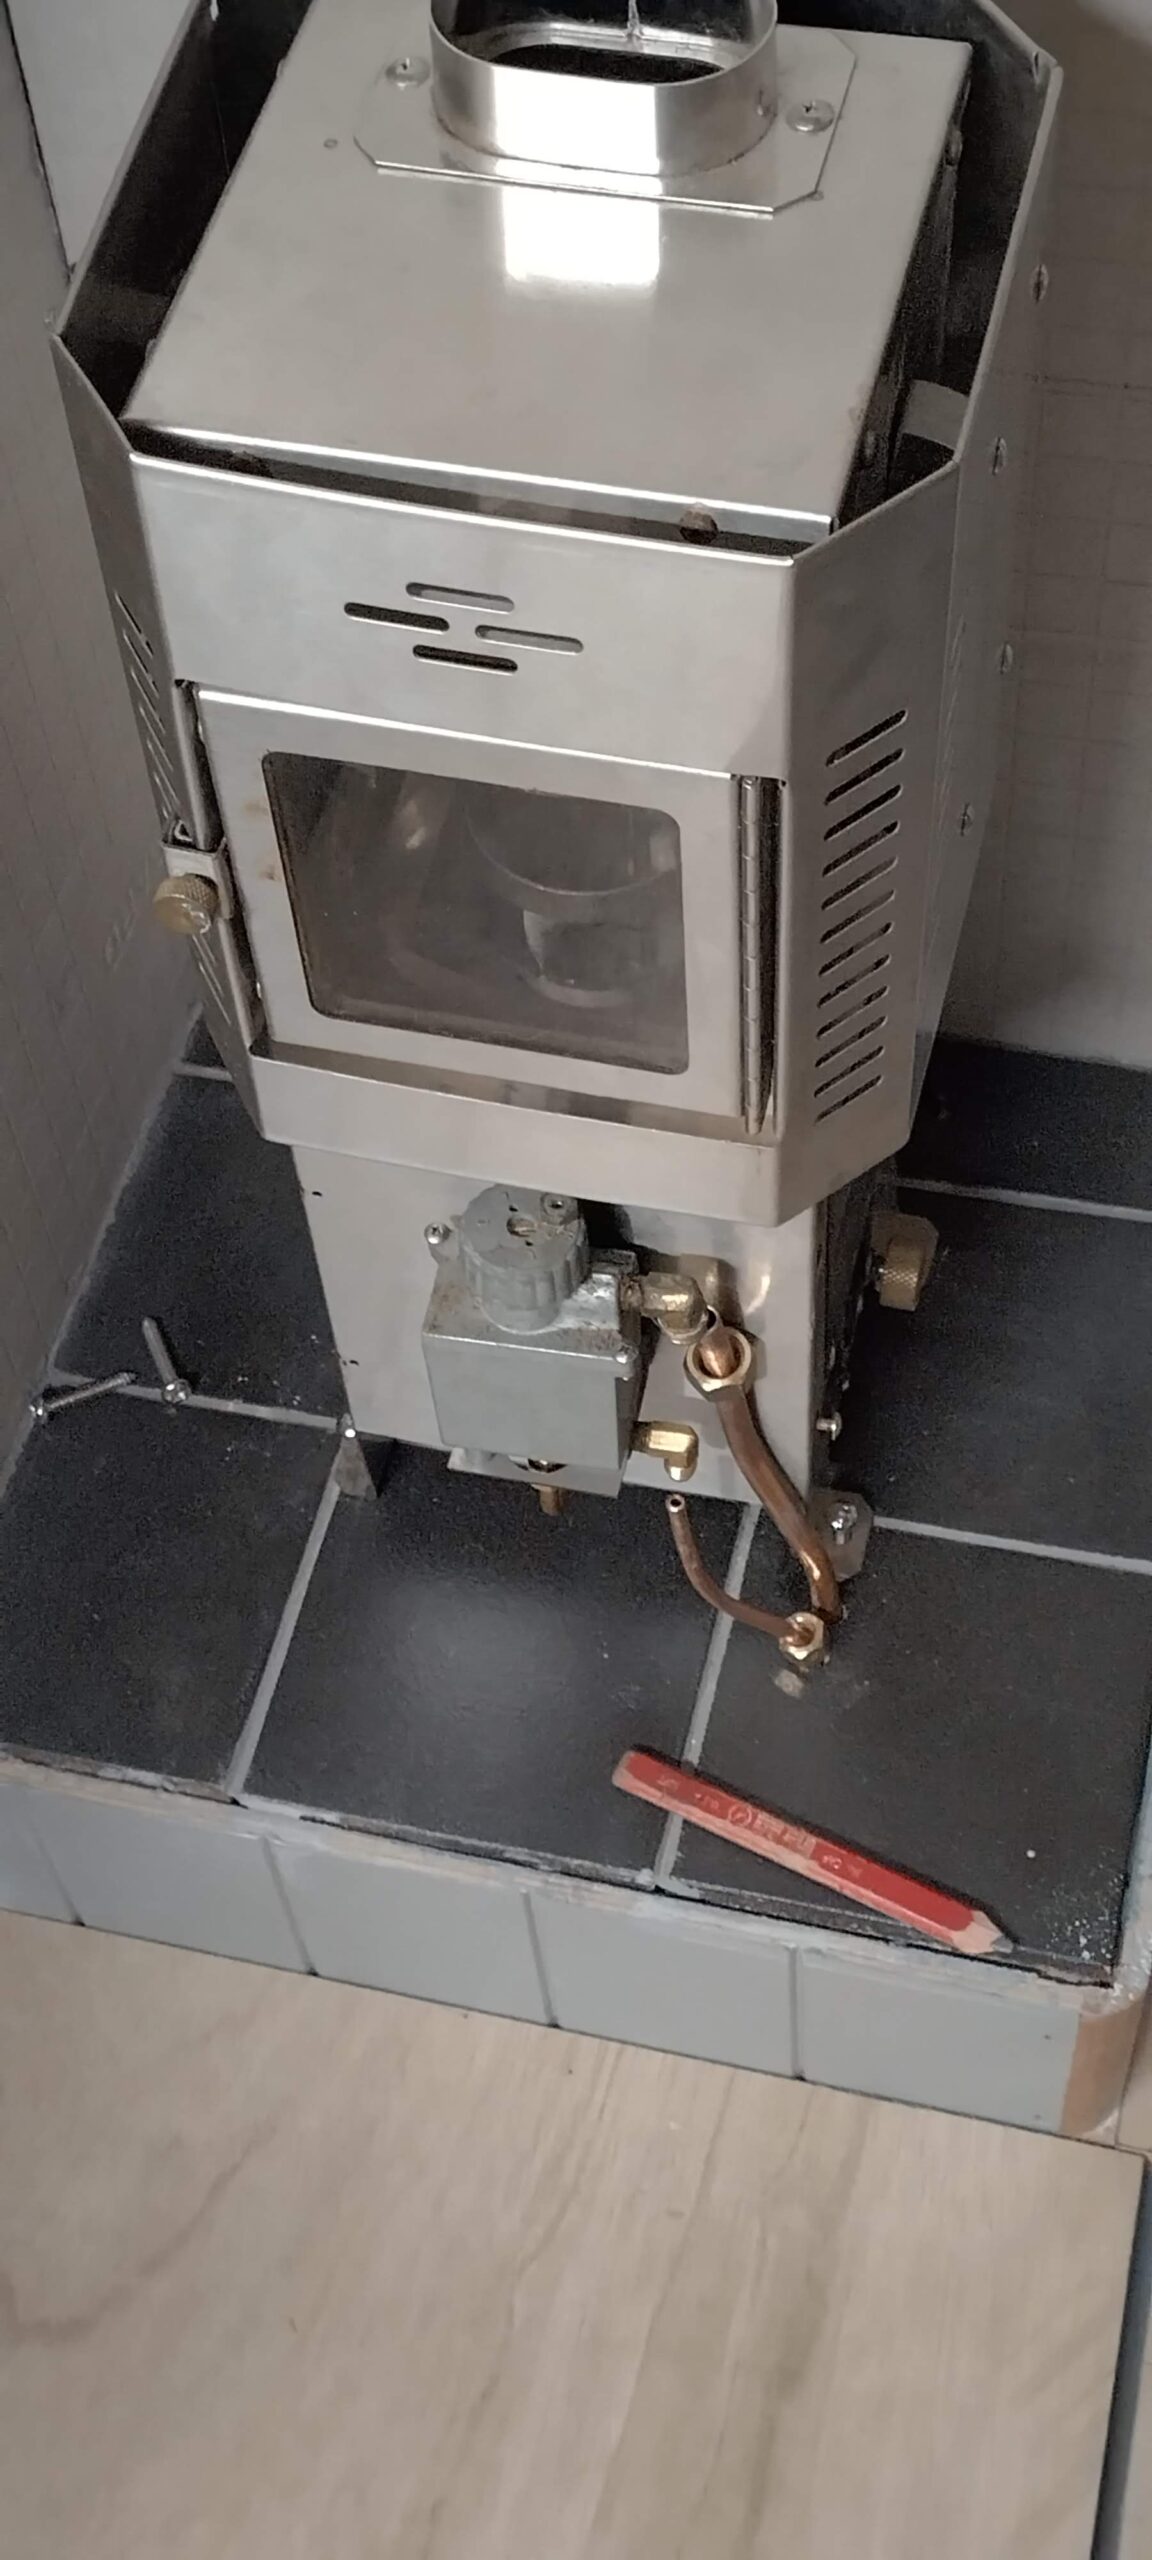
In the meantime I was able to lay the quarry tiles, then drill them for the fuel supply and return / overflow pipes, and the four screwholes for holding the stove down to the hearth. After grouting I then fed the pipes through the holes, bent them to fit the stove, and attached the other ends to the fuel filter (for the supply) and a tiny overflow tank for the return. This tank was procured from a go-kart parts supplier online, and hides below the sole out of the way. Next was to flare the ends of the pipes to fit the fittings on the stove, but unfortunately the borrowed flaring kit I was using was not up to the job, so I had to order one of these to use on my return from sea.
A final joinery job I managed during this free week was to build the seat back locker doors. There are six of these, made to the same dimensions, which will be fully cushioned and upholstered. I just needed to build them from a 9mm ply panel edged with 12 x 45mm softwood, rounded and varnished. Finally I fitted the hinges and catches and left them in place until such a time as I would be painting the rest of the joinery.
When I returned home in May, the first job I had set myself was to replace the tarpaulin which forms a shelter over the boat. The story behind this is essentially that the shed roof leaks around most of the skylights which were retrofitted into the corrugated asbestos roofing. These all have their own internal gutters and drains; the gutter serving the one right above my boat has collapsed and therefore the contents drip straight onto the middle of the bay my boat sits in. I have had a tarp rigged over the boat to deflect this leak (which has got worse over the years), and over the last six months or so the constant dripping has slowly made the tarp porous in a couple of places, so it then rains on the deck, and dribbles down the topsides onto my valuable timber and stores. This had reached an unacceptable level and risked damaging my materials, so a new tarp was required. This took a day to do, taking down the old one (on a dry day) and rigging the new to a suitable tension so it drains properly. This still makes puddles down the alleyway down my starboard side, but these can be minimised by catching the majority of water in buckets. As long as the boys at the yard remember to empty them when it has been raining, this keeps my whole work and storage area at an acceptable level of dampness. This is all slightly annoying when one is paying thousands a year for inside storage, so hopefully once my neighbour has moved out of the shed, and the boys can get the telehandler in close enough, they will be able to deal with the offending gutter.
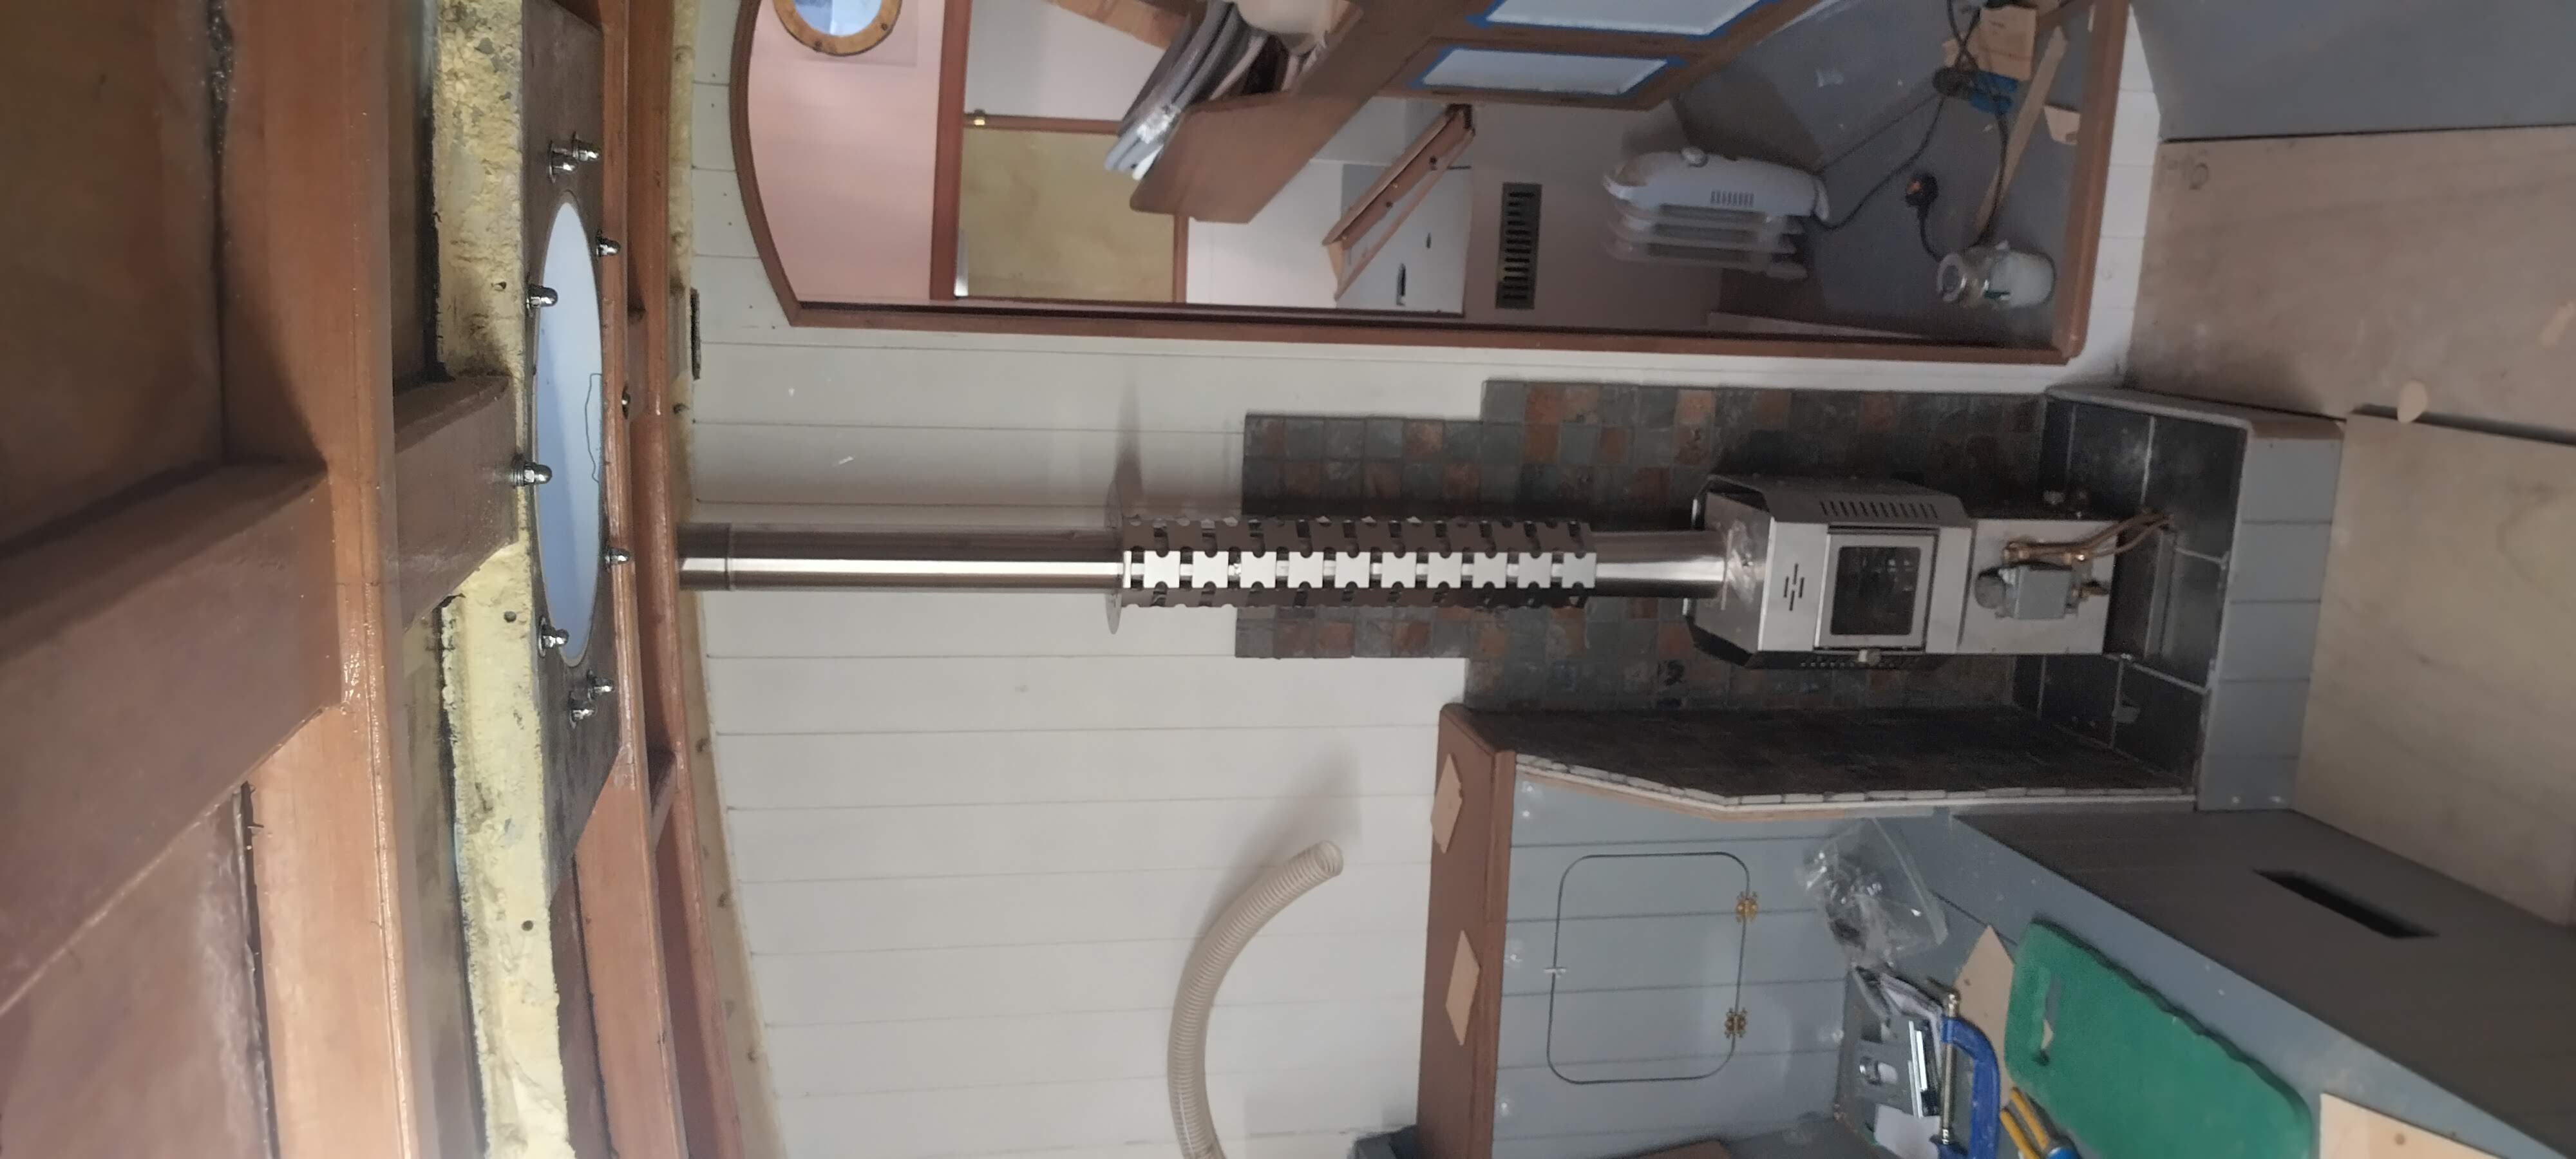
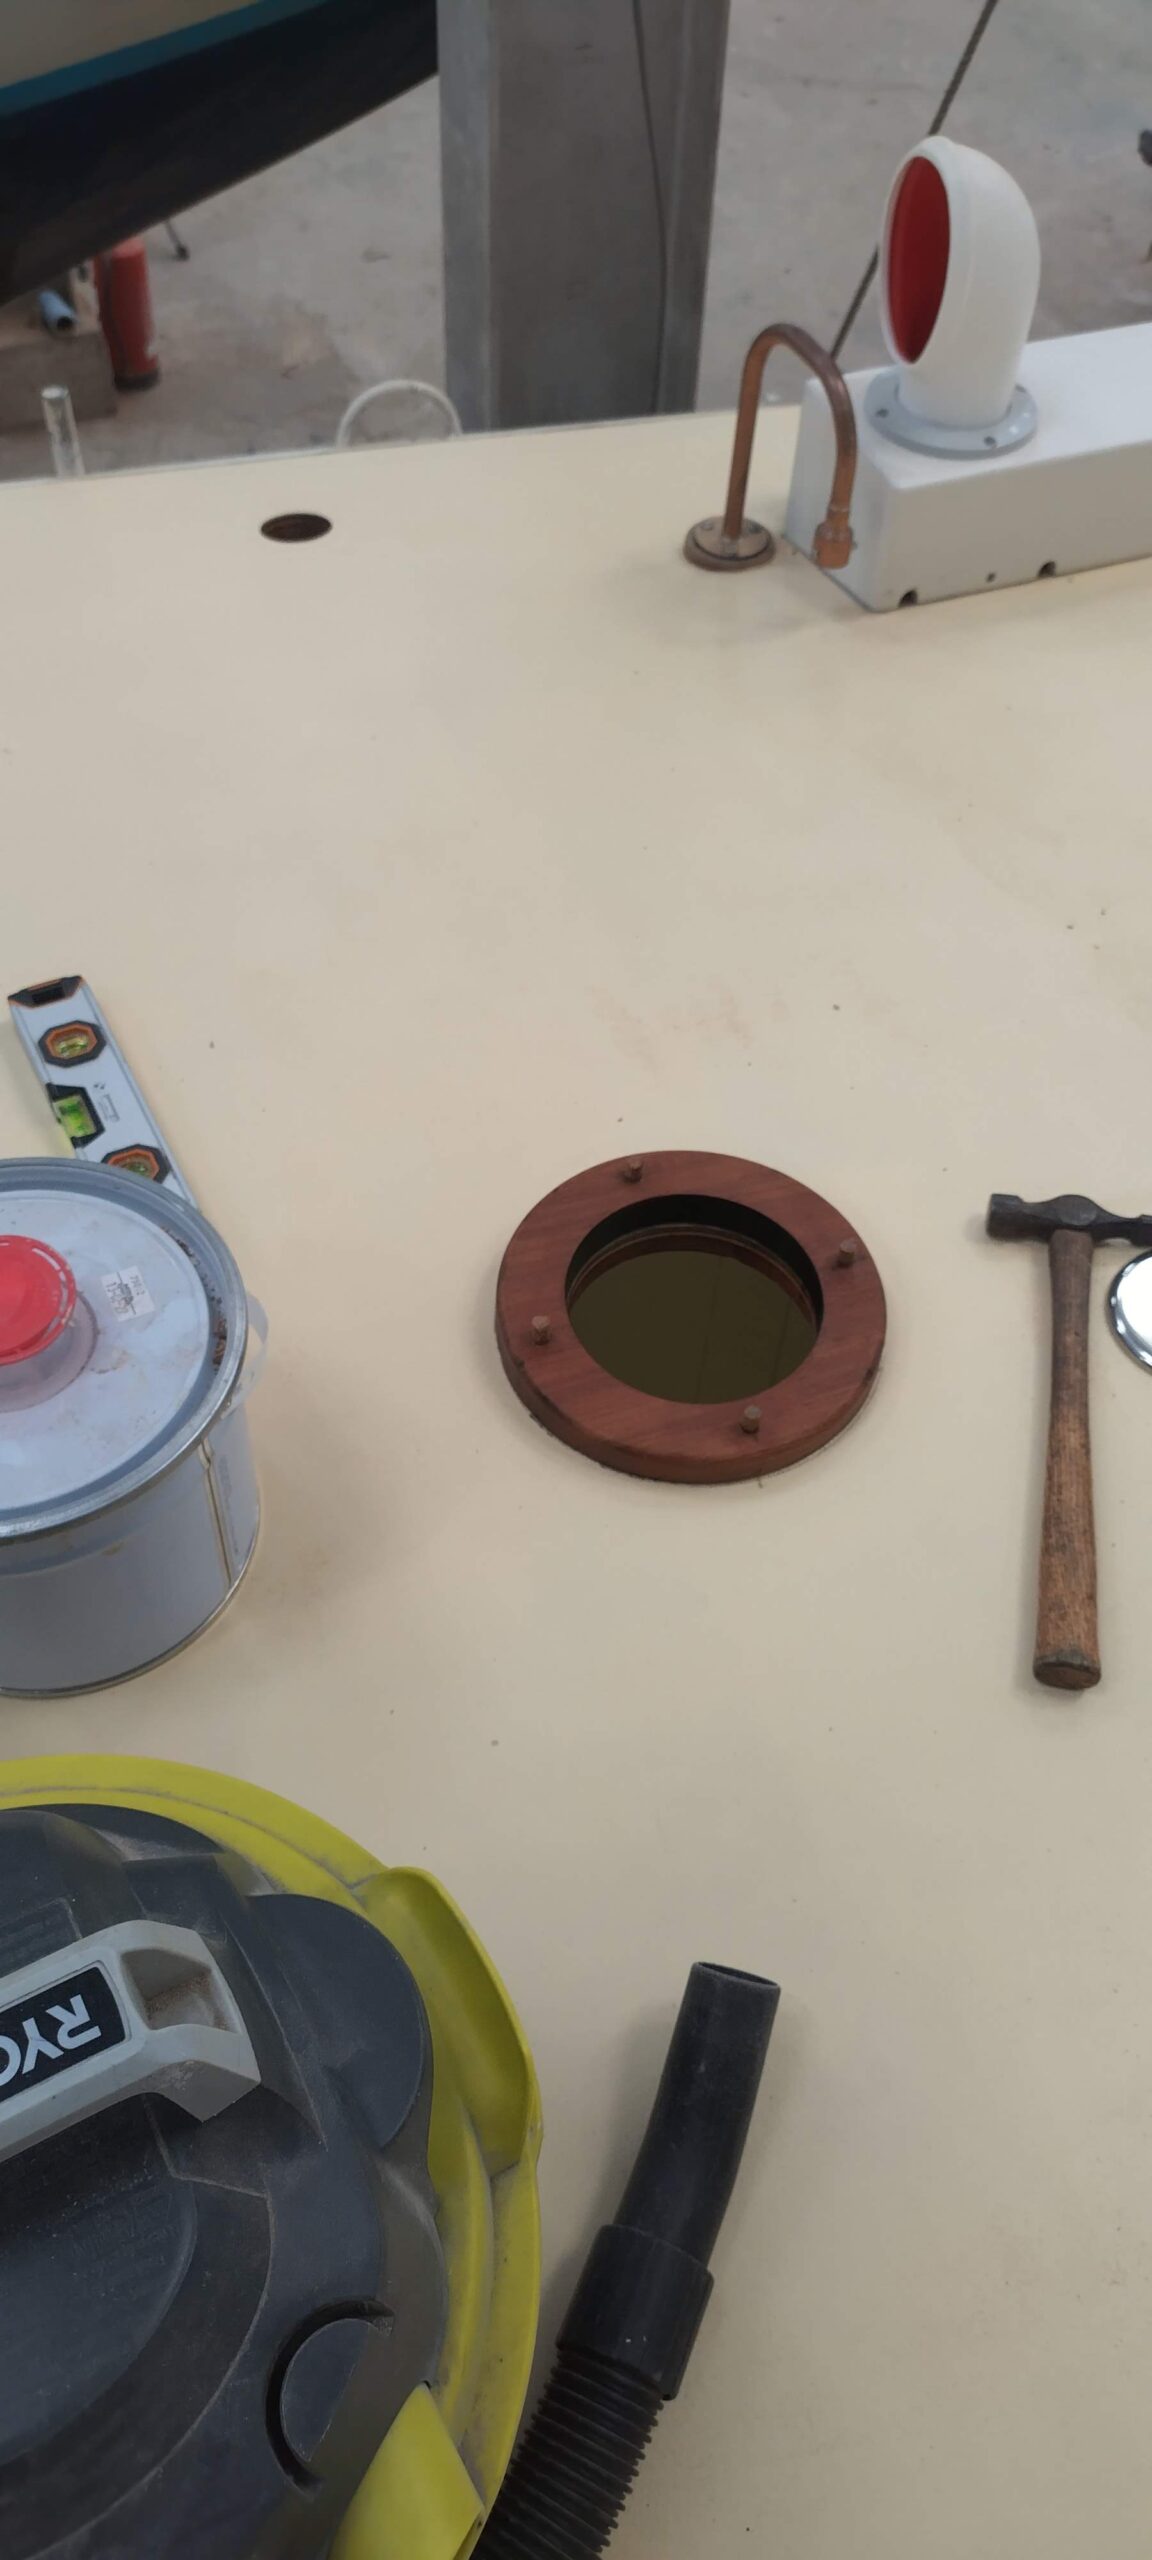
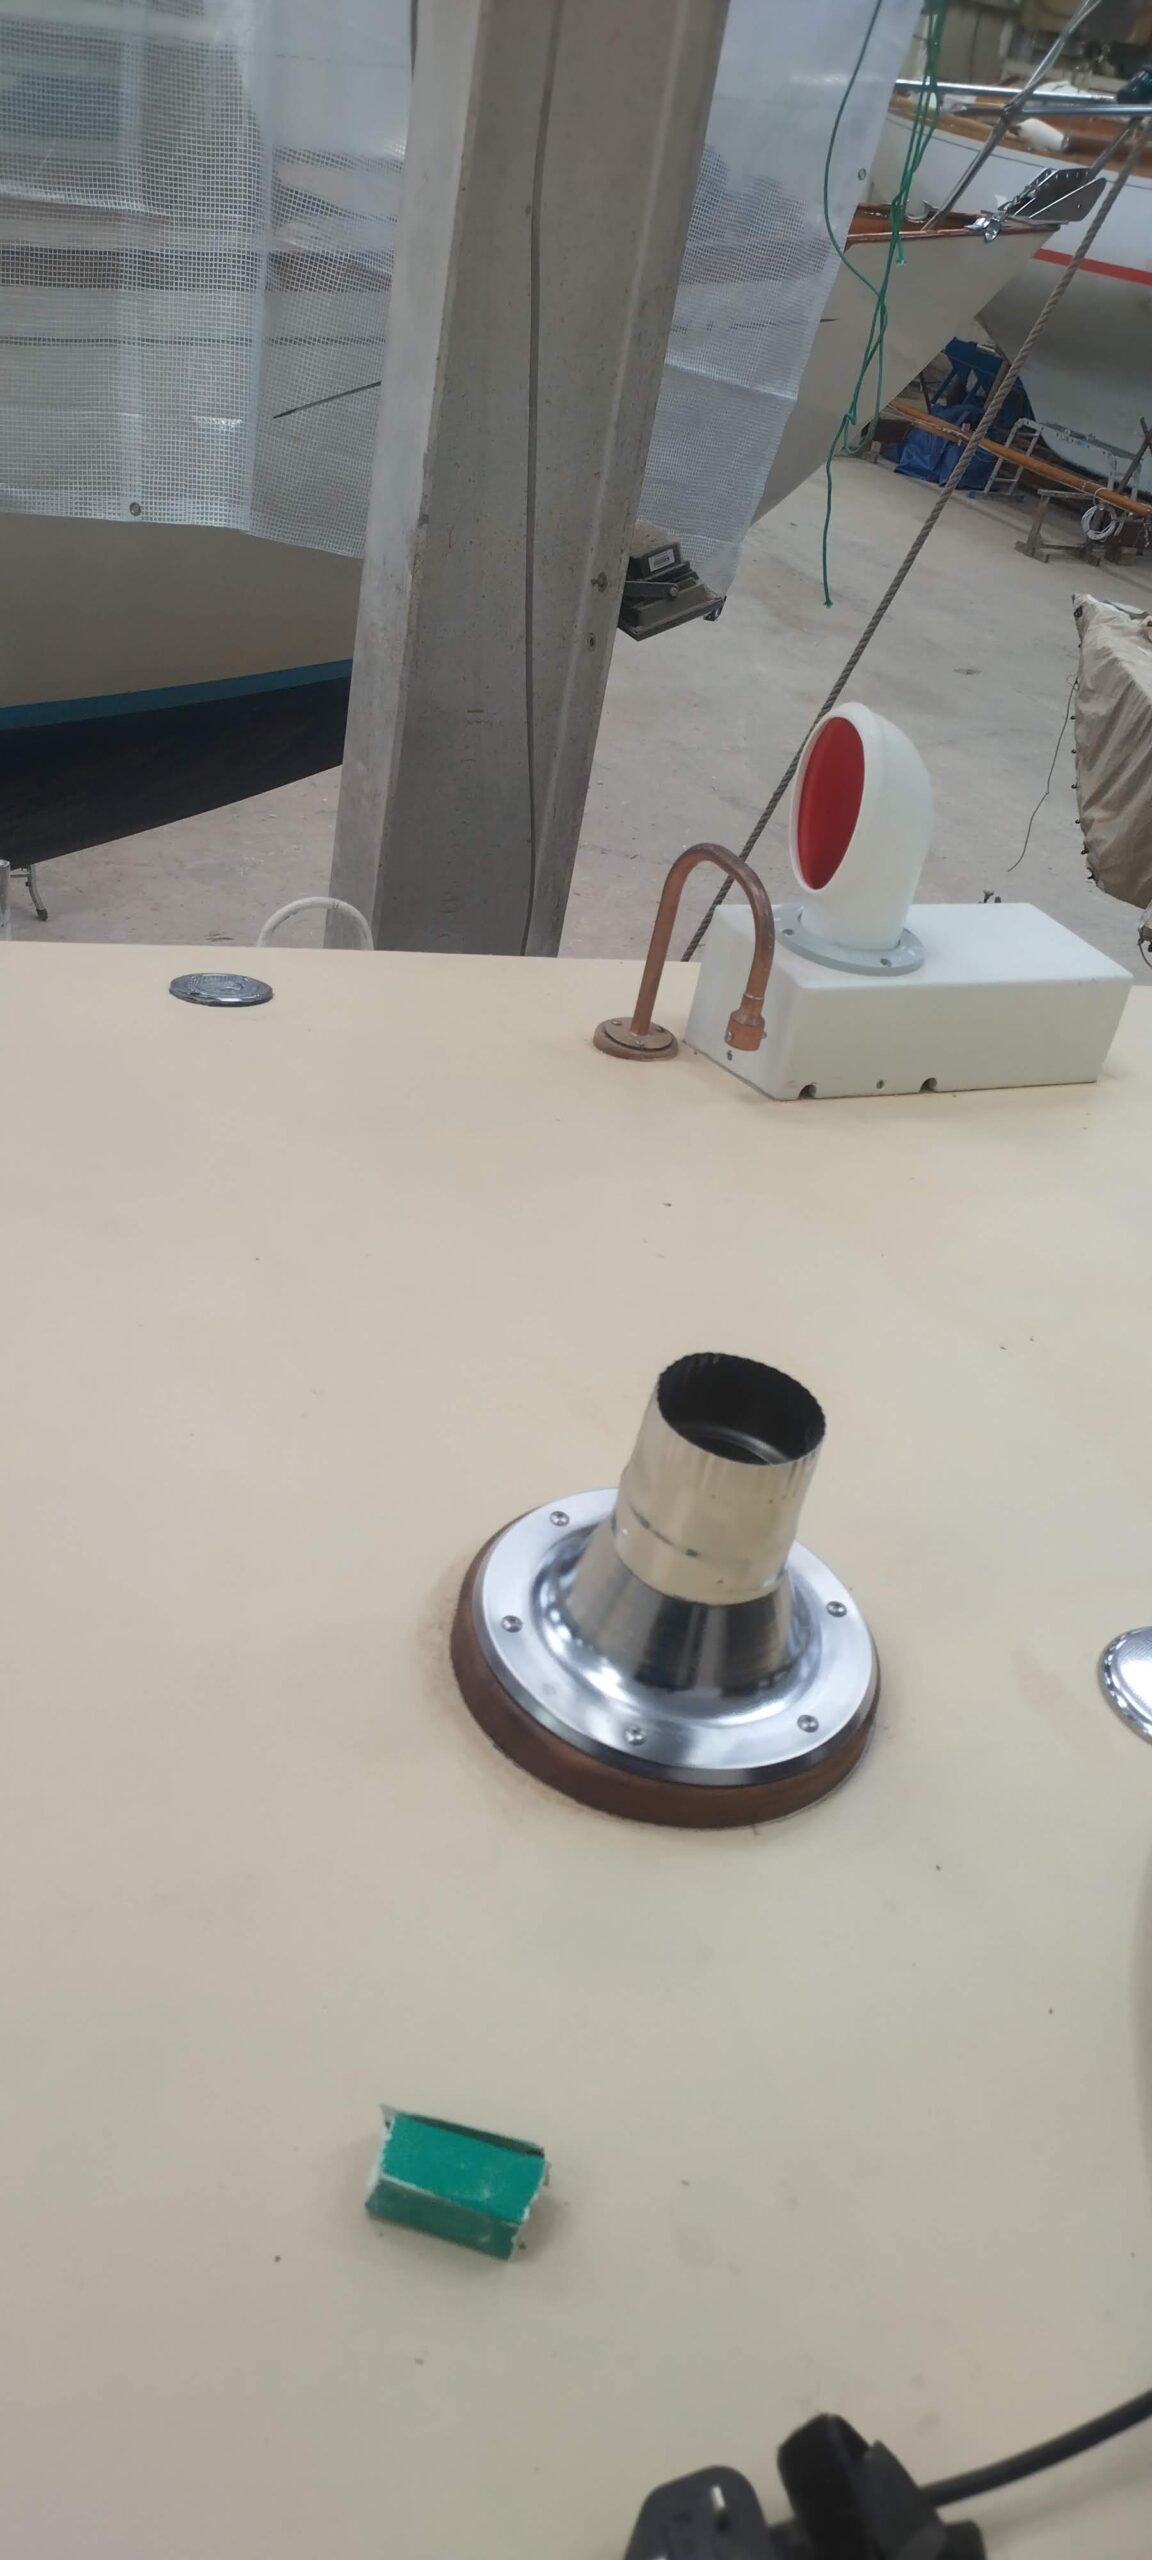
Such practicalities dealt with, I was able to continue with the boat, and almost completed the tiling of the fire surround before my trip down south. This was quickly completed on my return, and the grouting down to an acceptable finish before I sealed the slate against possible water or diesel penetration. This was a happy milestone, because now I could think about finally fitting the stove and its flue. For the latter I had to cut a 5″ hole in the deck (always a nerve-wracking job: Is it in the right place? Will I hit any fastenings hidden in the deck?), and whilst in the mood for cutting big holes, I also cut the two 2″ holes required for the water tank fillers. All three cut-outs had their bare edges sealed with a couple of coats of epoxy, and whilst this was curing I made up a slightly bevelled ring of teak to provide a level seat for the flue deck fitting. This was epoxied in place and the bolt-holes for the water fillers were drilled-filled-drilled again to prevent water seeping into the ply deck (this is a technique whereby the holes are drilled oversized, filled with thickened epoxy, then redrilled through the epoxy, effectively keeping water away from ply endgrain – something I try to do for any and every deck fitting). Then the flue deck fitting and the two deck fillers could be fitted with copious amounts of polyurethane goo to bed them down. It was a fairly quick and very satisfying job then to cut one section of the flue down in length slightly, then assemble the flue from its component parts (two plain sections, a barometric damper and a heat guard) between the stove and the deck fitting. Finally I wired up the fan which provides draught for starting the stove (although it remains unconnected at the supply end!), and if I had any diesel in the day tank I would be able to flash the stove up! Maybe I will wait until the temperatures drop again in the autumn and then put a couple of litres in the tank to give this a try.
At some point around here I also decided I had fallen into the bilge too many times by now, so roughly cut the sole boards for the main part of the saloon, so I have a fully-boarded area to work in now! These boards will eventually be painted on the underside and have a glued corkoleum floor covering fitted, with teak edge trim, so they will be cut to exact size when they are finished in this way. Annoyingly after doing this I found that one of the transverse sole bearers stands slightly proud of the rest, so I have wobbly sole boards at the moment, until I get round to planing the beam off slightly.
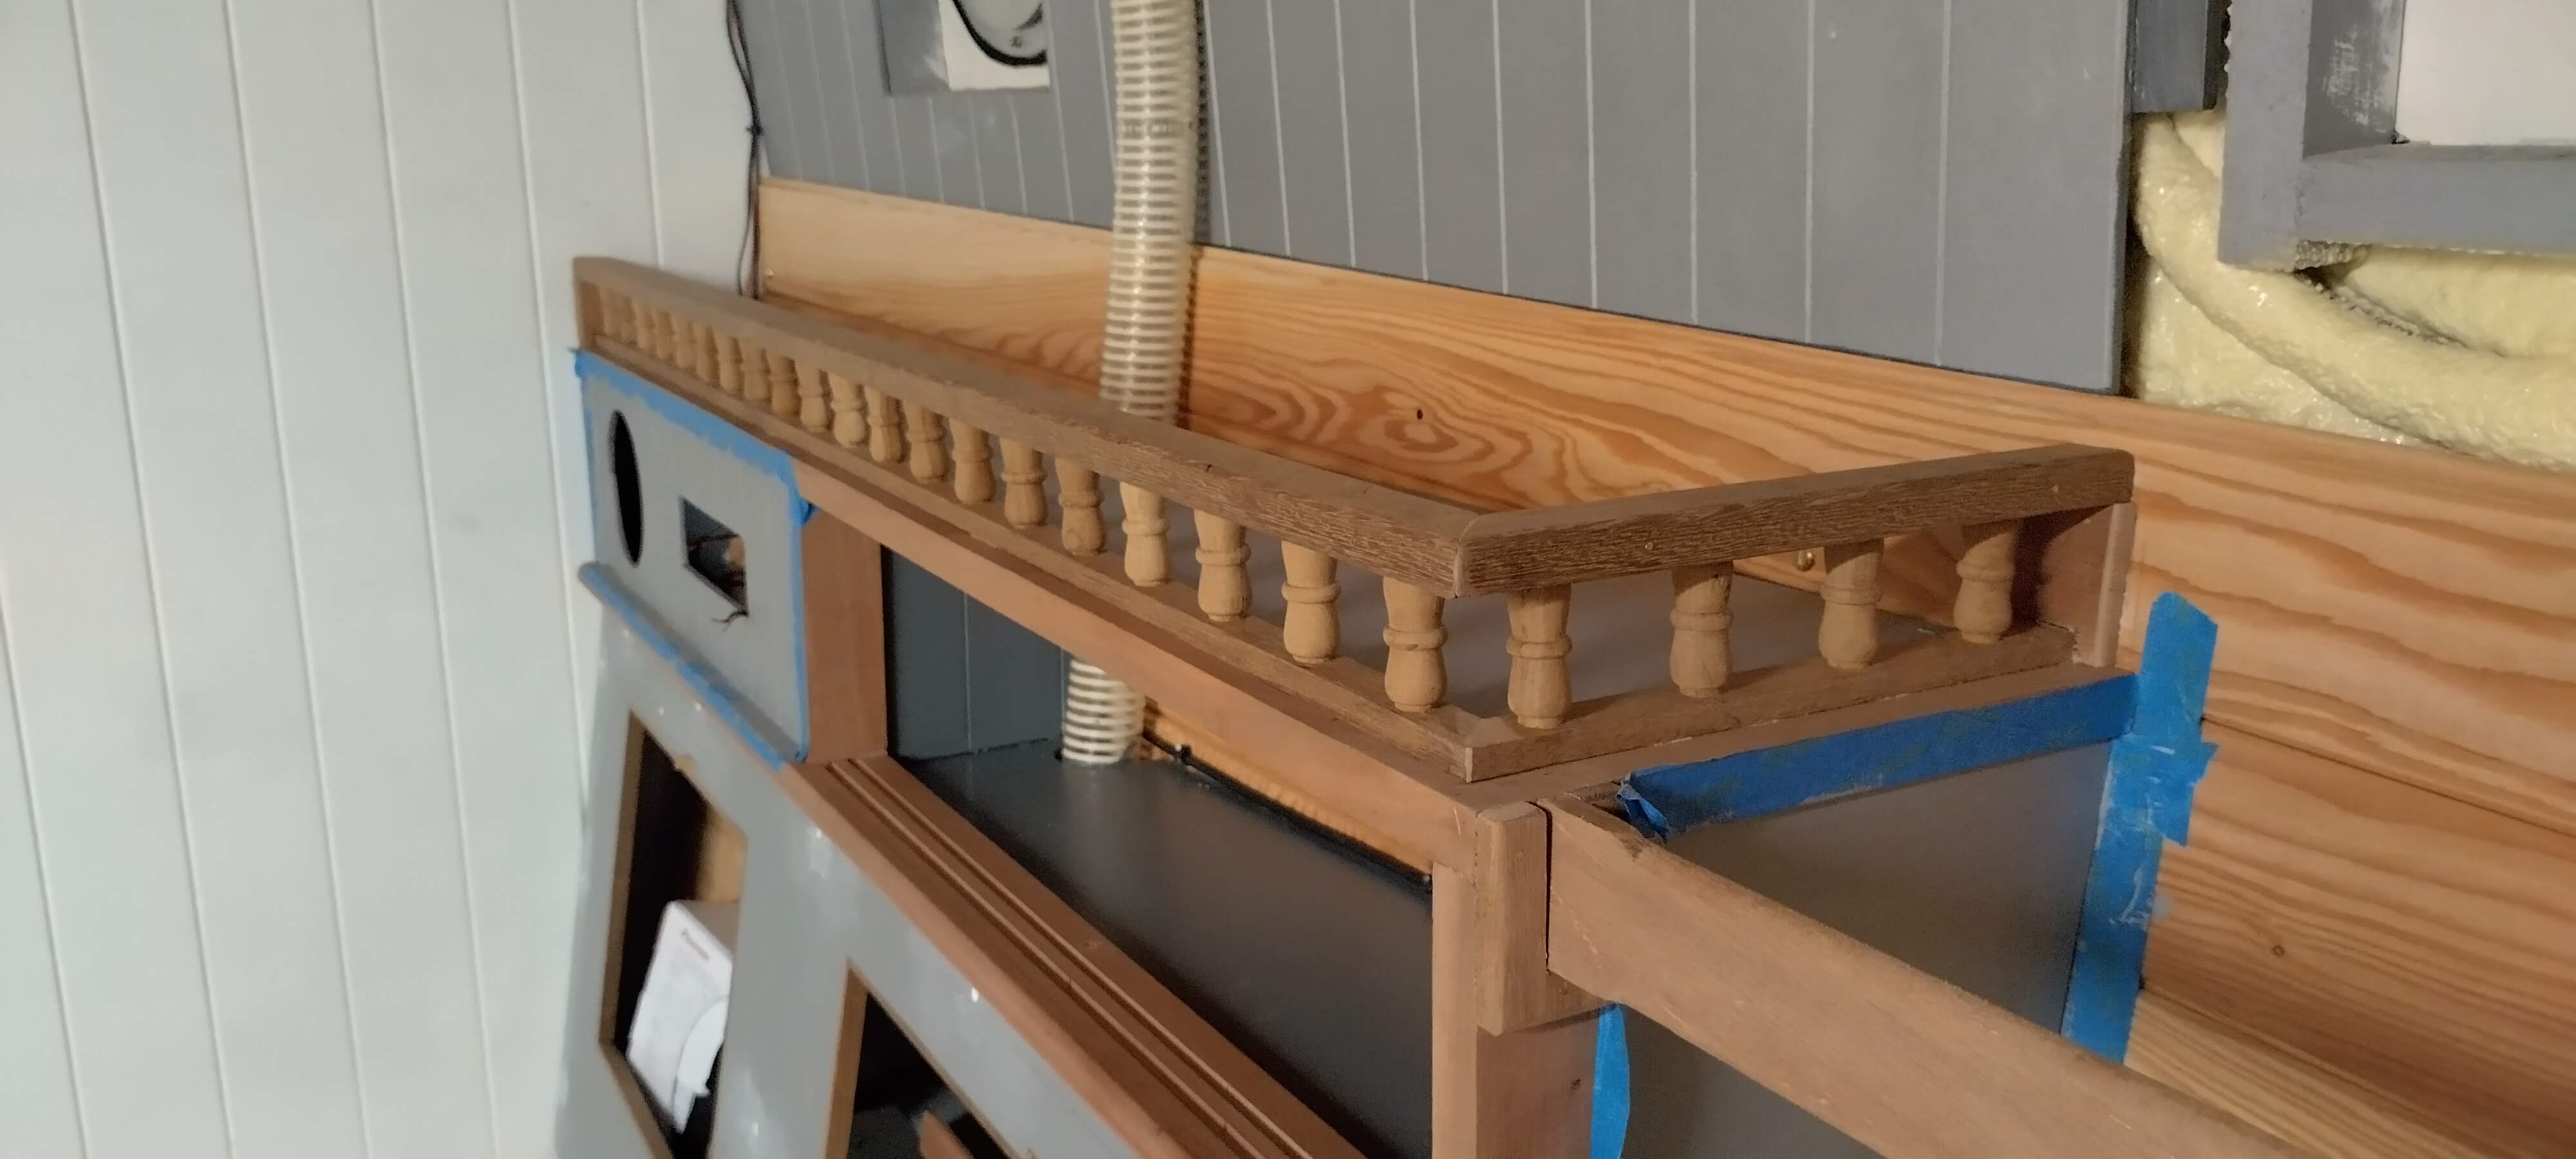
All the while I had been tiling / travelling / tinkering with the stove, I had been contemplating the next stage in the saloon: what to do on top of the stbd seat back box, and at the foot end of the pilot berth, in terms of extra stowage and finishing steps. On the starboard side I sketched up a design for a combined unit consisting of, at the forward end, space for a speaker and car stereo system, a small locker for knick-knacks in the middle, and a bookshelf for big books at the aft end. Meanwhile, on the port side, I envisioned a tall, thin locker outboard at the end of the (unextended) pilot berth, with a small “sideboard” surface inboard, and some bookshelves and a glass rack above. The starboard side was the more straightforward from the point of view of joinery, so I started that first, having ordered a pair of car speakers and a small car stereo unit with an FM / DAB radio and Bluetooth (modern ones without a CD player are half the depth of the standard DIN unit). I made a rectangular frame with two apertures for the front face: the forward (stereo) end would be panelled with a bit of left-over 6mm “T&G” ply which I use for the lining of the upper cabin sides, whilst the middle section I grooved top and bottom for a pair of little sliding doors from the same ply. The aft end was left open as a bookshelf, to which I would later fit a removable fiddle rail. Once I’d fitted the front frame and little 6mm ply partitions, I roofed the whole thing in with a shaped 9mm ply panel. This I then finished with a bit of prefabricated teak “pinrail” fiddle rail, which I topped with my own rounded moulding to make it more sturdy and decorative.
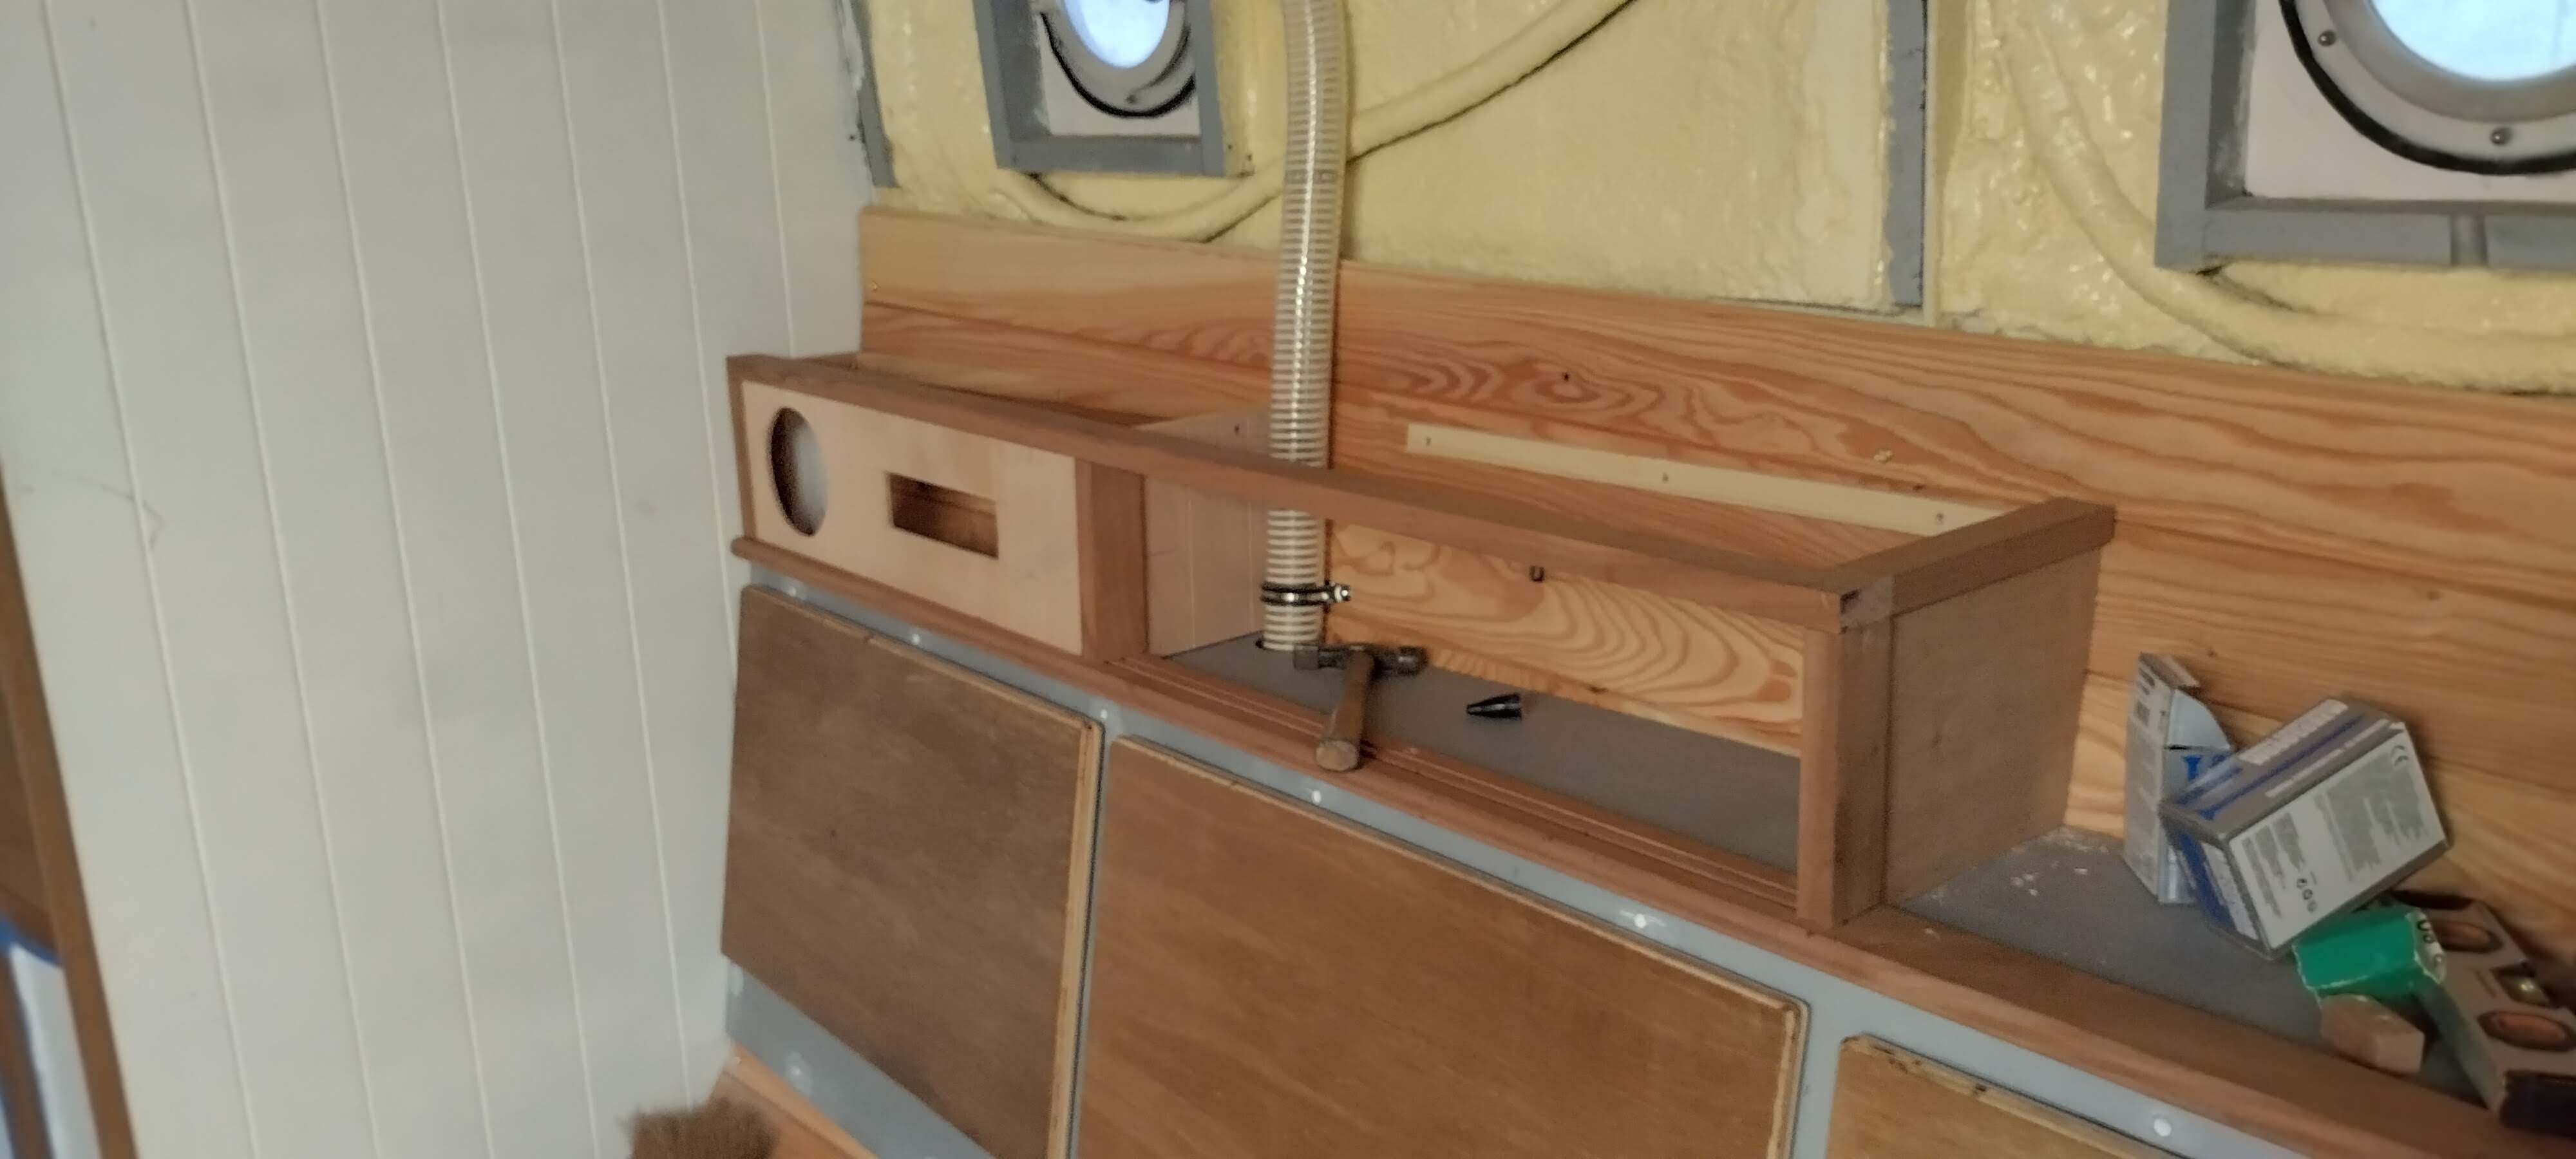
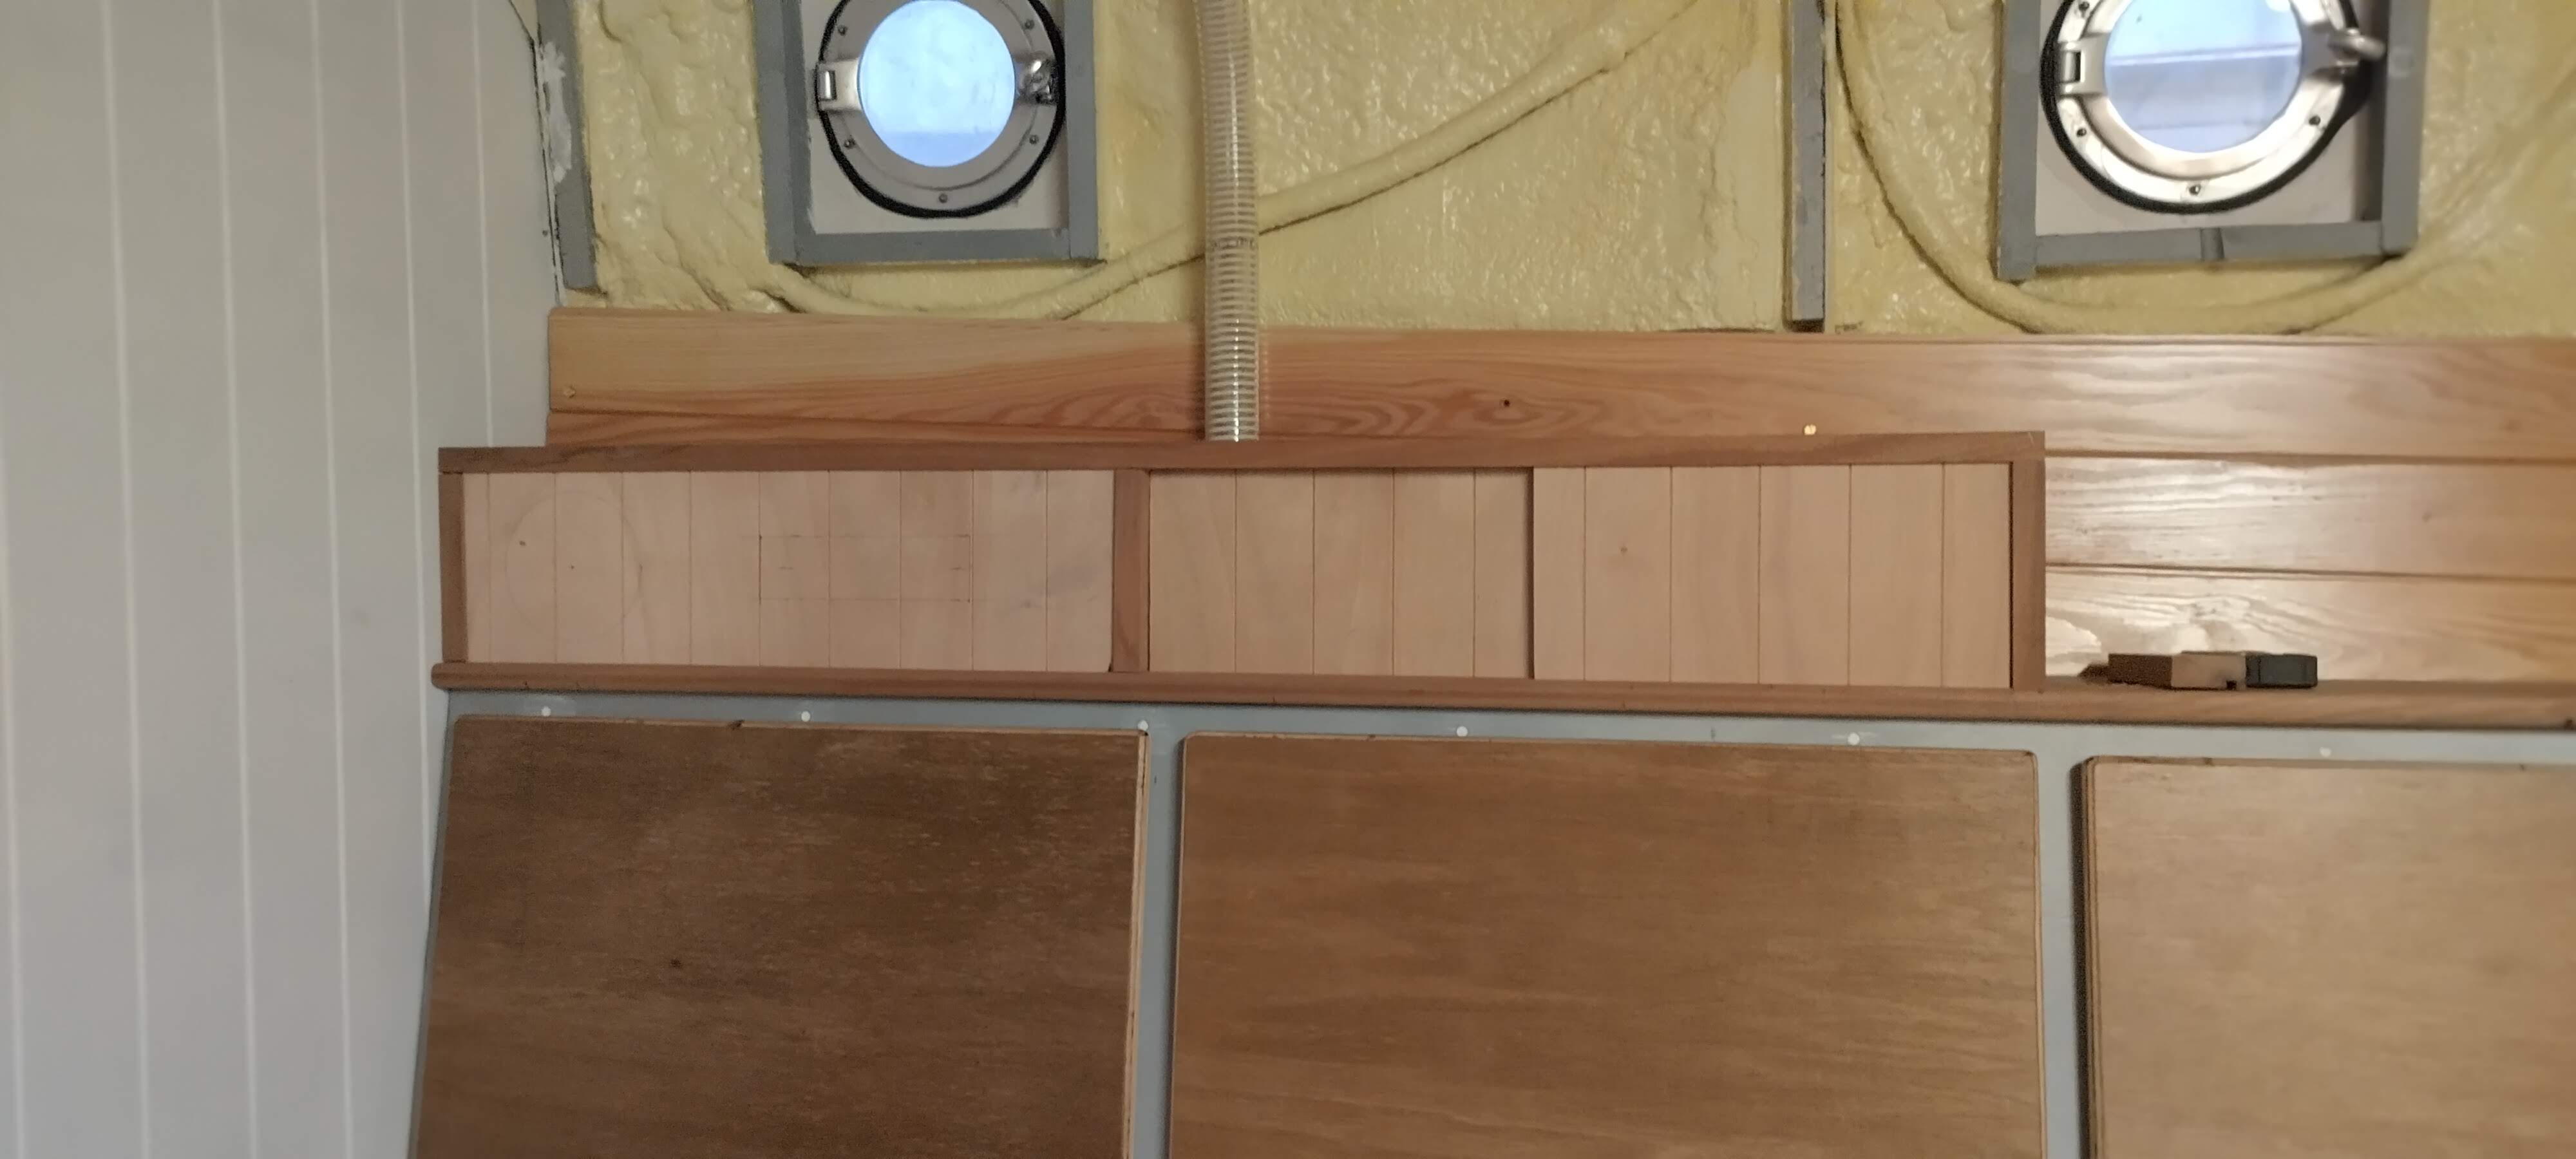
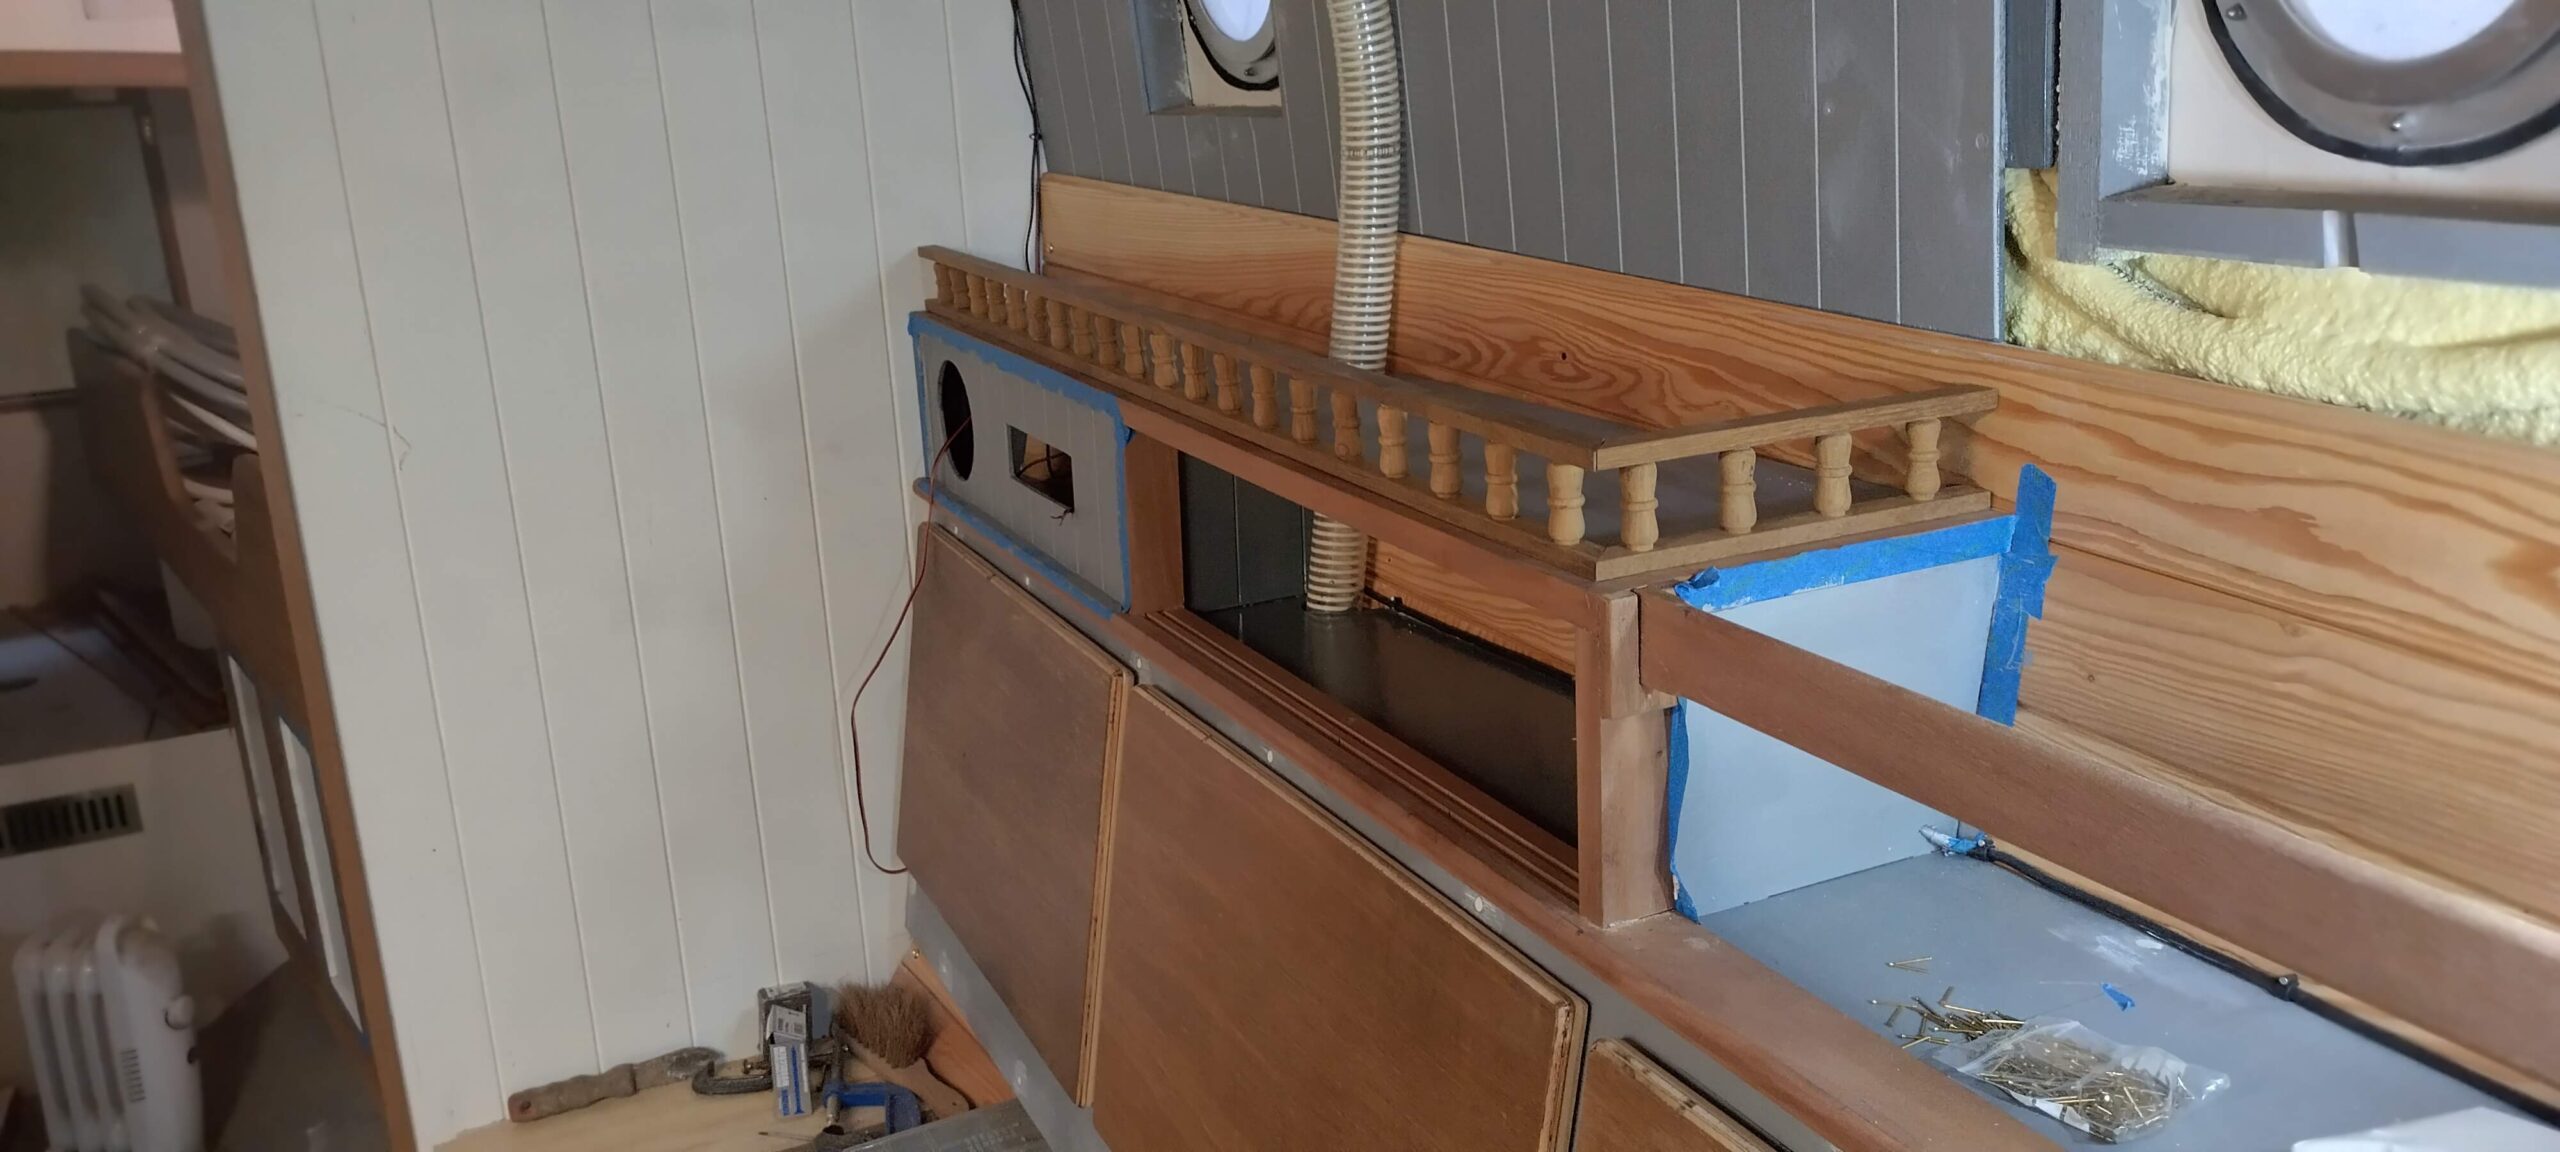
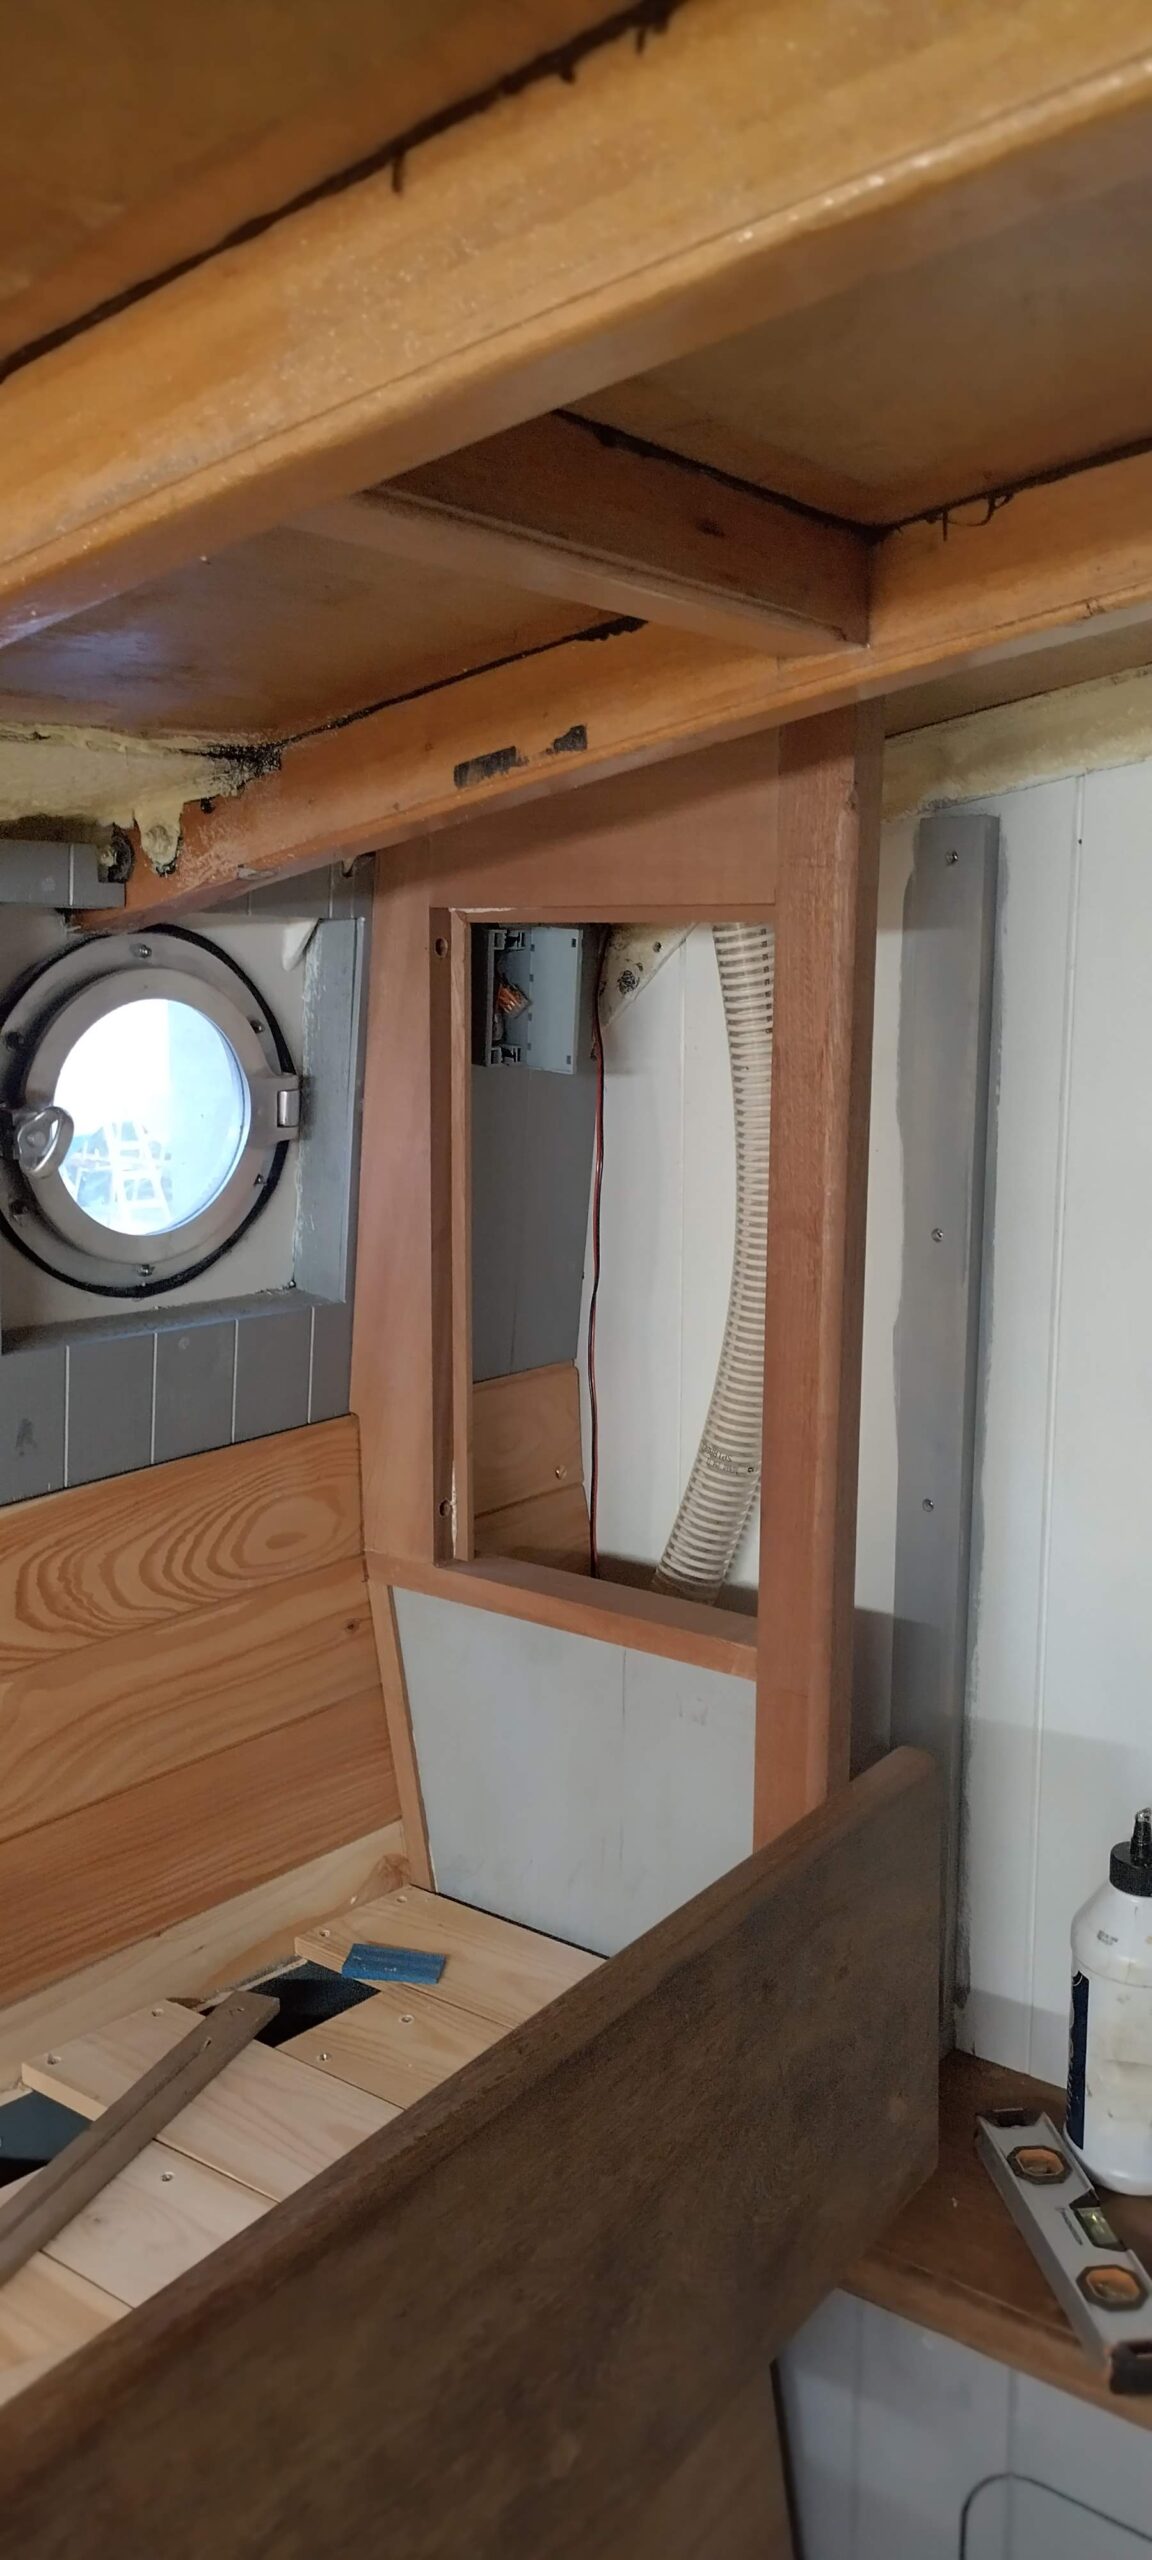
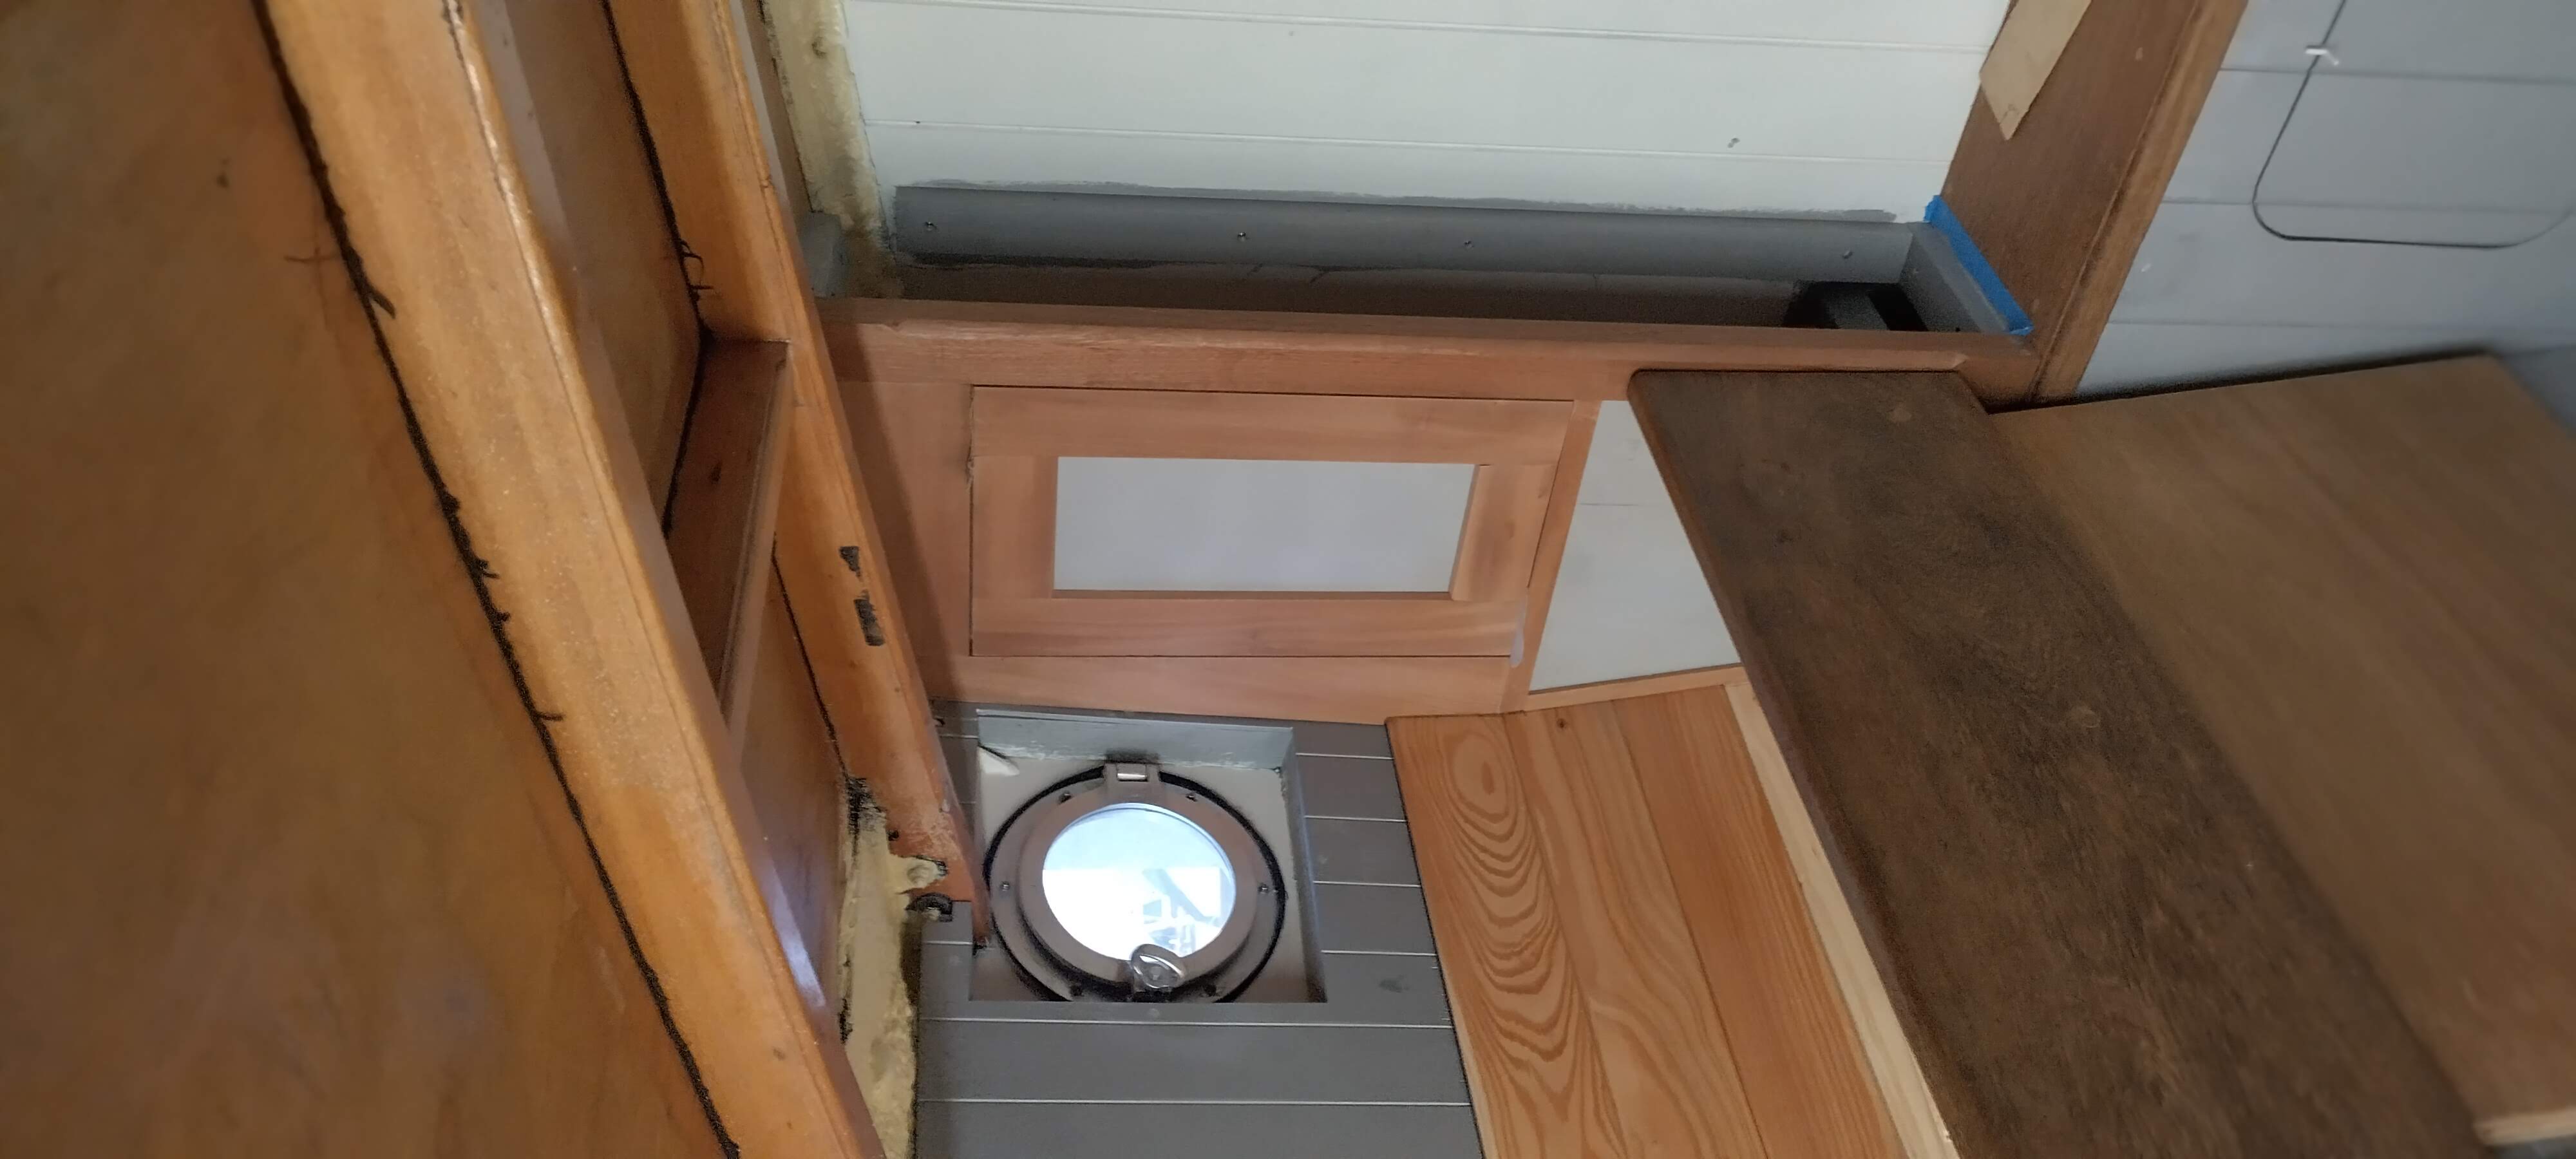
The port side bunk-end locker was also not too tricky once I had come up with a design and method of construction, and quite satisfying when it went together. I made up a front frame from hardwood pieces, which was shaped to fit the cabin side (the forward section of which I had lined with the above-mentioned 6mm “T&G” ply in readiness) and the deckhead, with a 45 x 45mm square corner pillar on its inboard edge, with the remaining openings panelled with ply. The inboard panel was 12mm as it would be required to take the weight of the bookshelves and glass rack. The sideboard top had already been fitted, made of another piece of lab worktop. Meanwhile I built up a door for the locker in the now-established way, using my special router bits to shape the rails and stiles.
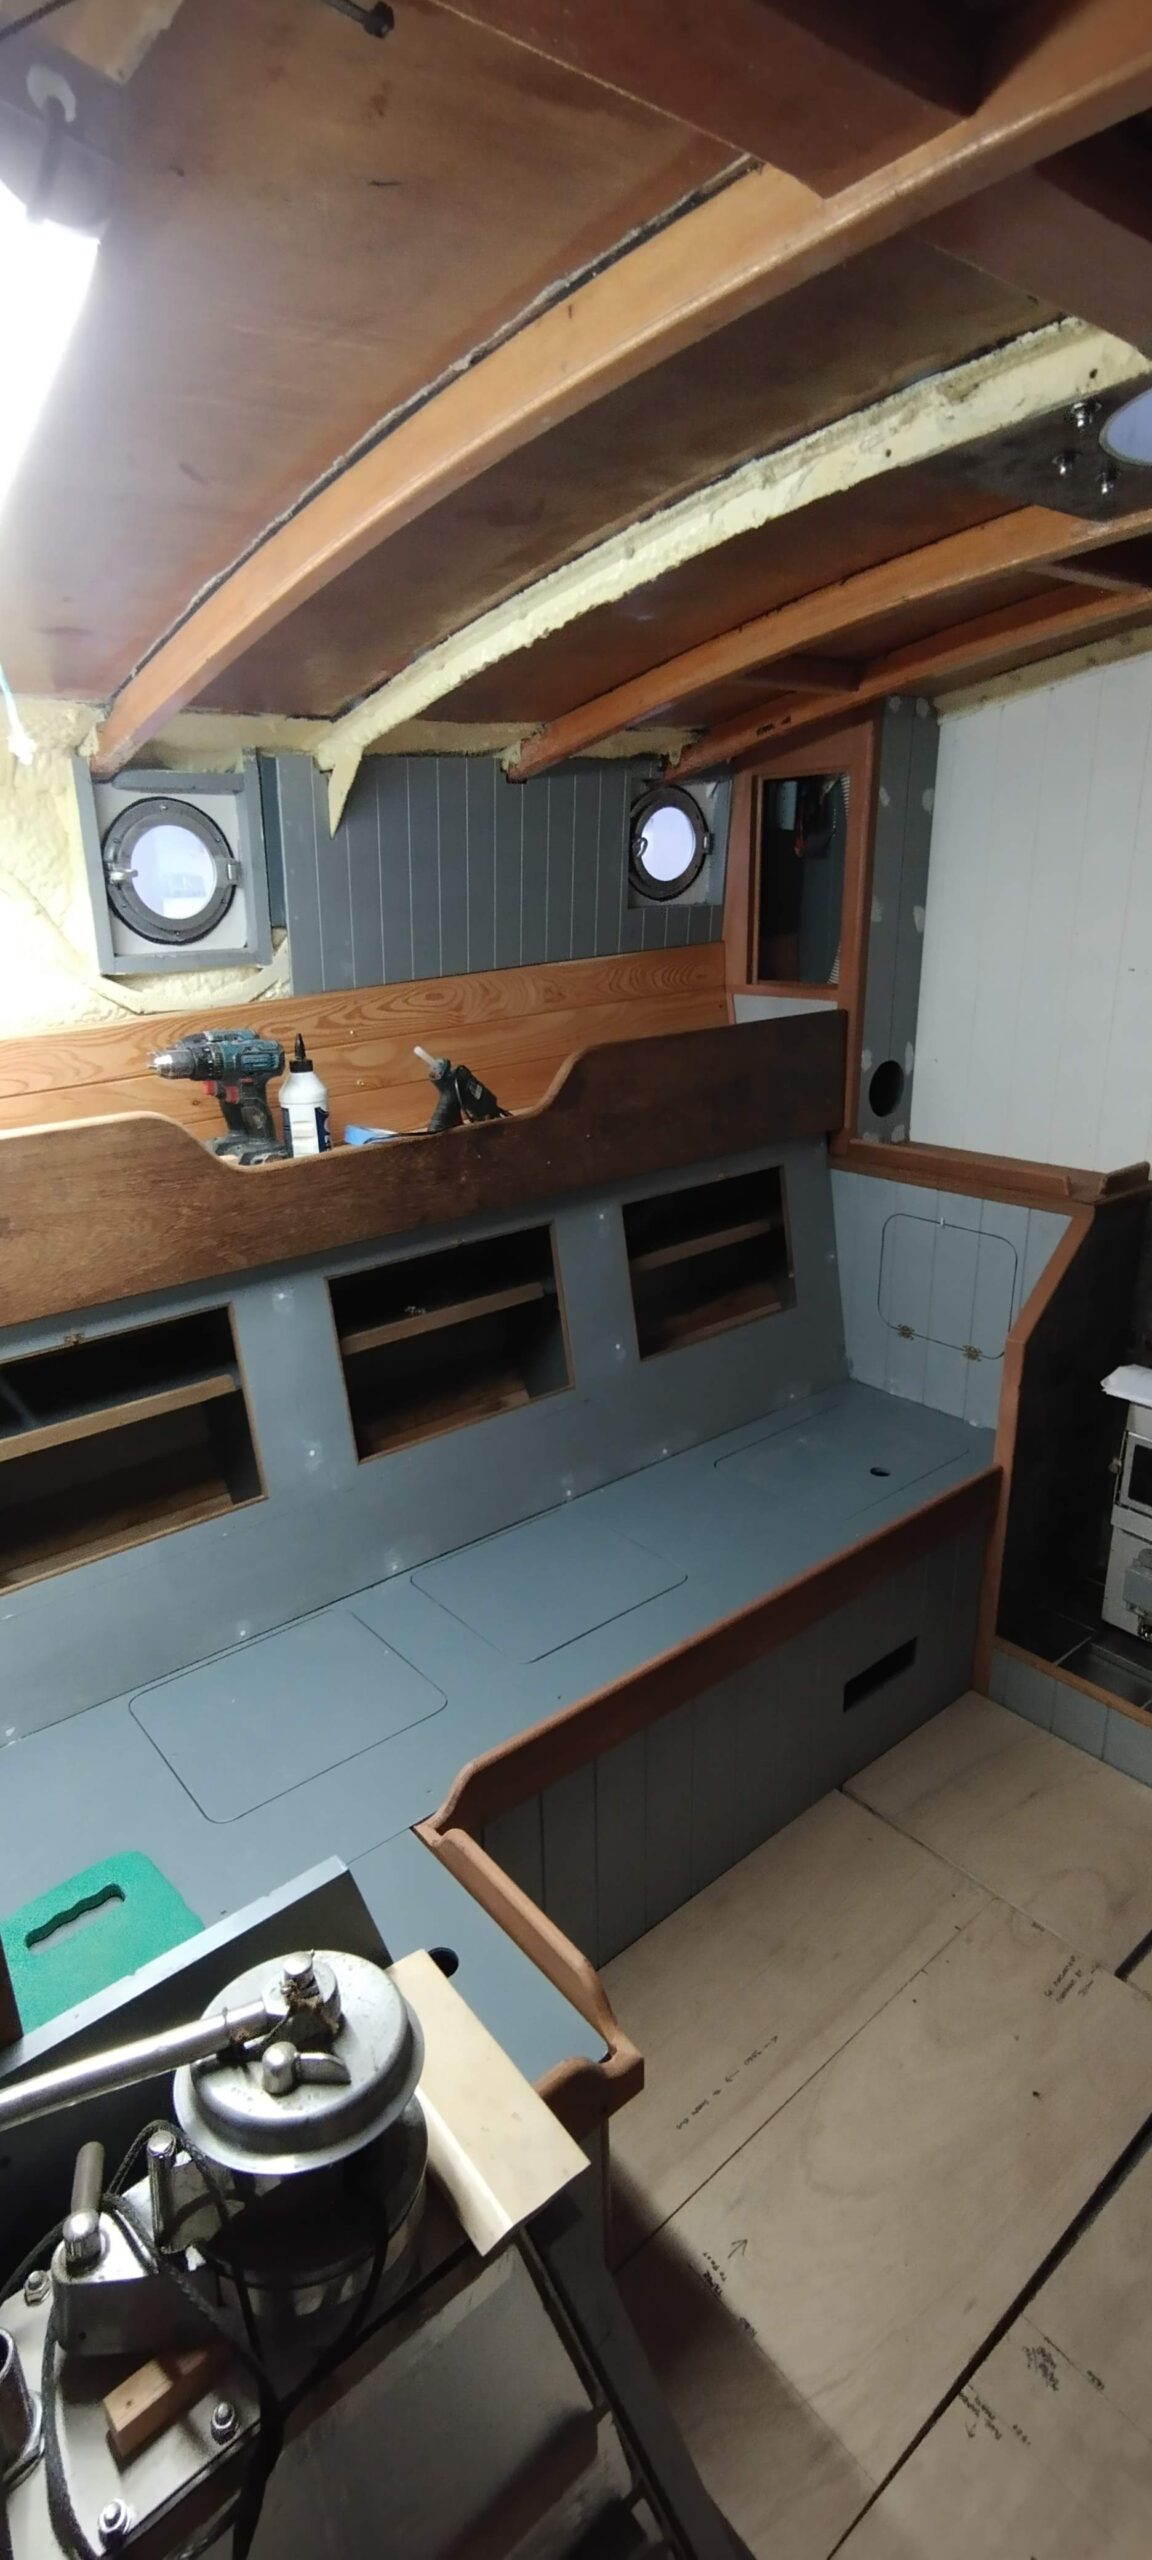
The last few days of my leave were occupied with the laborious task of trimming and fiddling – hiding all unsightly edges of plywood with hardwood trim: around the fireplace, seat back locker edges, locker shelves (fiddles) and other bits and bobs. I also fitted the fiddles to the settee edges (to hold the cushions in place) – these were fashioned from 80mm wide boards of 18mm red hardwood, with the upper edges nicely rounded for comfort. Finally this was all masked up so I could get a coat of white undercoat on all the flat surfaces before heading back to sea again. What I have ended up with is a saloon which is now al,ost recognisable as such. Just add some cushions and it will look quite homely!
Next time: I hope to do some more work on the masts while the shed is empty, cutting and then splining a cable conduit channel in the mainmast and adjusting the lower end so it fits my partners and mast step, measuring up for the masthead fittings and painting both masts up to their final finish coat.