Take a seat, Sir? Don’t mind if I do!
After yet another inexcusably long break, here I am again with what might turn out to be quite a substantial update! Firstly, those of you who follow me on Facebook may be aware that I have changed jobs yet again – that nice niche I have been trying to find since leaving Nellie in October 2019 has as yet proved elusive, and the Serco job in Kyle, although meeting quite a few of my needs, fell short on quality of life and boatbuilding time. So, back in October I applied for a job I saw advertised with Hebridean Island Cruises, owners of the (relatively) well-known Hebridean Princess (as chartered a couple of times by Queen Elizabeth after she was deprived of HMY Britannia), and more relevantly, two smaller vessels, Lord of the Glens and Lord of the Highlands. To cut a long story short, I am sitting at the desk in my cabin on board the Lord of the Glens (LOTG) as I write, having just started my first stint on board, currently understudying the other Master during the reactivation period prior to the start of the 2026 cruising season. Cruises start in earnest in early April, and I will be on a 4-week on, 4-week off rota during the season, with potential for a lot more time off in the winter, all for roughly the same money! This of course is relevant to the boatbuilding project in that I will have a lot more time to devote to getting Serchthrift finished and afloat. This has been kicked off by a nice long break between finishing with Serco at the end of January, and joining LOTG today. The last week of January I actually spent in Sweden: I had decided to spend a bit of money on attending the IMO Polar Code courses, just in case another opportunity comes up to work in Polar areas. I also took a week (or just over) visiting family and friends down south – something I hope to be able to do a bit more often with my new routine.
Enough of the preamble, and on with the good stuff…
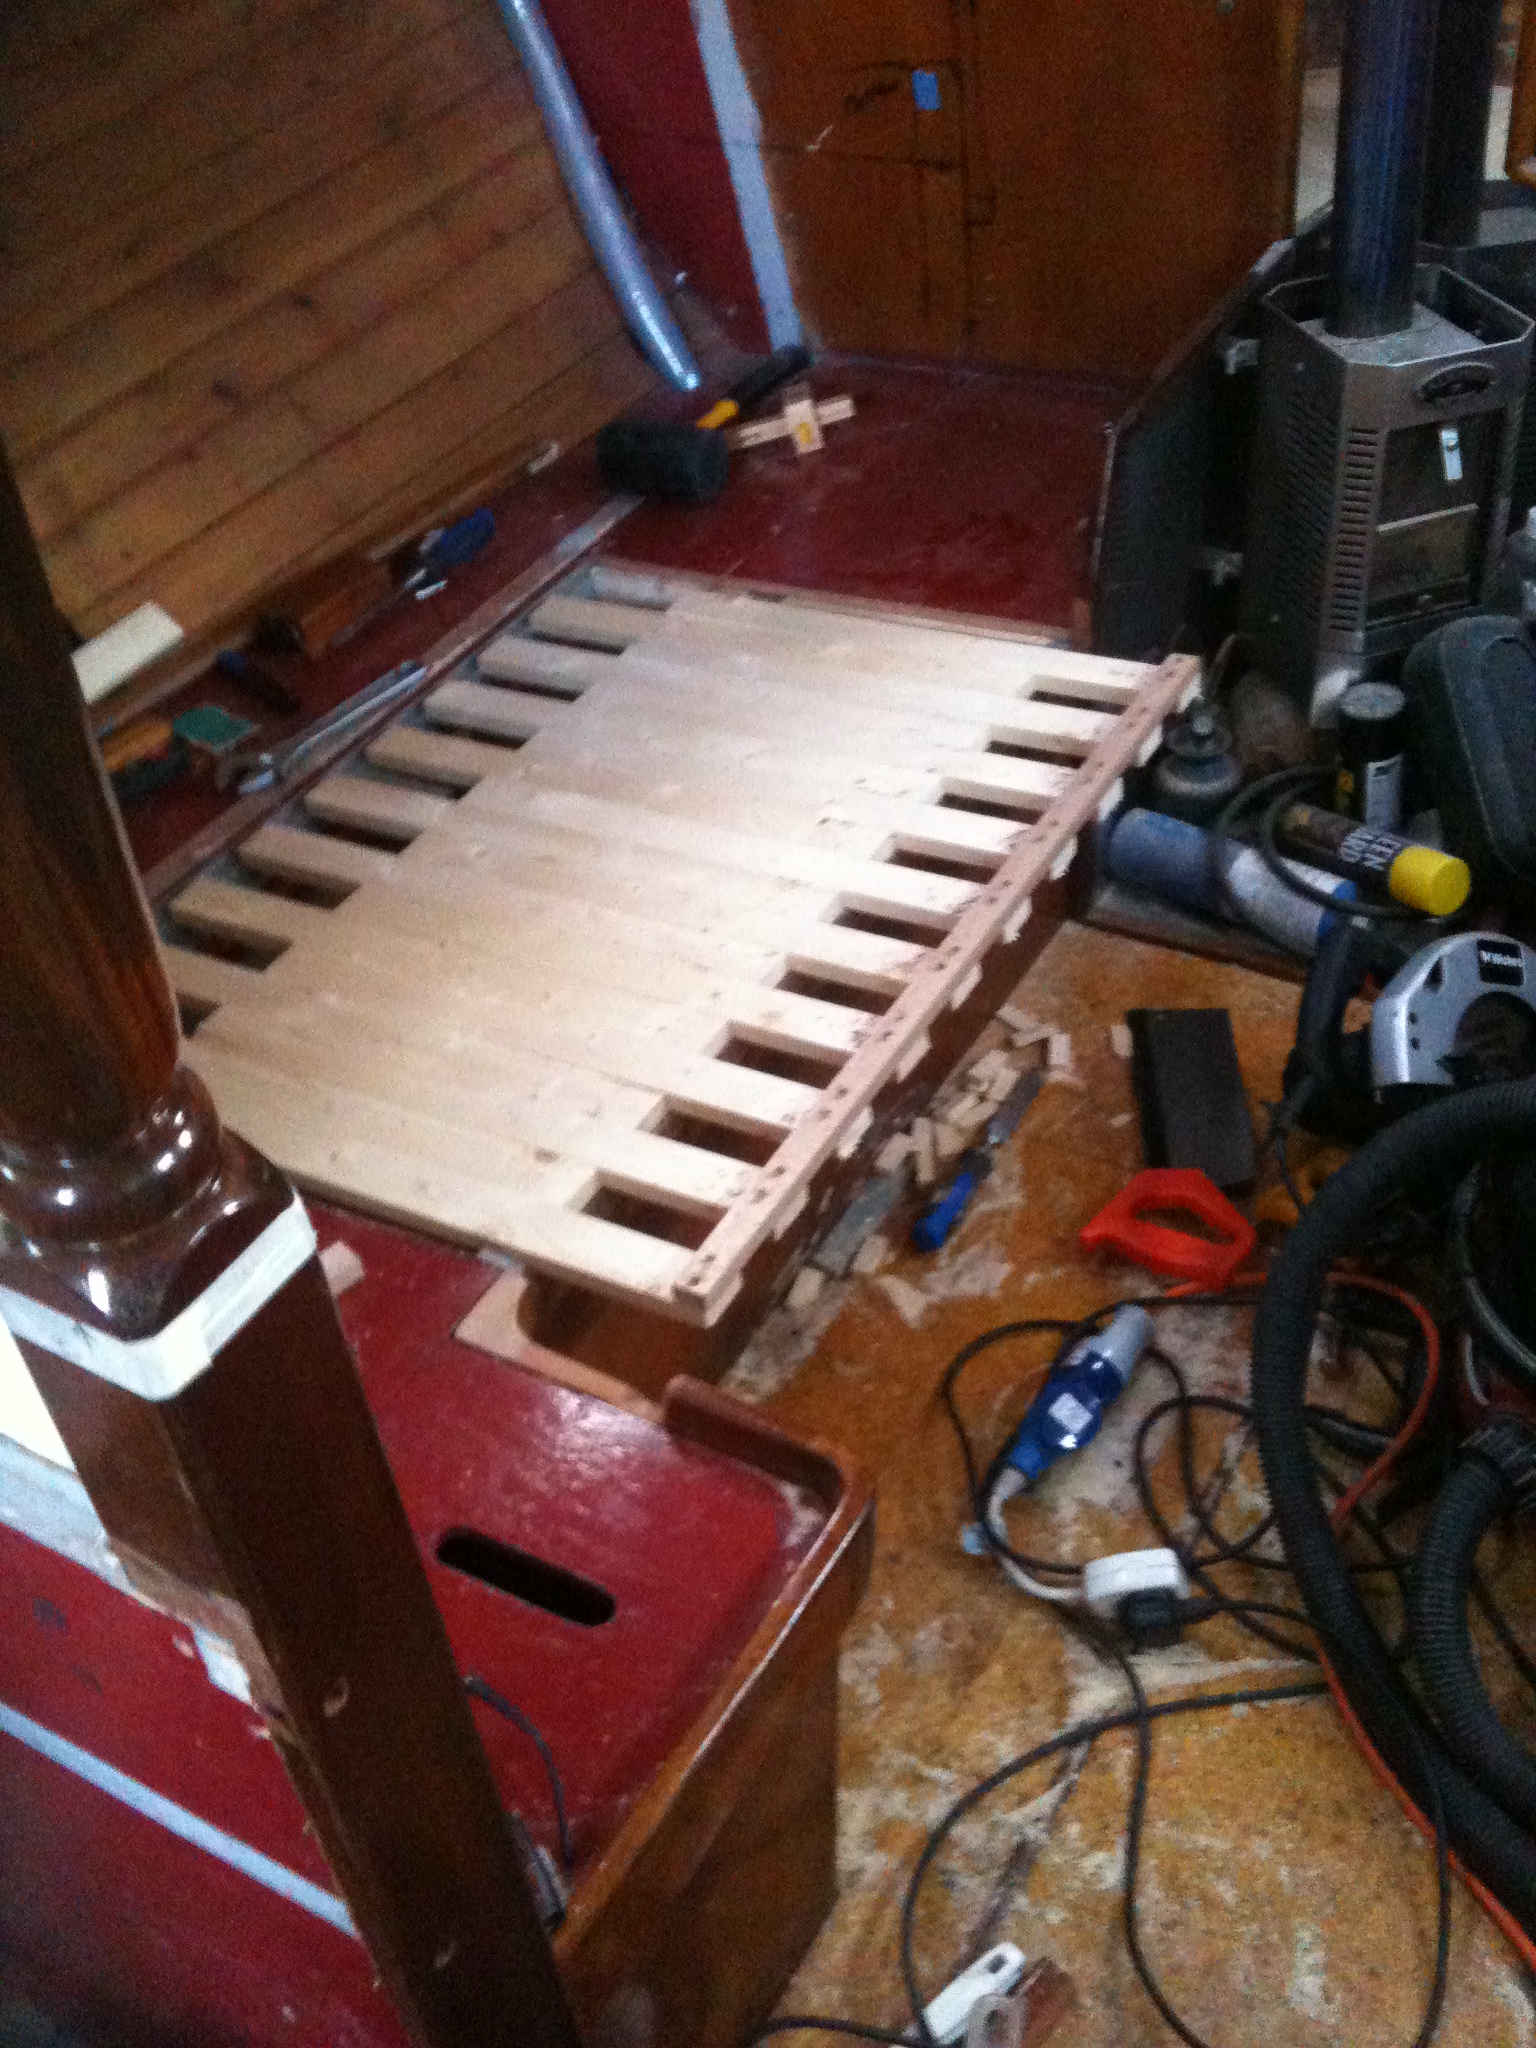
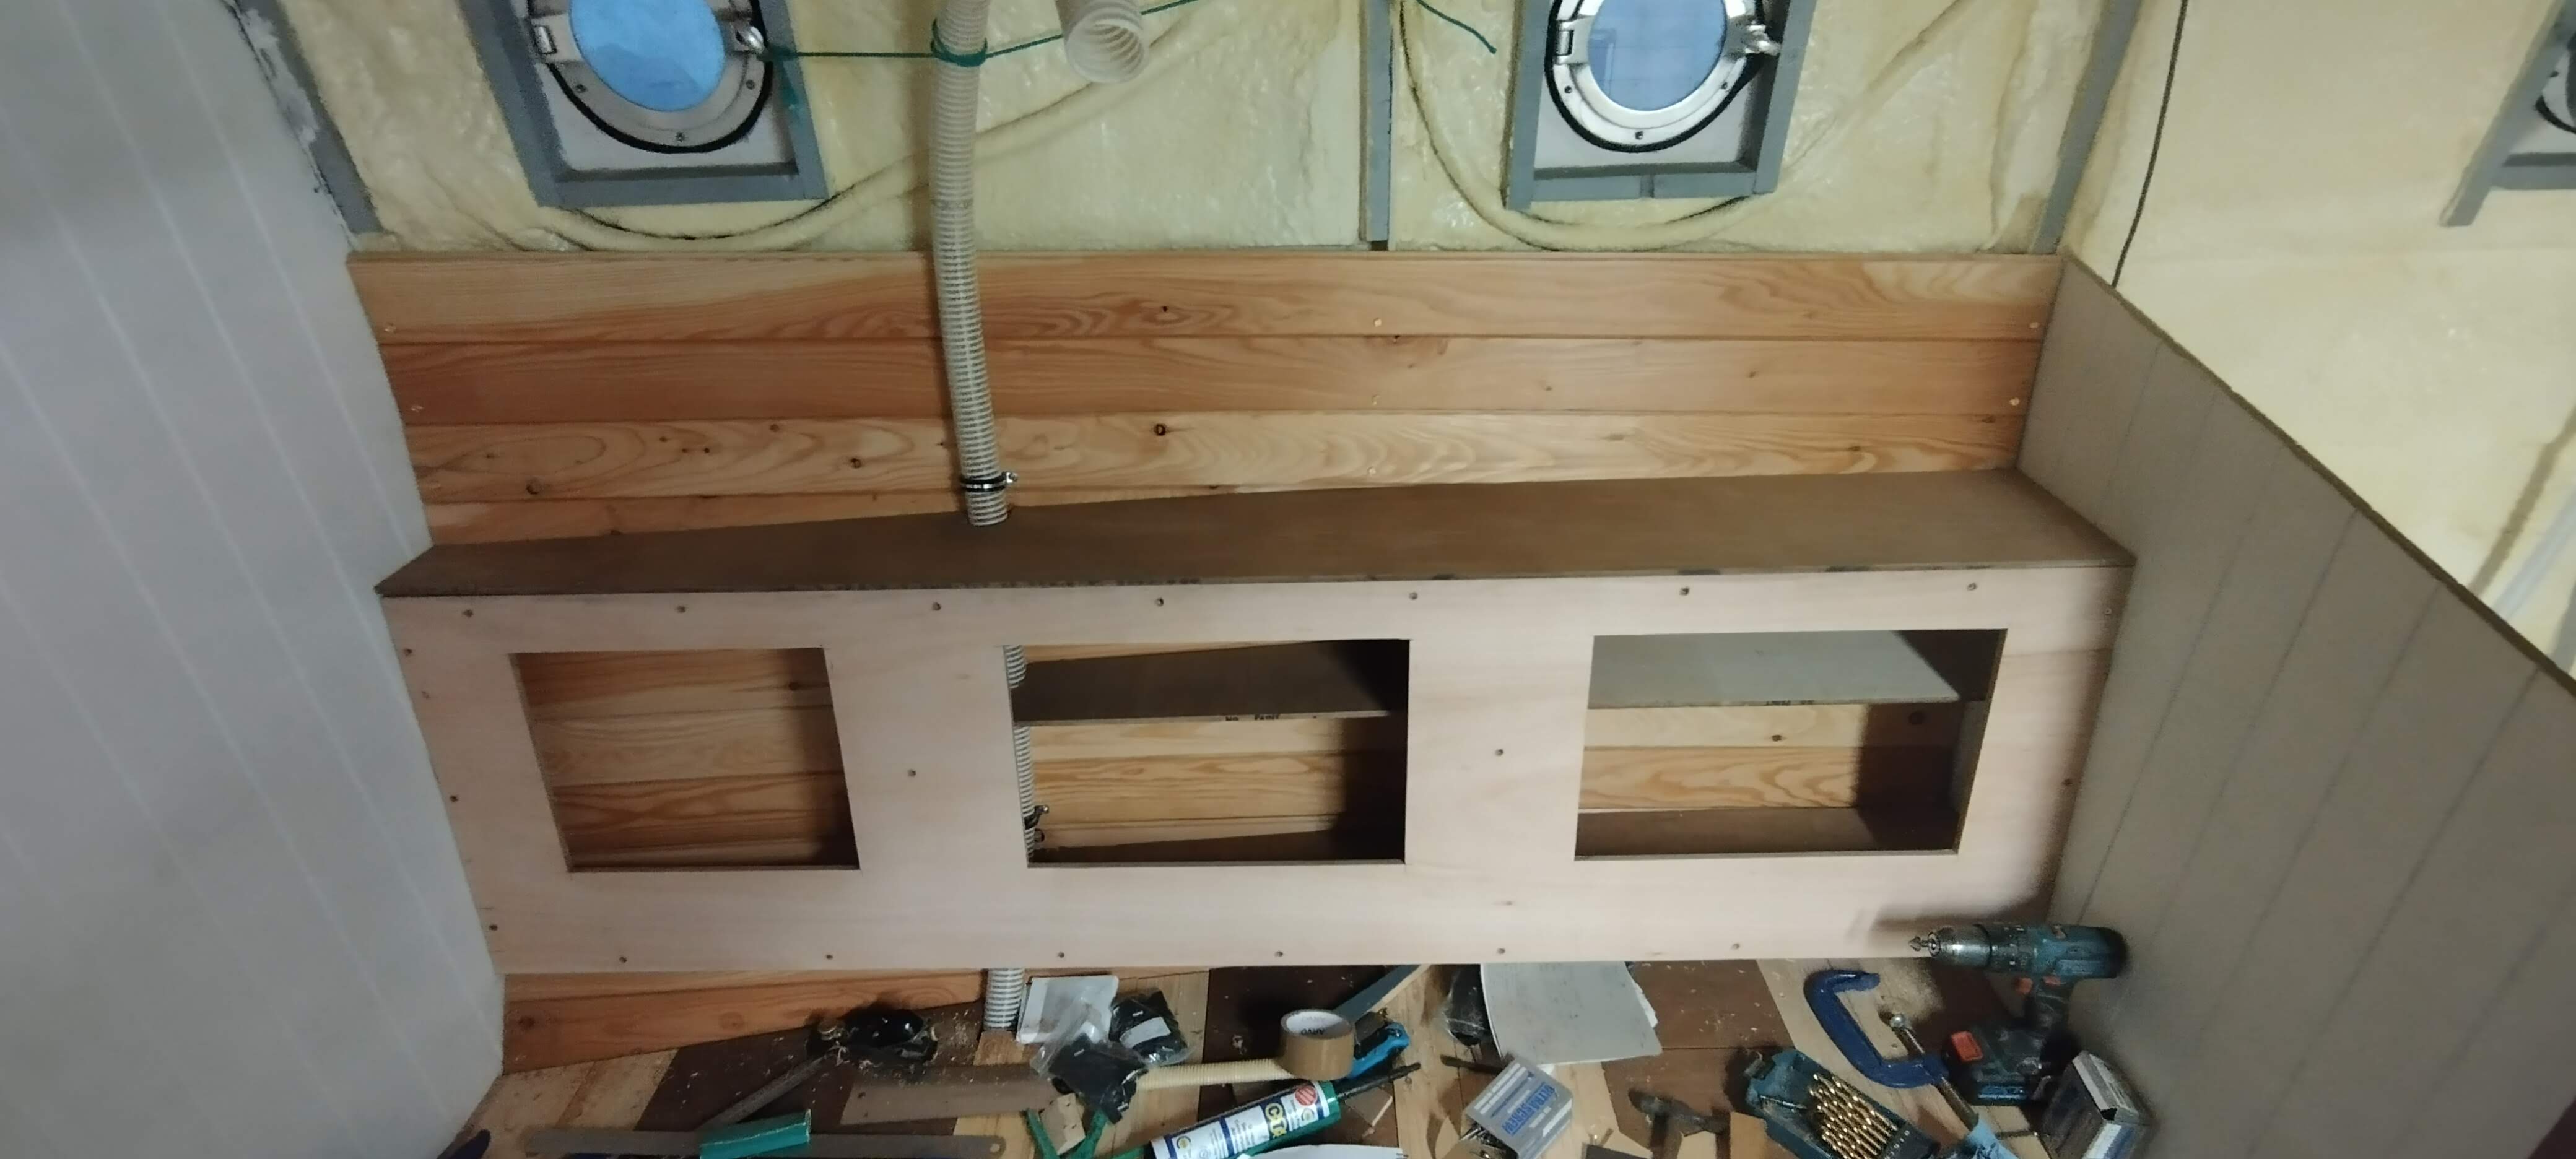
When I left you last time I had built the frames for both settees, and had fitted the front to the starboard one, with the port one almost ready to fit. With plenty of time available I now returned to hit the saloon hard and get as much done as I could. The next stage I decided to tackle was the top of the starboard settee, which will be extendable by four inches so it can be used as a bunk of a comfortable width. I did something very similar when I refitted Meander back in 2010, and it can be done fairly easily by using a system of alternating slats, as per the picture below:
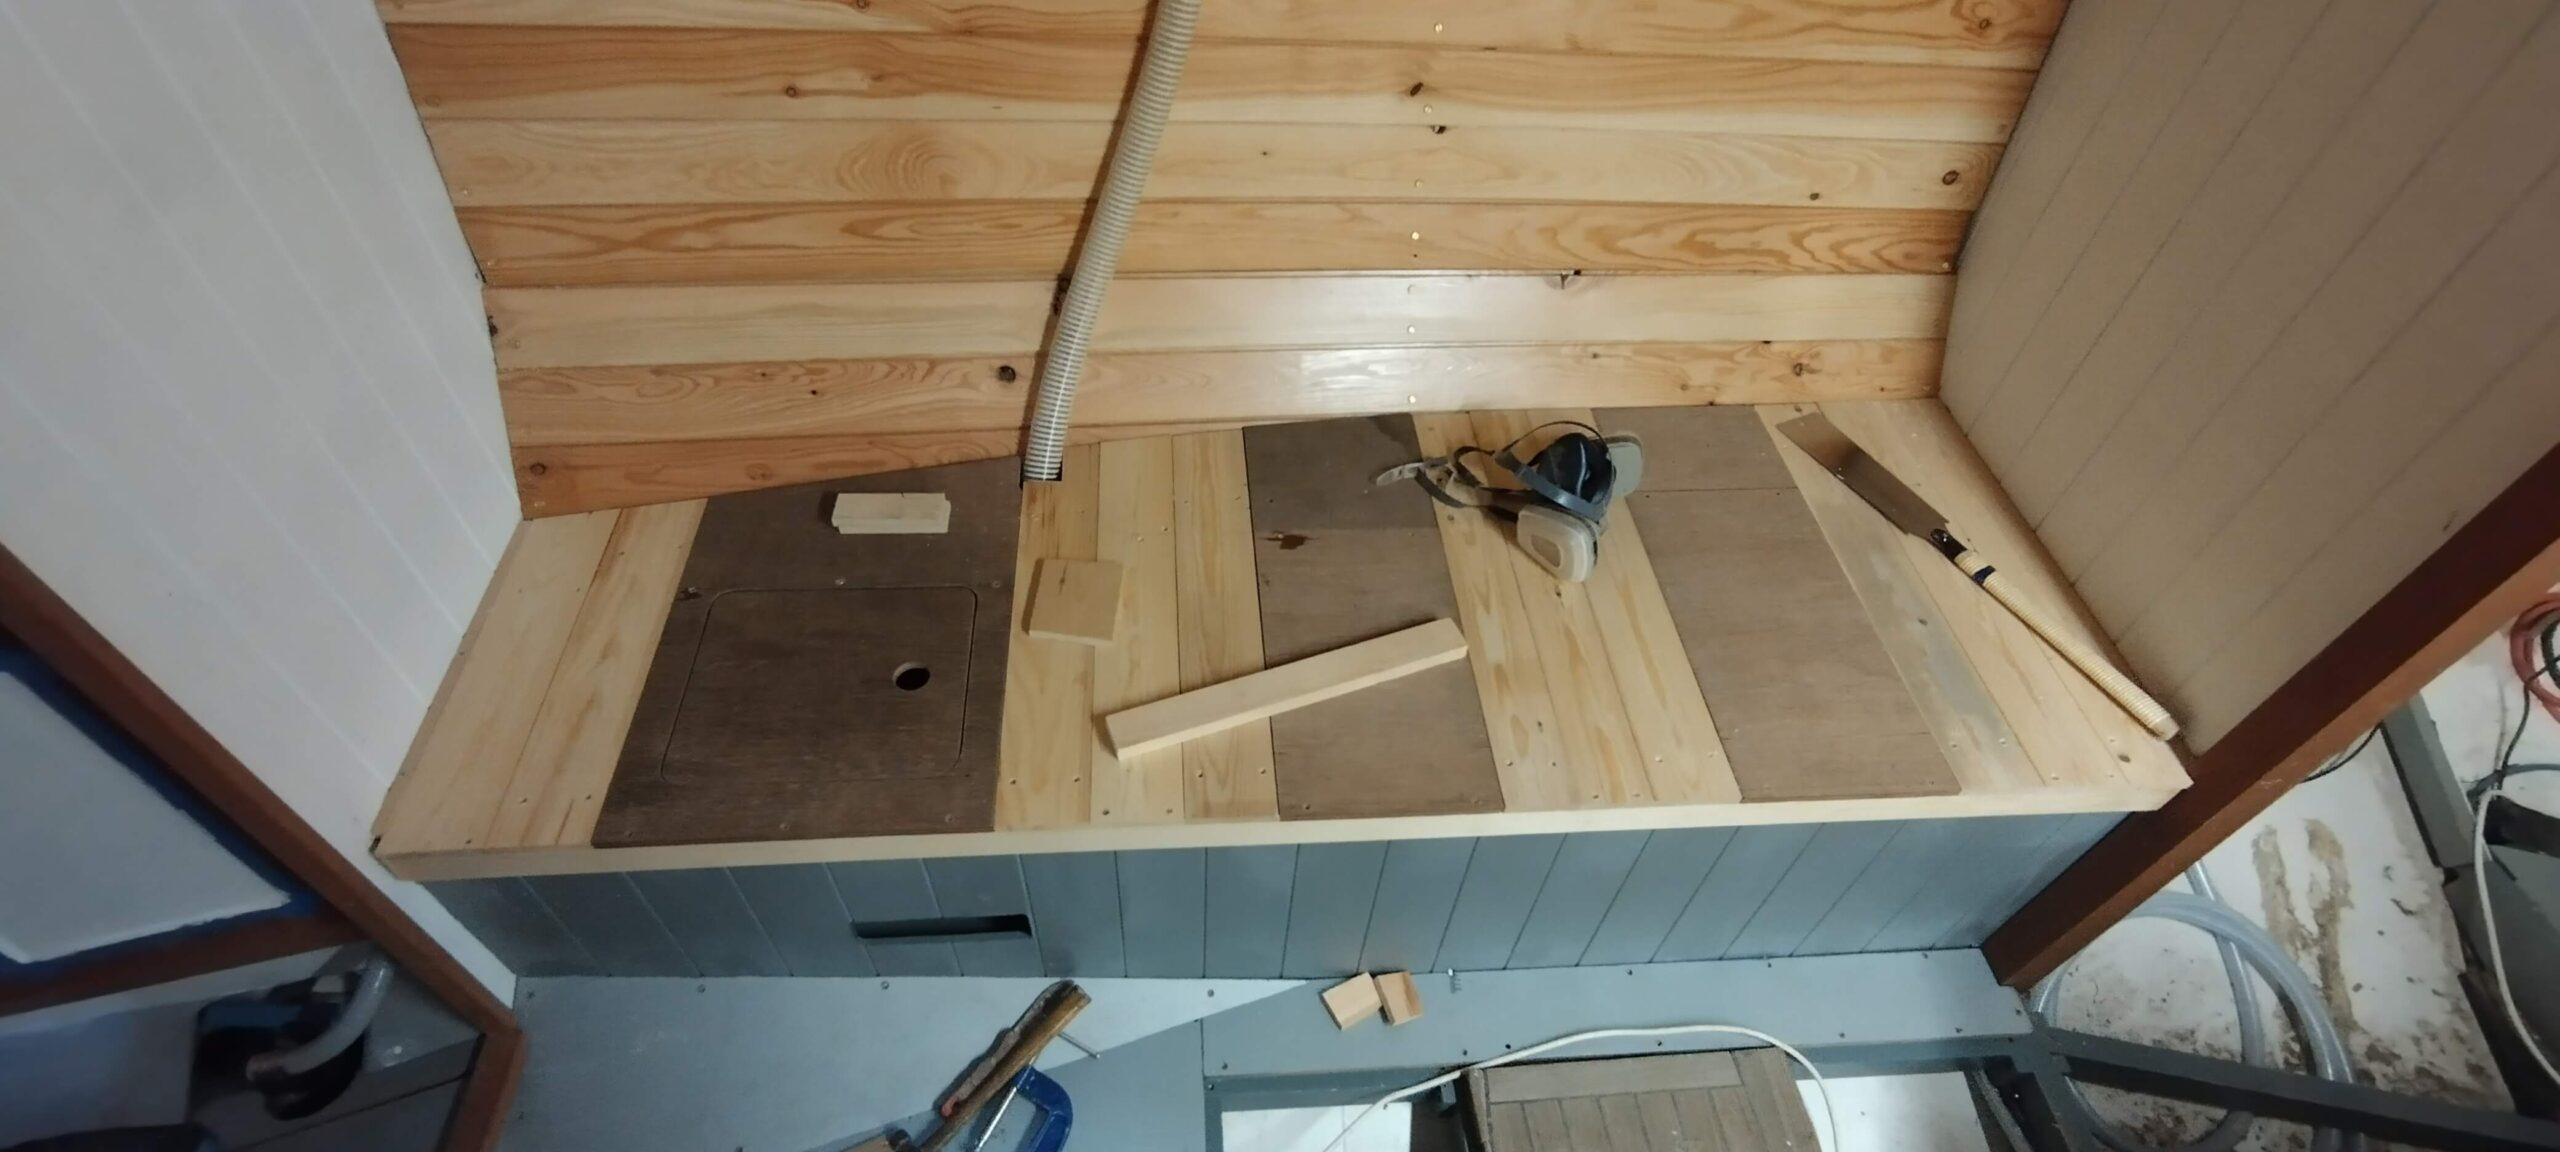
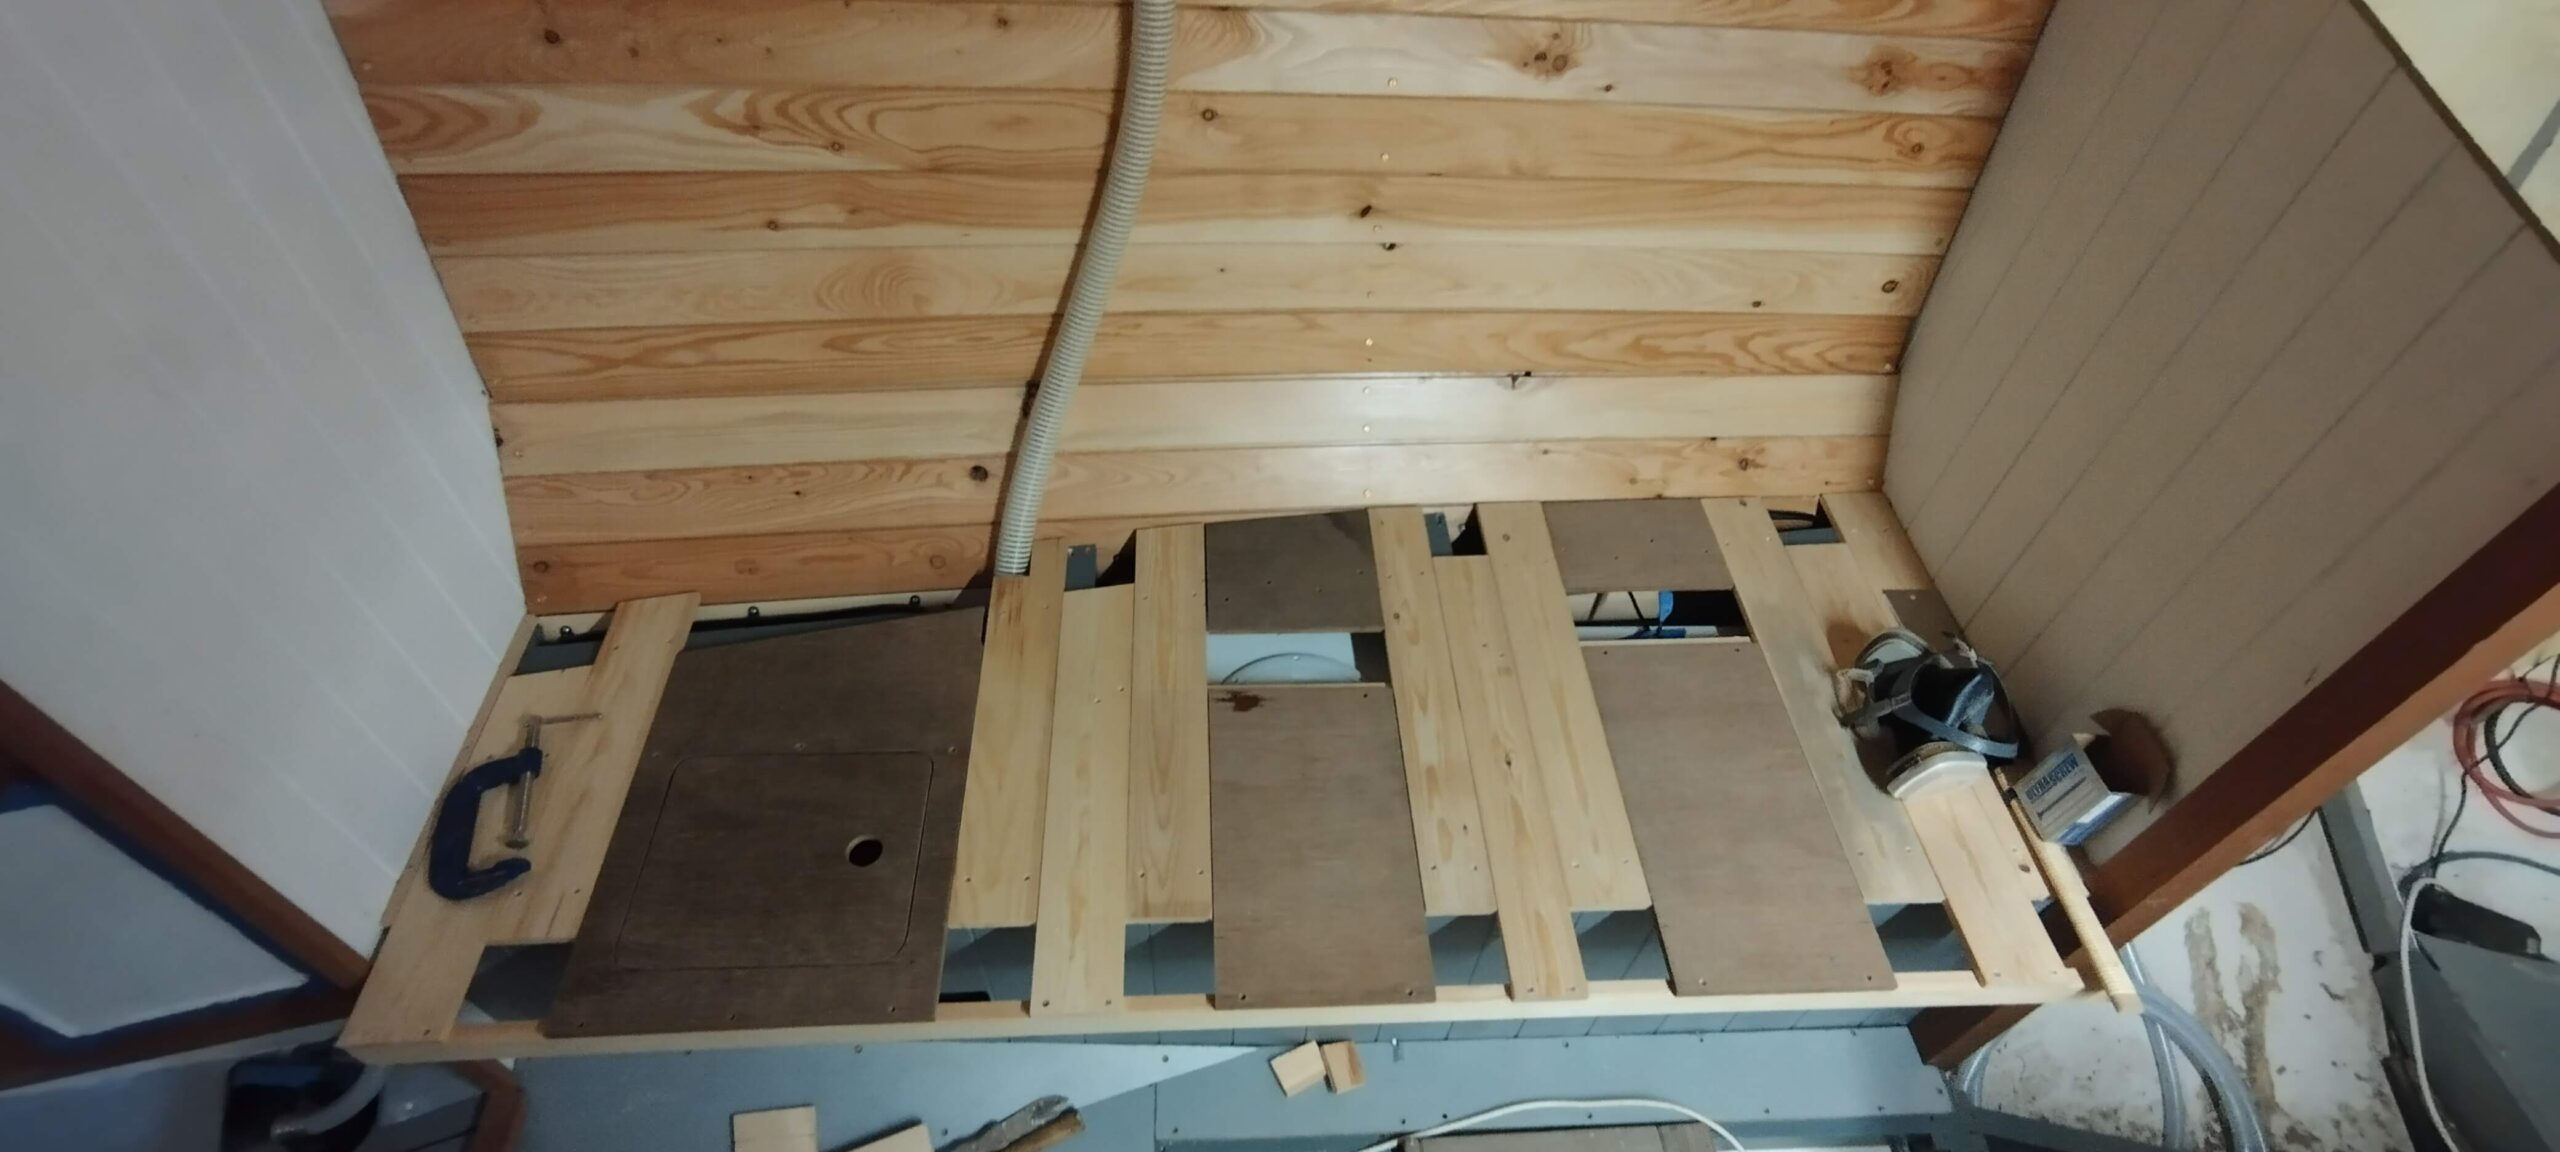
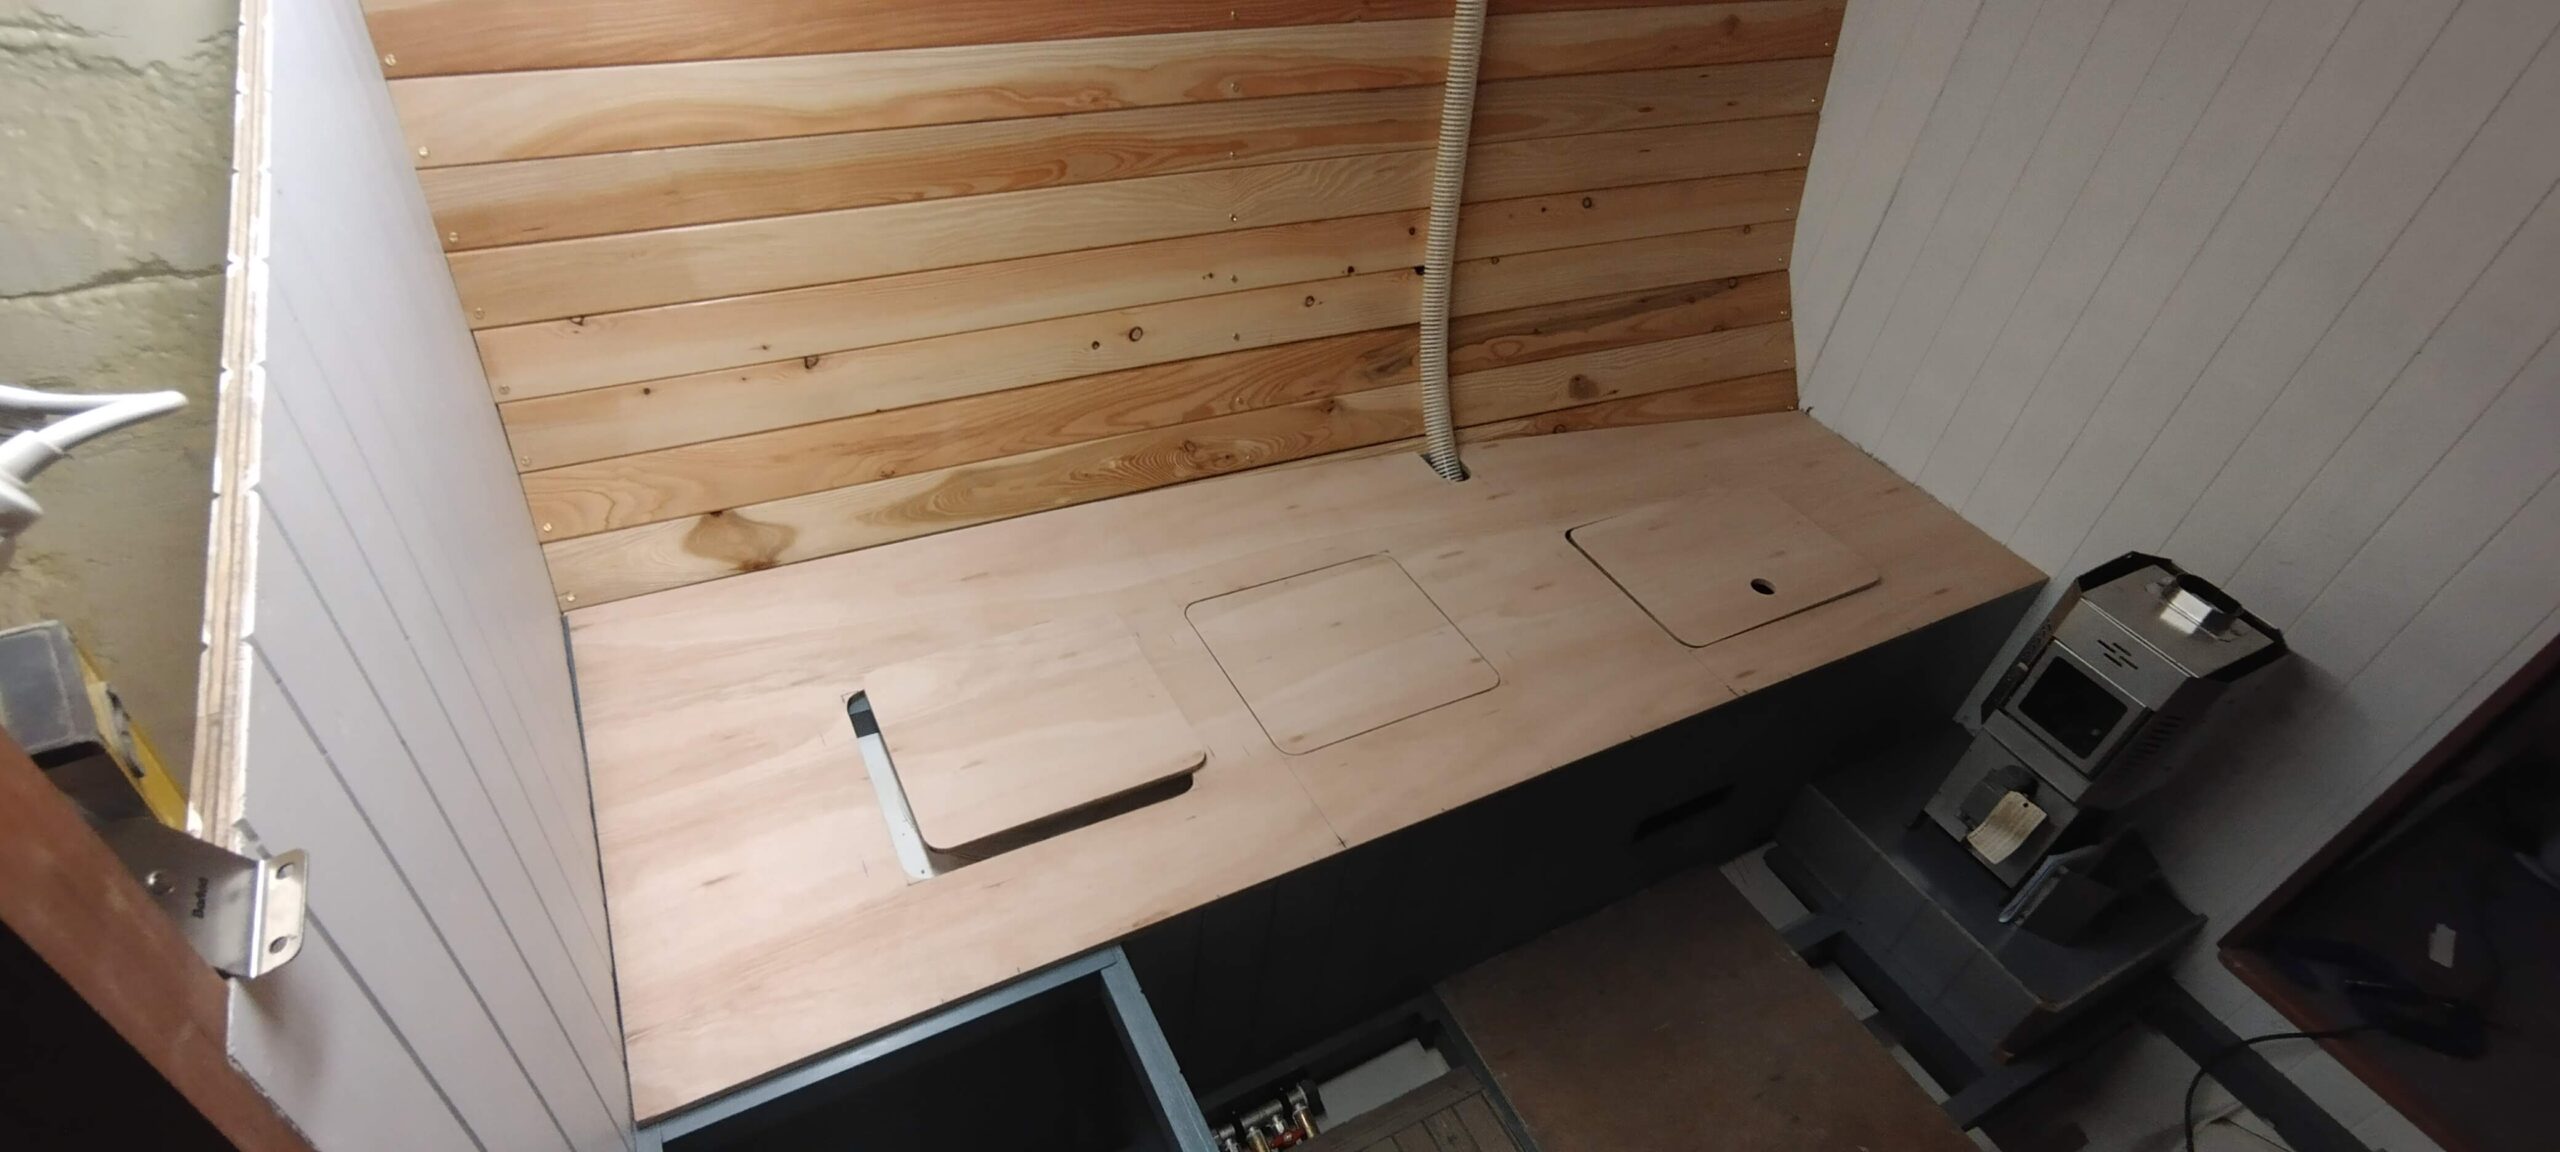
The starboard settee in Serchthrift is a little more complicated, as the water tank under the settee has two inspection hatches, which I want to be accessible for tank maintenance without having to dismantle the entire bunk top, as well as allowing top access to the locker under the forward end of the seat. After a bit of head-scratching and some back-of-fag-packet sketches, I came up with a hybrid system using slats over most of the surface, interspersed with areas of ply where access was required. These ply areas are large enough to allow access underneath by only removing one panel rather than a few slats, whilst being narrow enough not to introduce large holes into which an unwary sleeper can fall! The ply over the tank hatches is screwed down, as access to those only needs to be occasional, whilst the locker lid is a slightly larger panel with a removable lid for access.
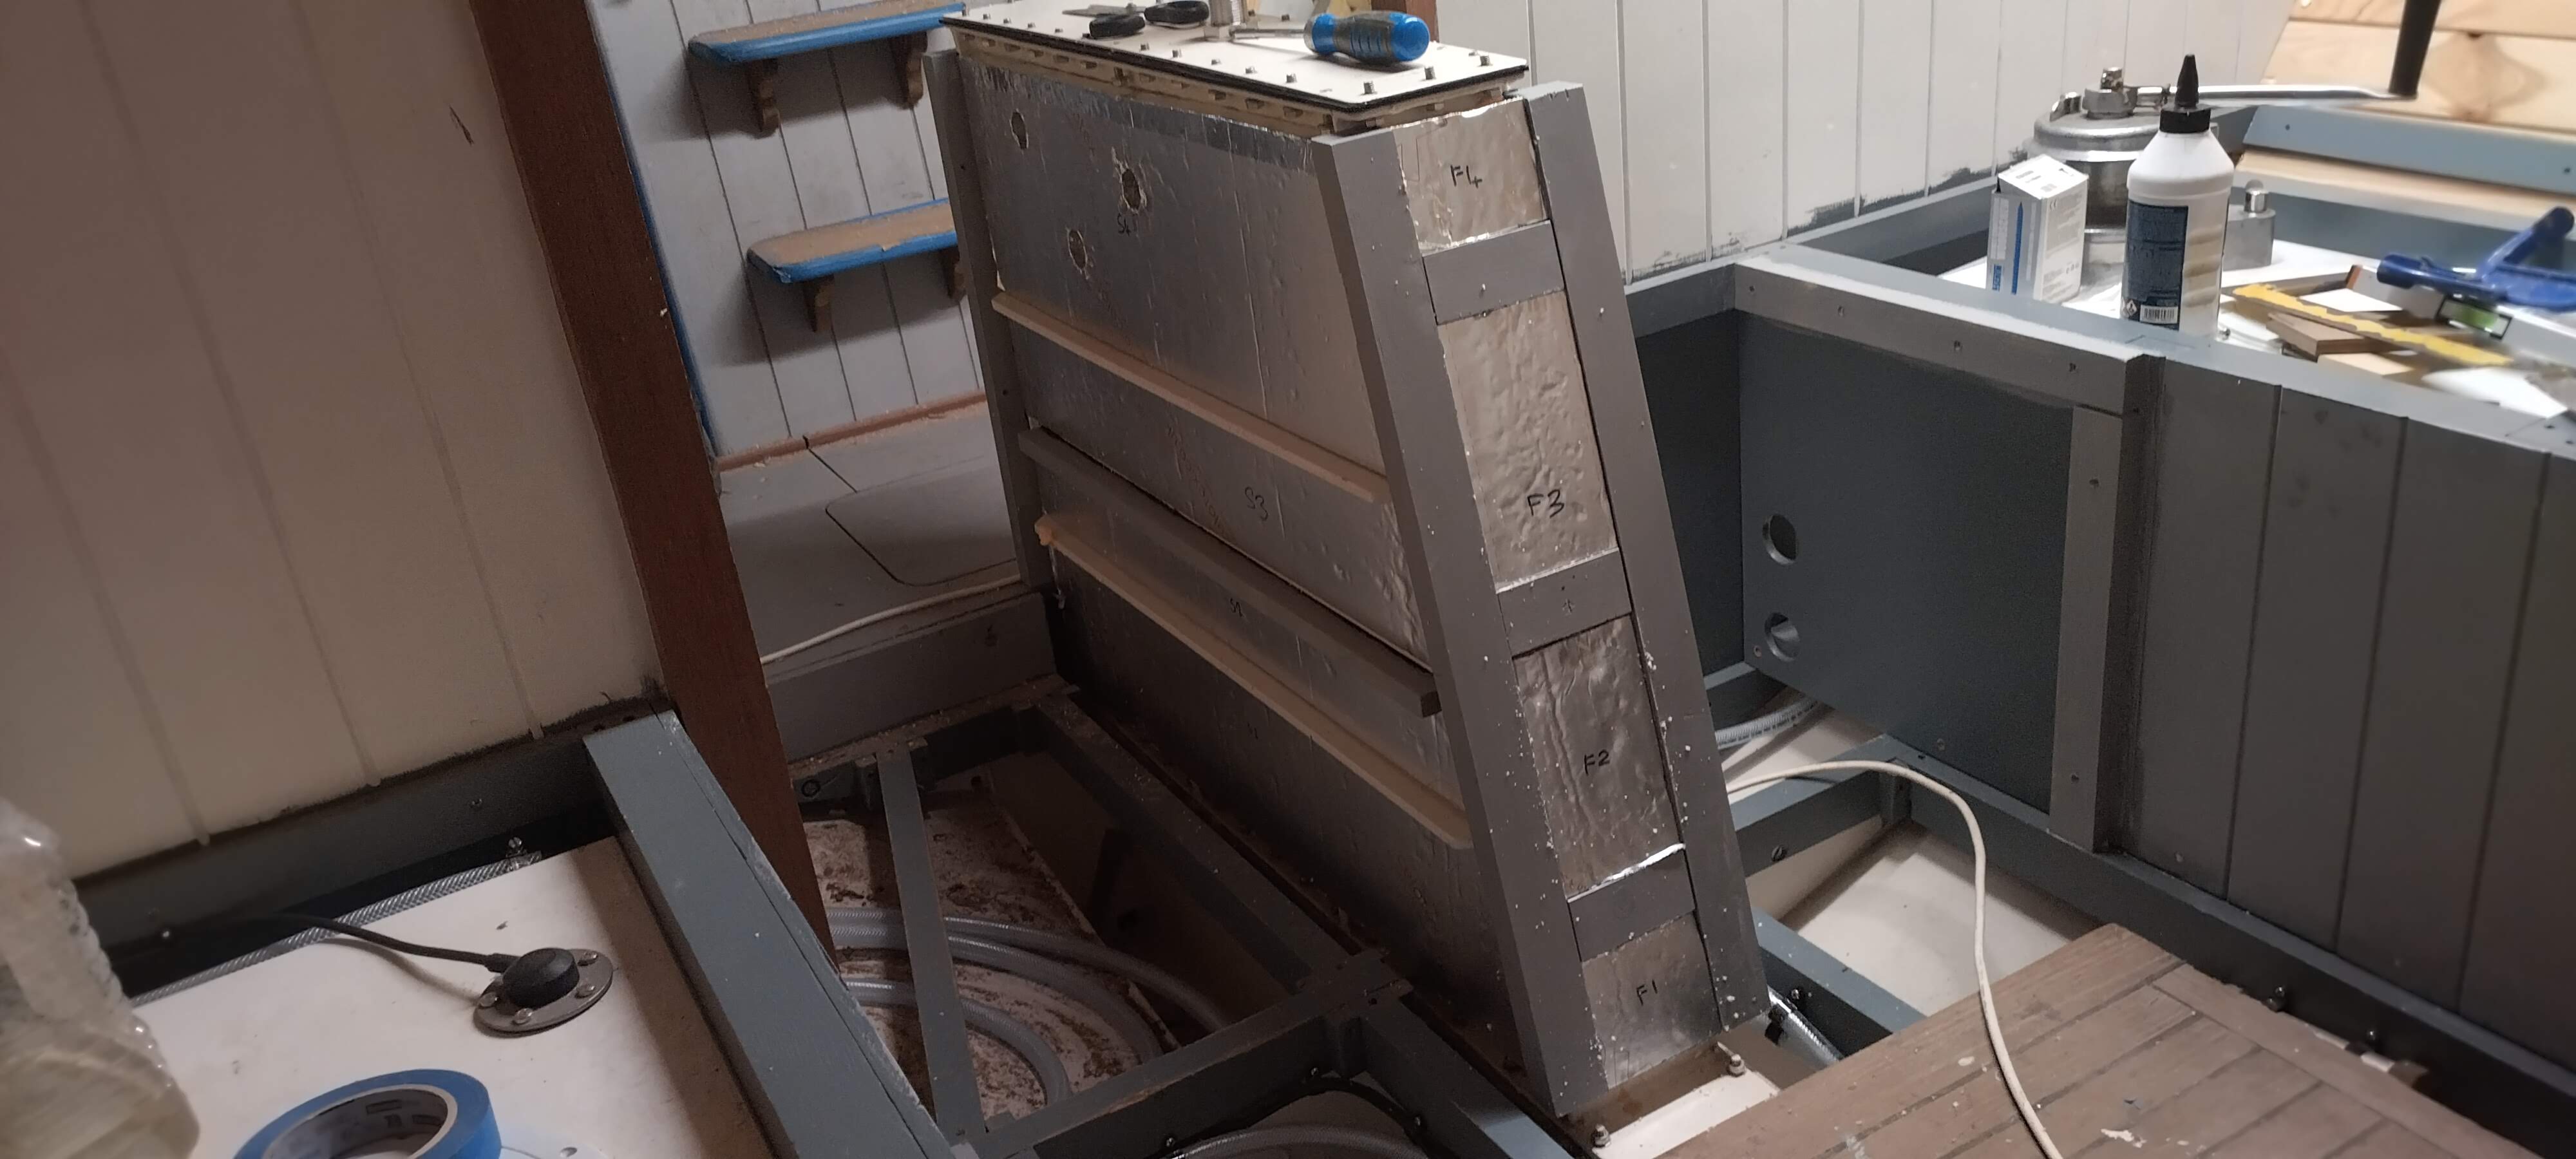
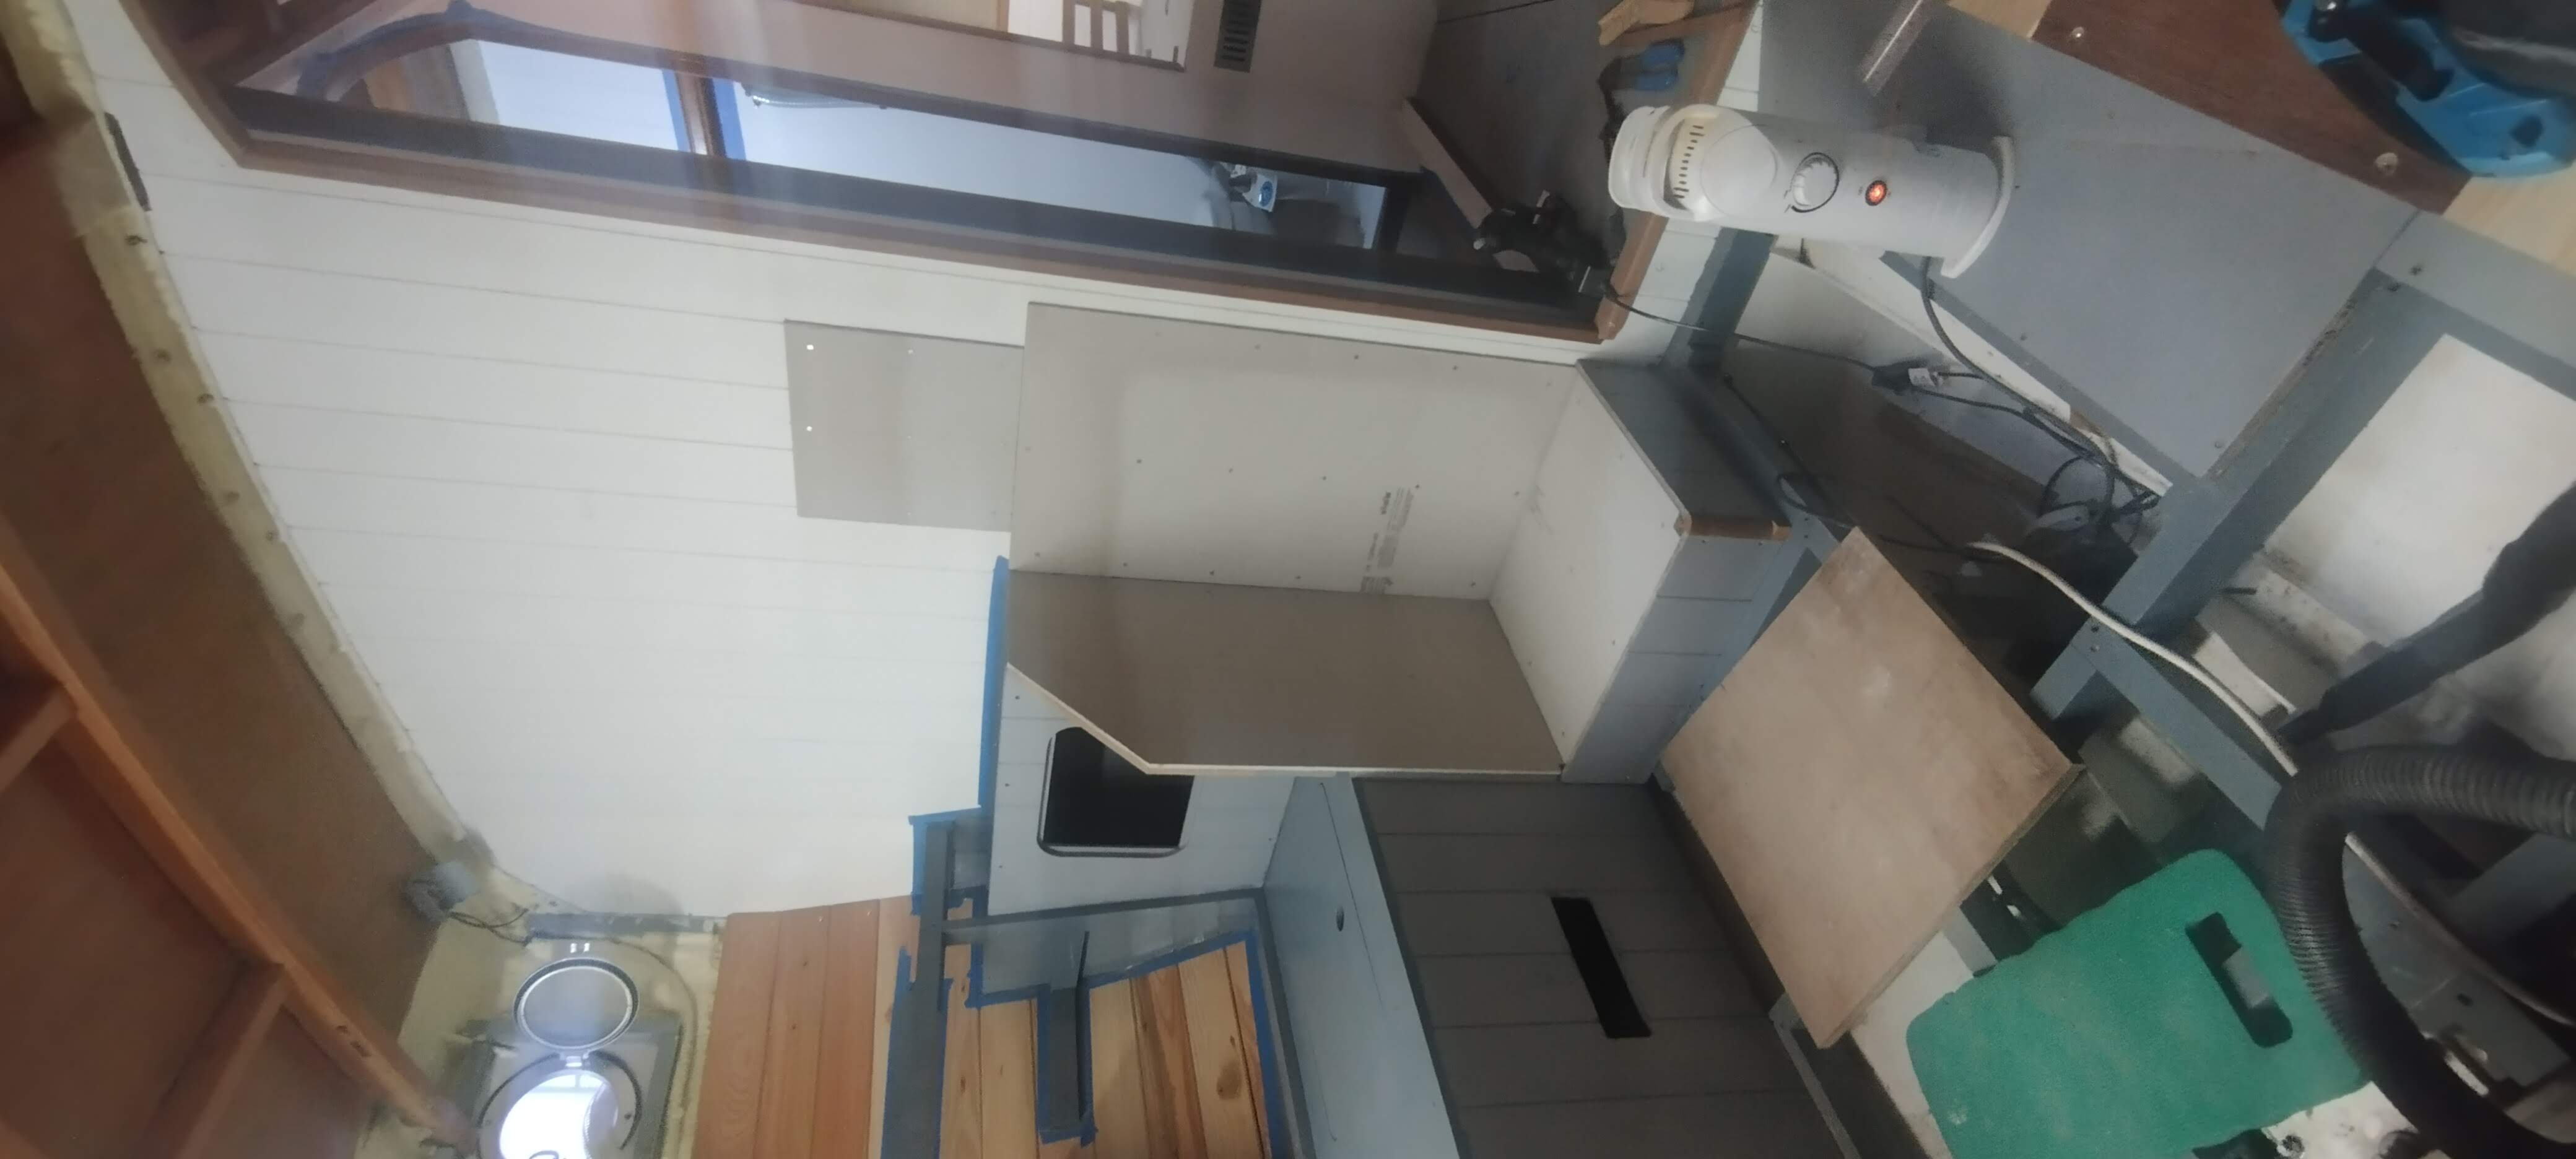
The next project, once the front face of the port settee had been fitted, was to construct the box to form the “L” of the settee at its aft end, as well as a second, lower box at the forward end to form a plinth for the diesel heating stove. Tackling the bigger box first, I had to initially cut a panel to form the port side of the centreboard case box. This could be templated directly from the centreboard case, to secure to the frames I fitted at the end of my last instalment. This also formed the inboard panel of the box, with a nice rounded hardwood corner post at the exposed corner. The front panel then screwed to a softwood cleat on the settee front. A removable panel was then cut to form the bottom of the locker, then this all came out again to be painted before final fitting. Whilst this paint was drying, I was able to insulate the steel of the centreboard case in order to try to remove a cold spot from the middle of the accommodation, and prevent sweating. This I did with a sheet of 1″ polyurethane foam board, of which Dave happens to have a stack sitting unused in the shed, and this was glued to the steel using a polyurethane foam glue. Holes were cut in the foam to allow access to the bolts in the side of the case before fitting, and an extra softwood cleat attached to the starboard face to give a good foundation to the 12mm ply panel which eventually will form that side of the centreboard box.
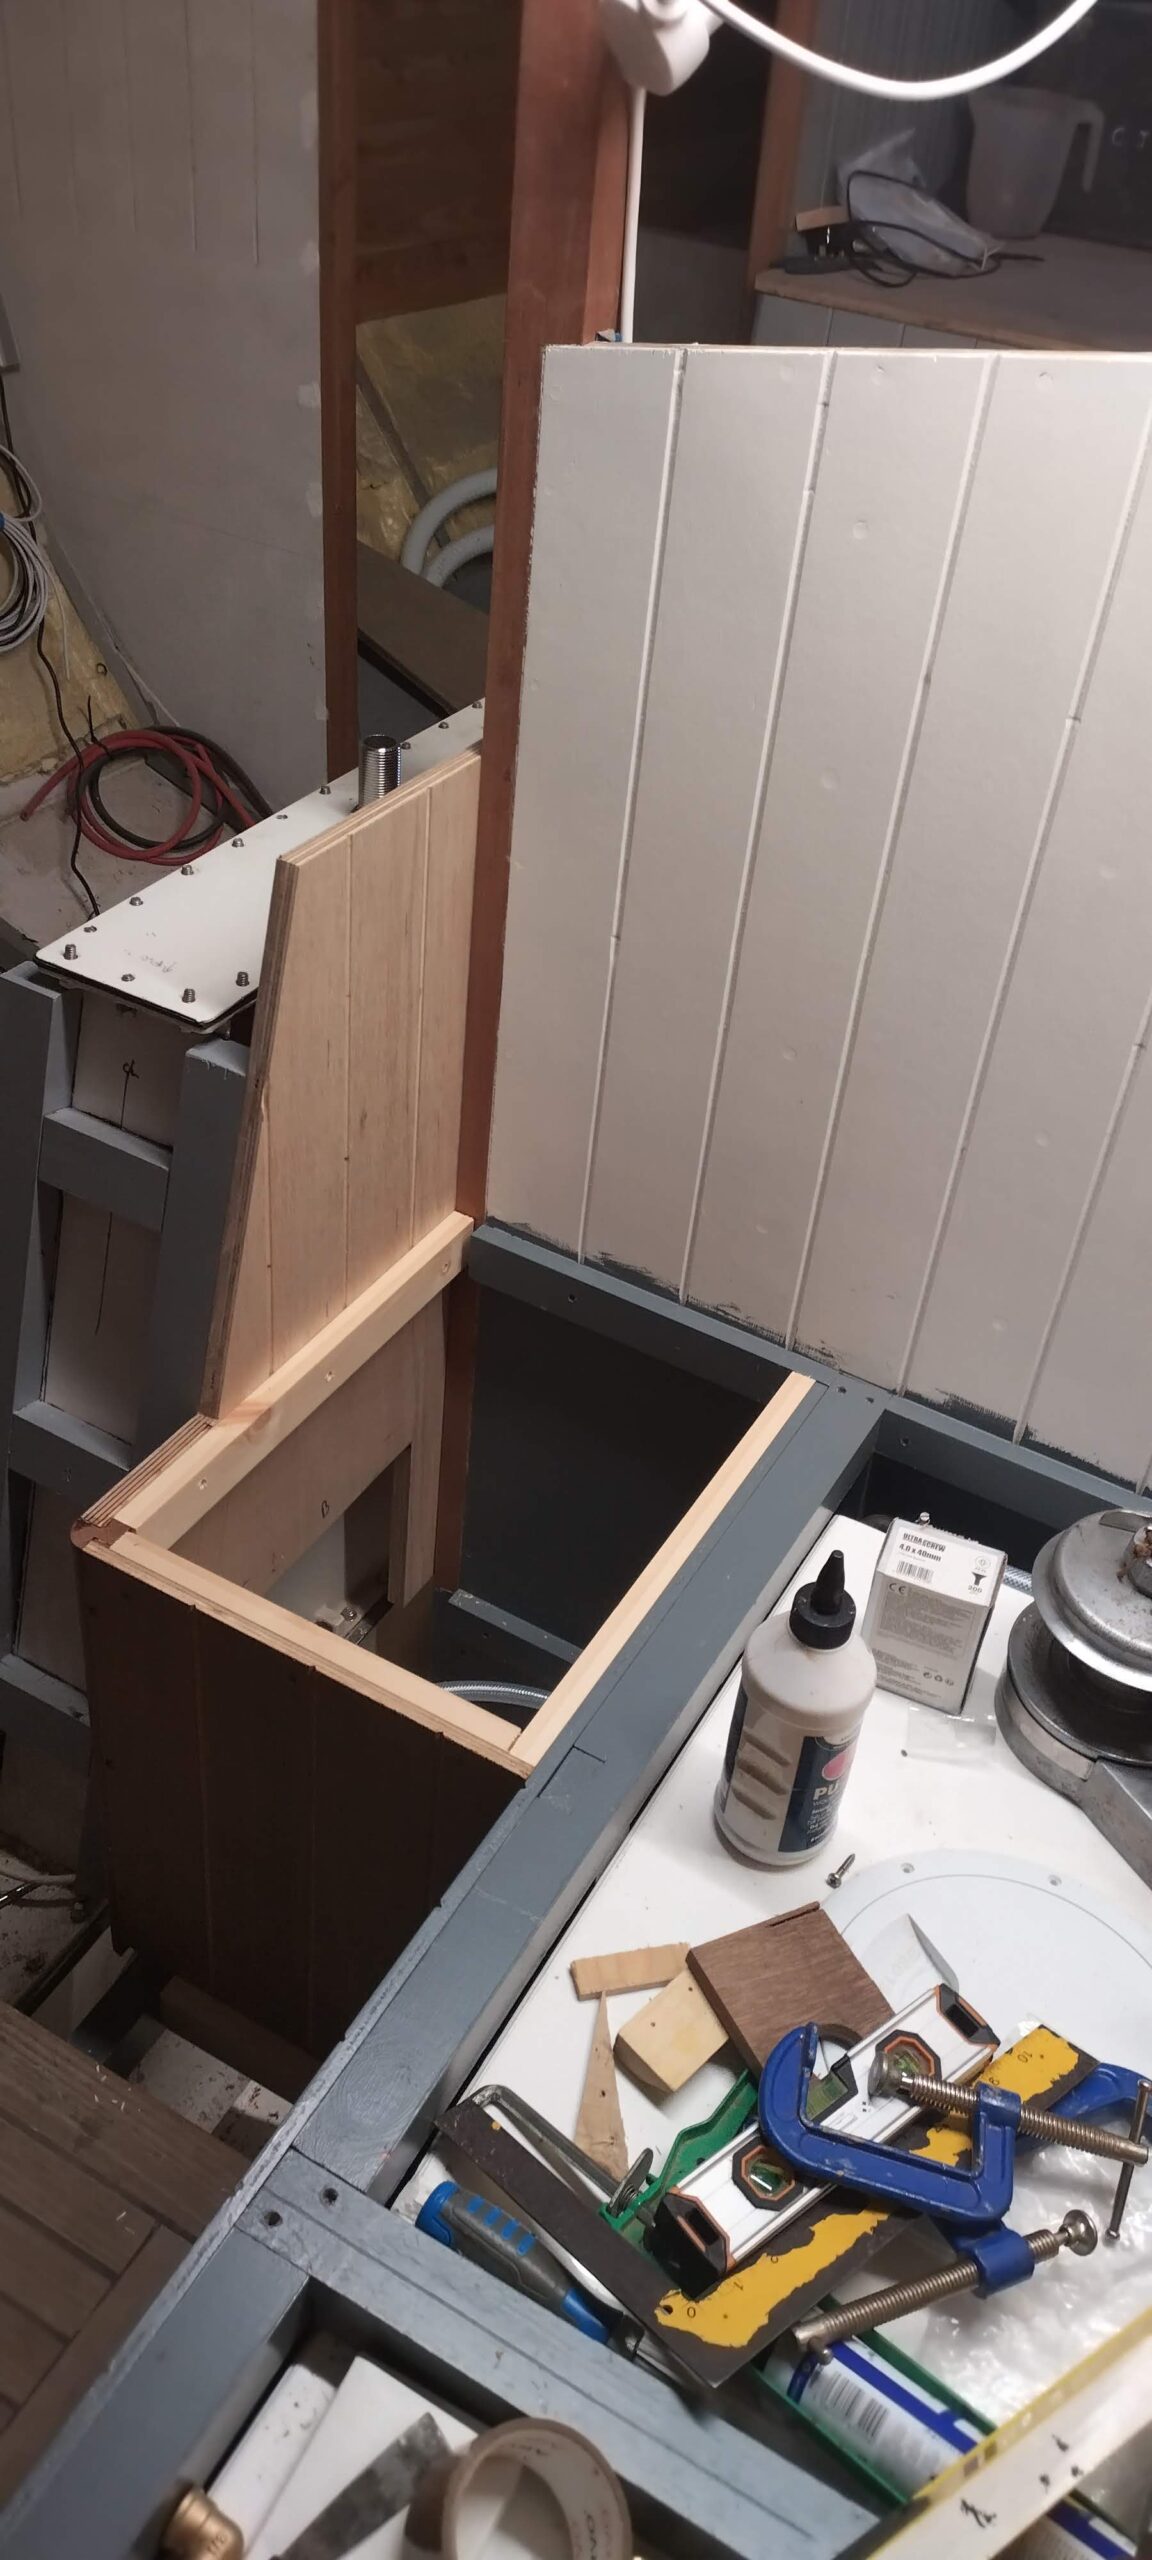
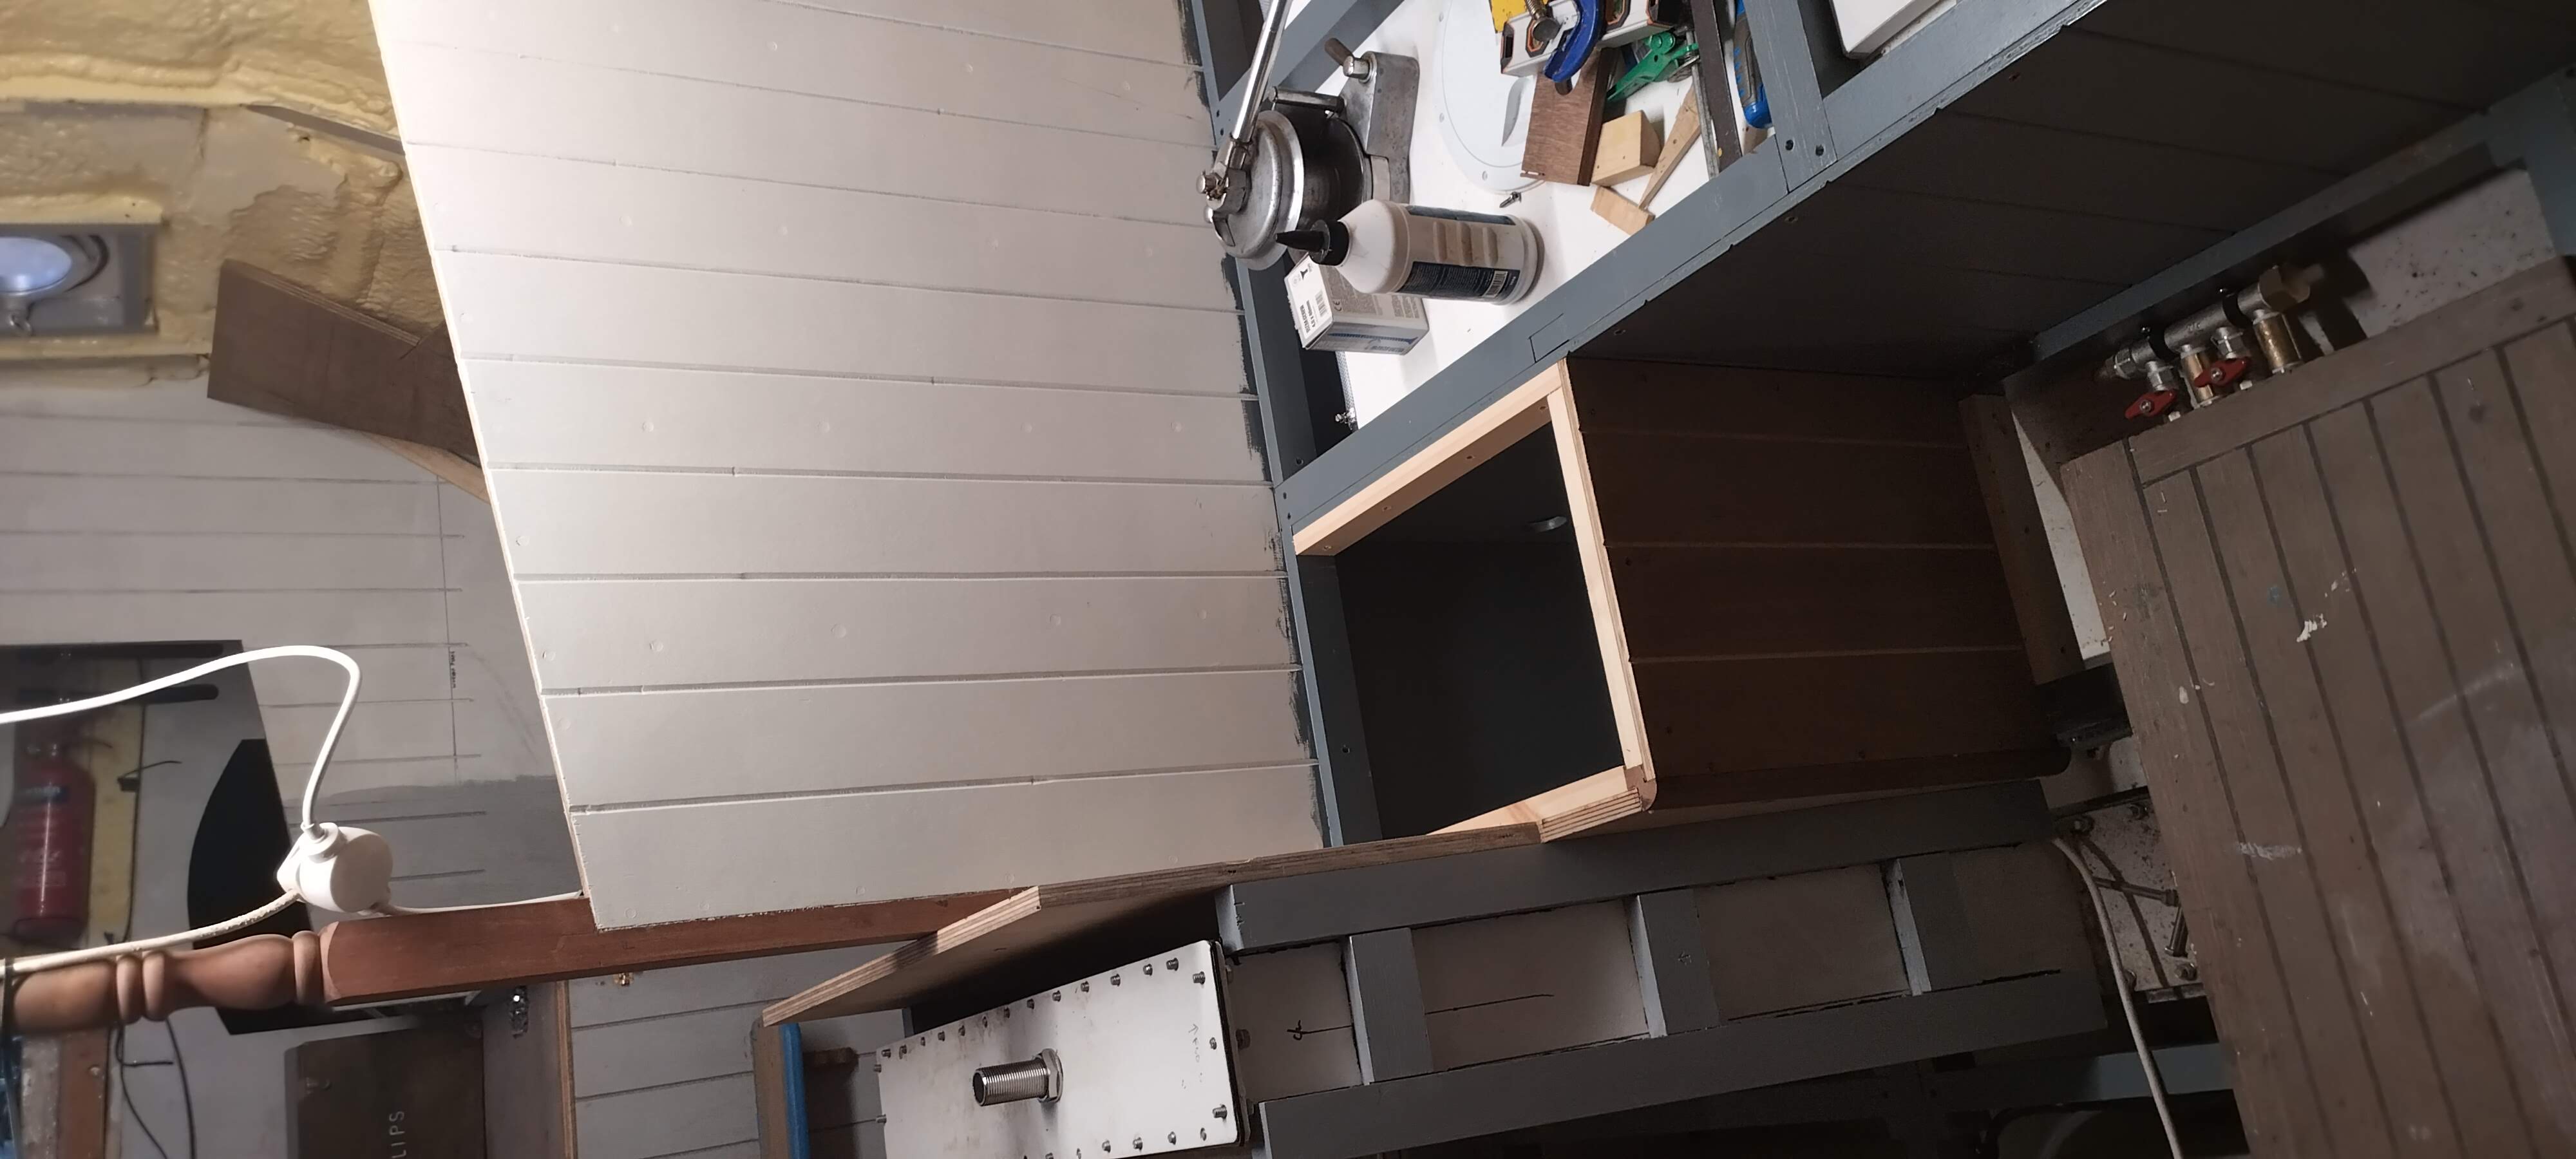
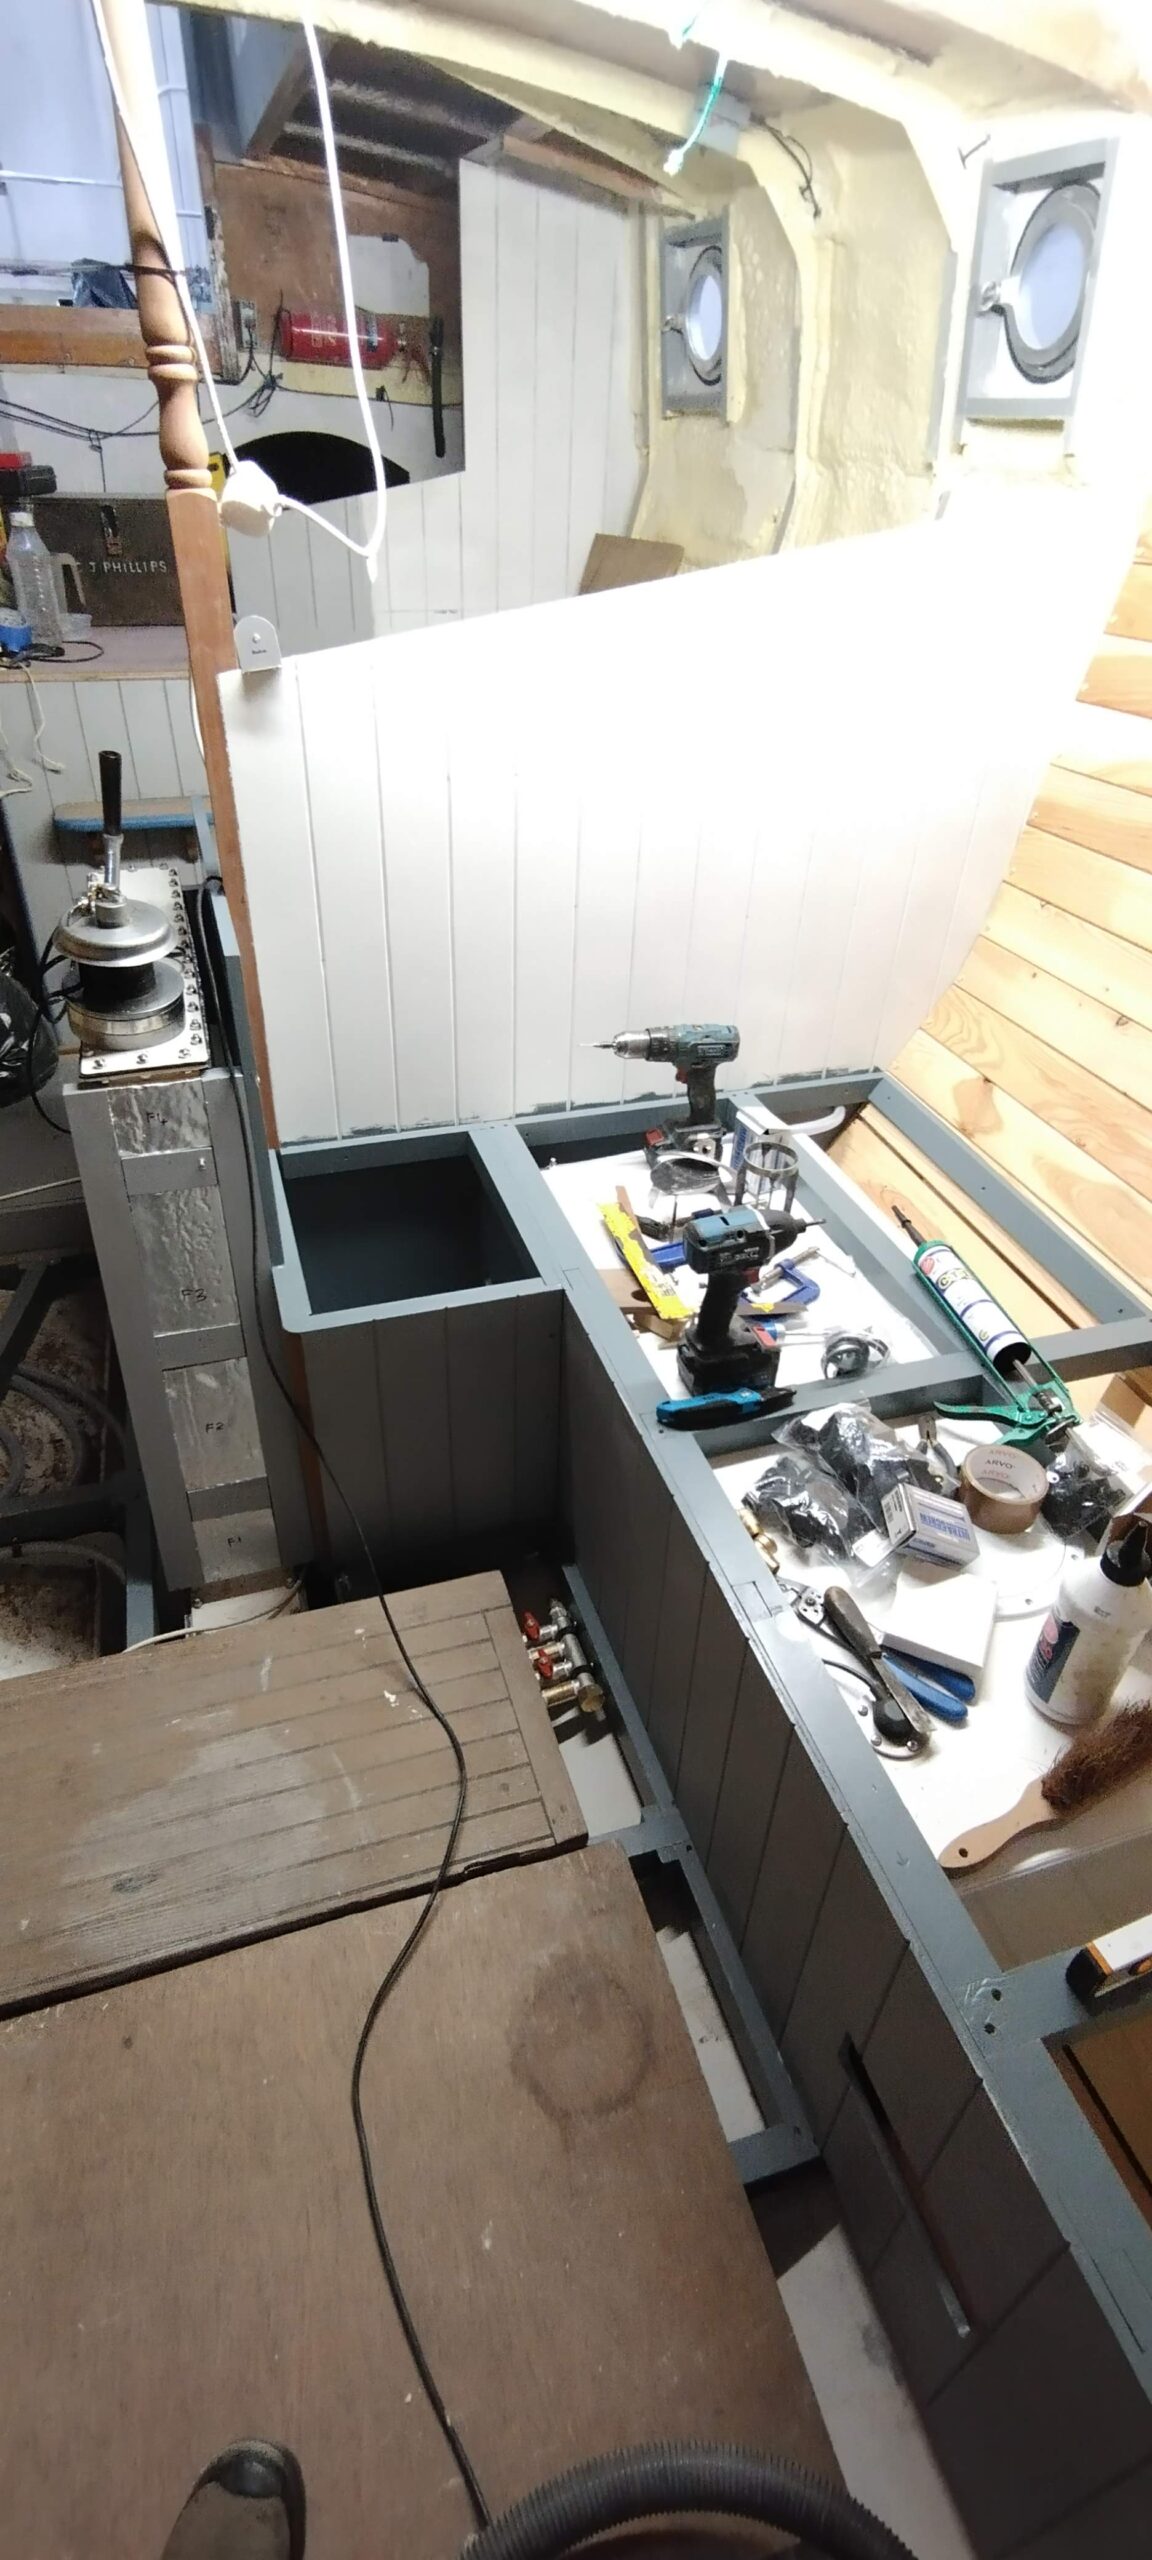
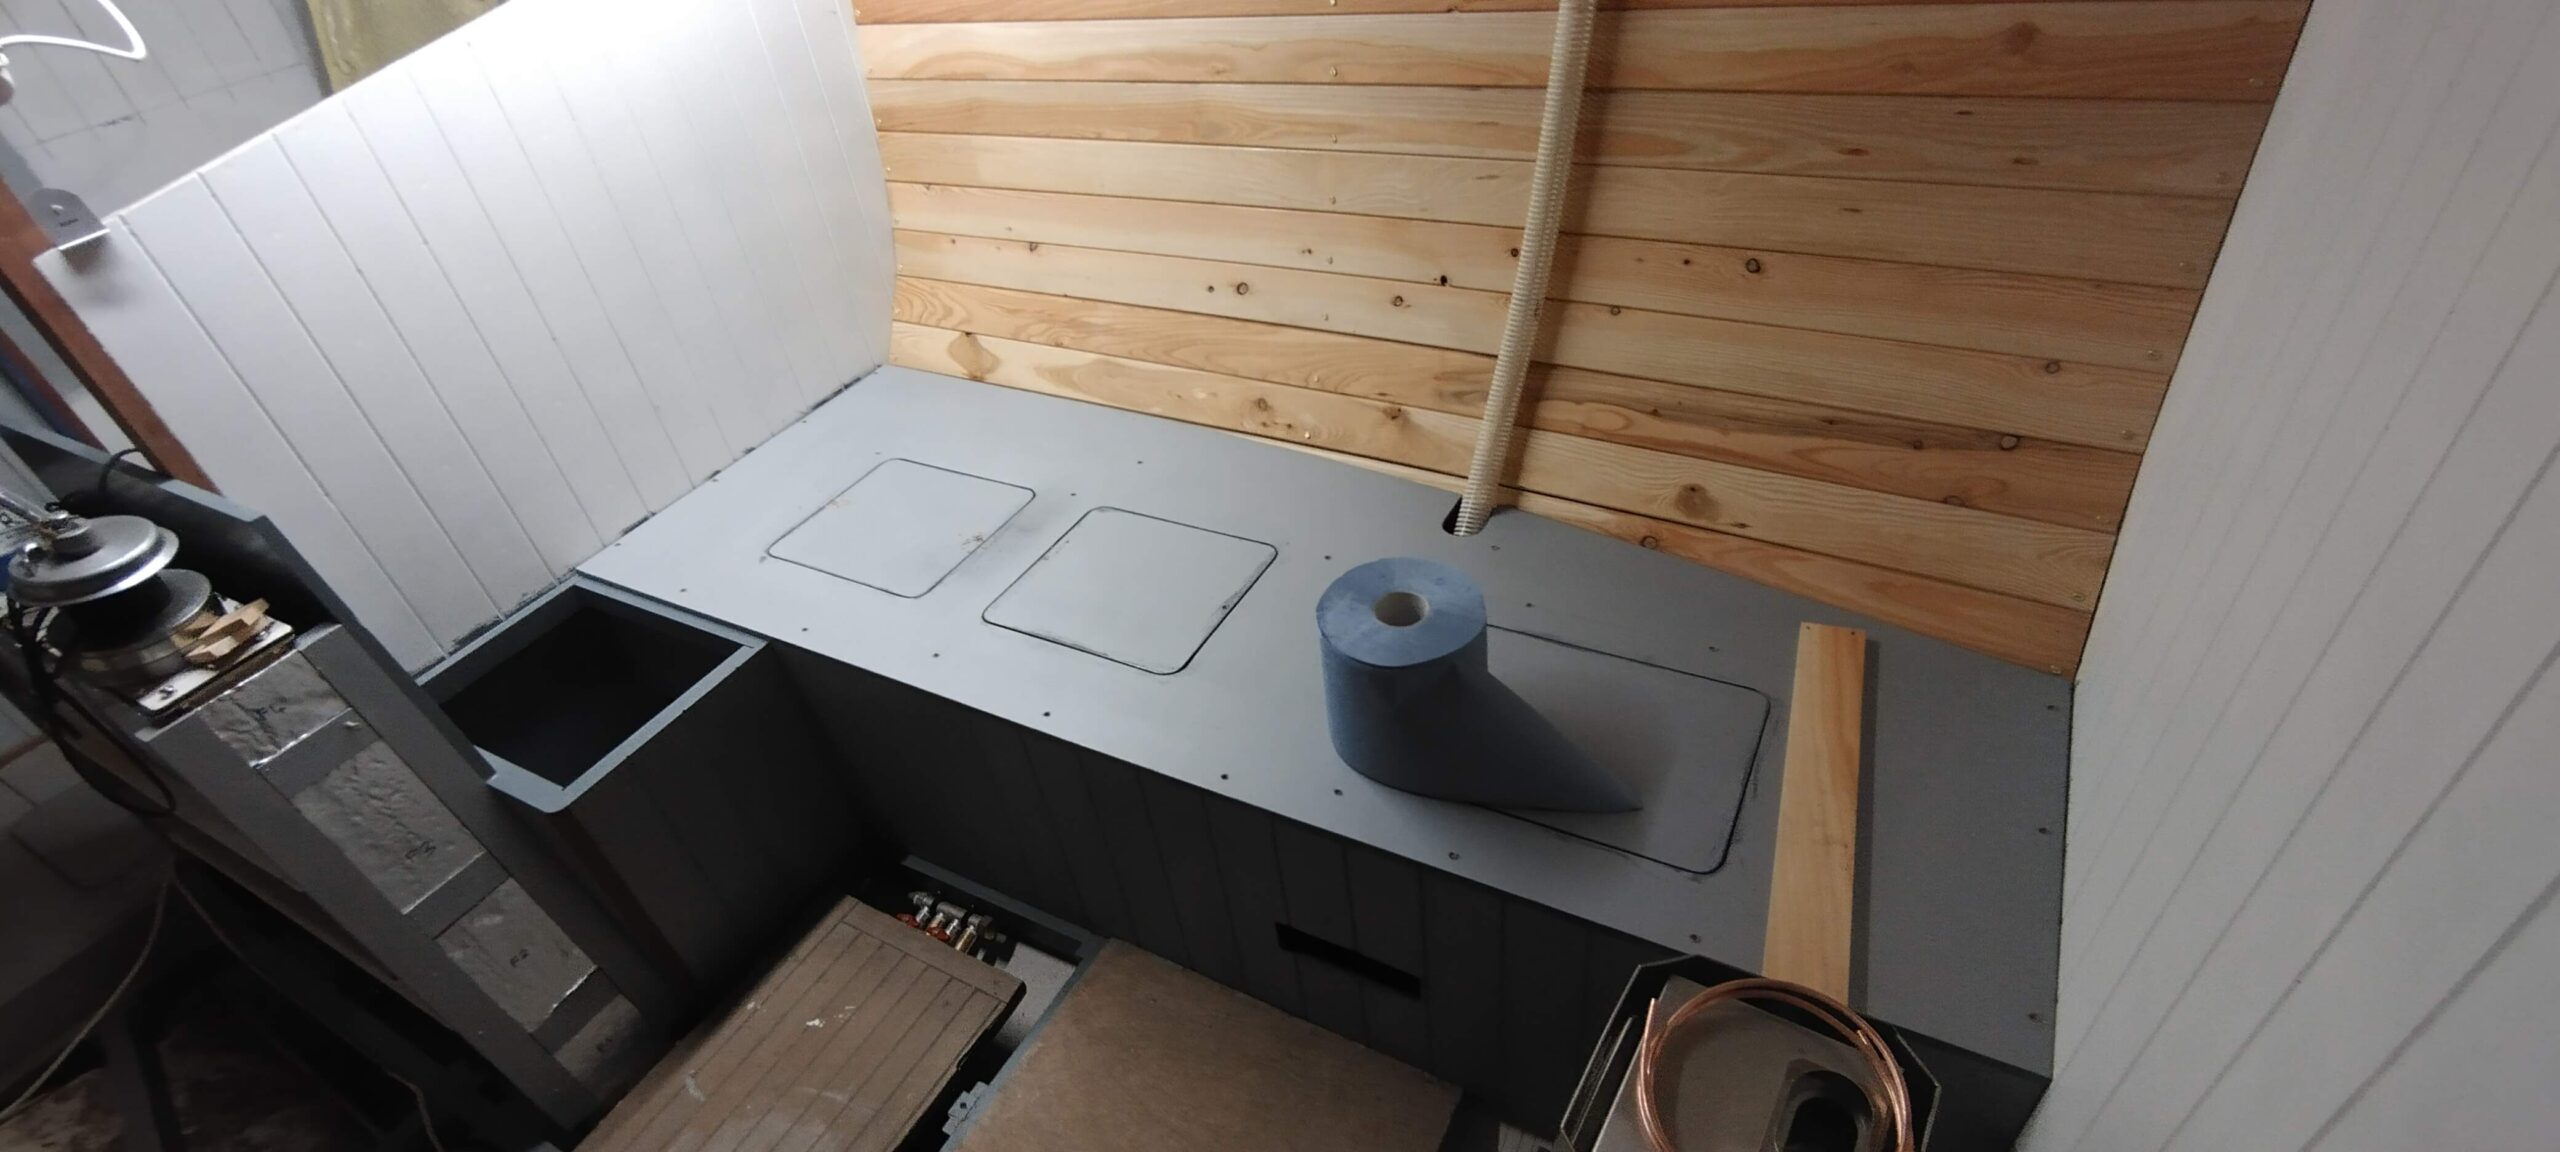
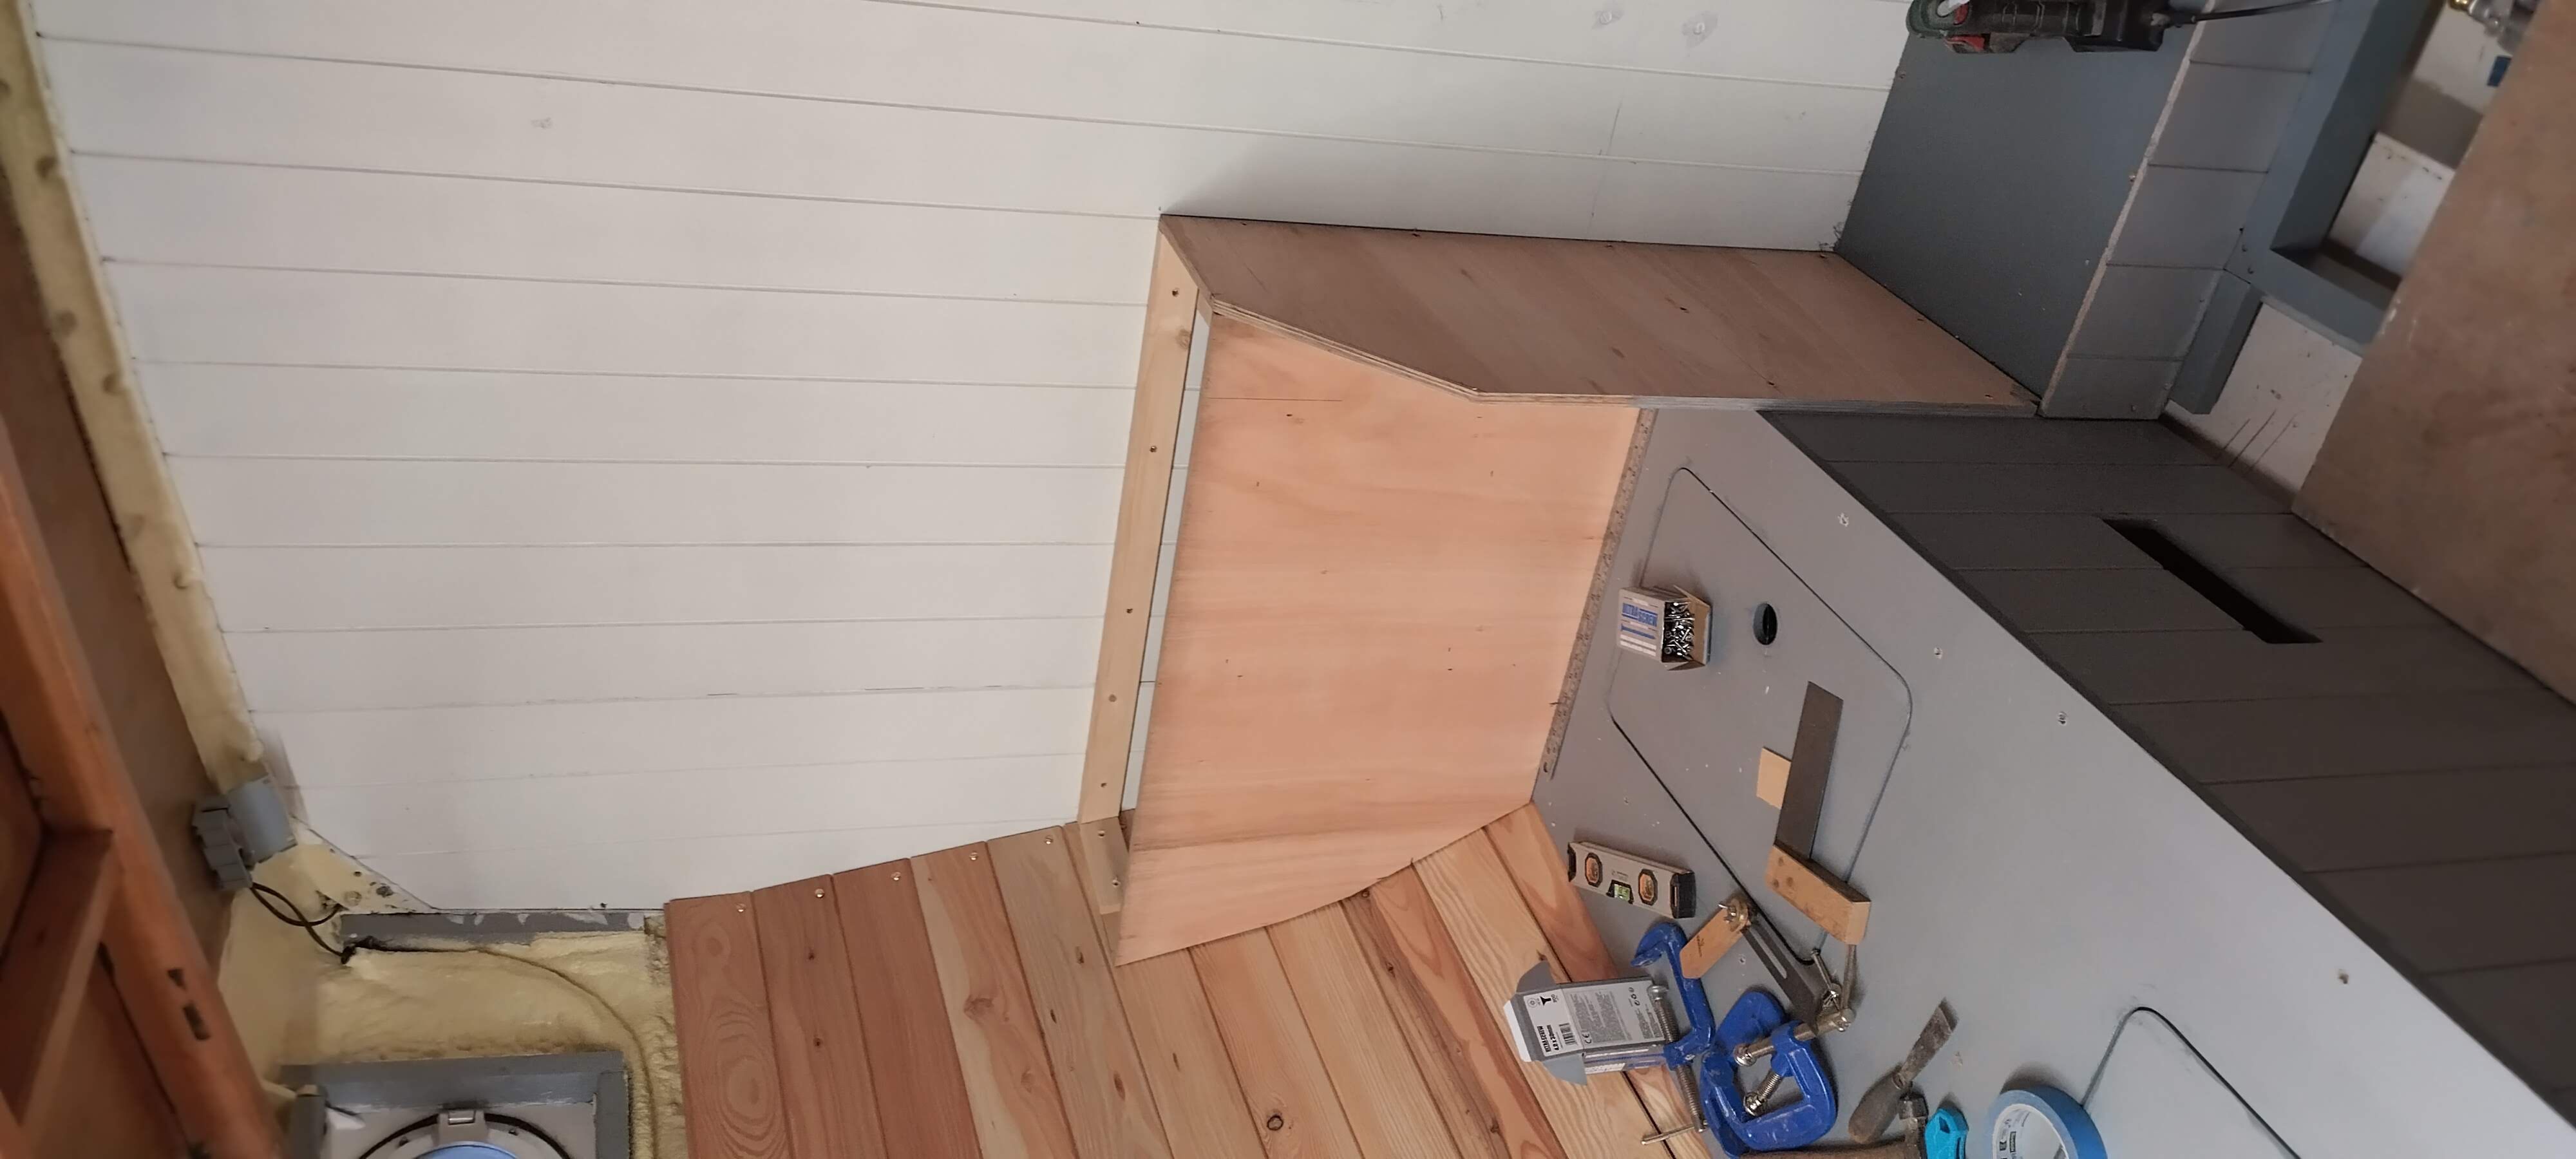
The stove plinth box was slightly less complex, consisting only of two sides and a lid, screwed to the settee front and the sole beams, again with a nice rounded corner post – although with this one I had to graft in a section of square corner so the sole boards fit nicely at the corner, without any gaps. Unfortunately this occurred to me too late to do the same on the aft seat box. The plinth was a necessary structure as in this part of the hull the bottom plating starts to impinge on the flat sole (I refer you to the last post, in which I had to do some clever geometry to fit a sloping area of sole on the starboard side), so there would not have been a large enough flat area for the stove had I not raised it 4″ above the main sole. You will see later on how the “fireplace” will be lined with cement board prior to tiling.
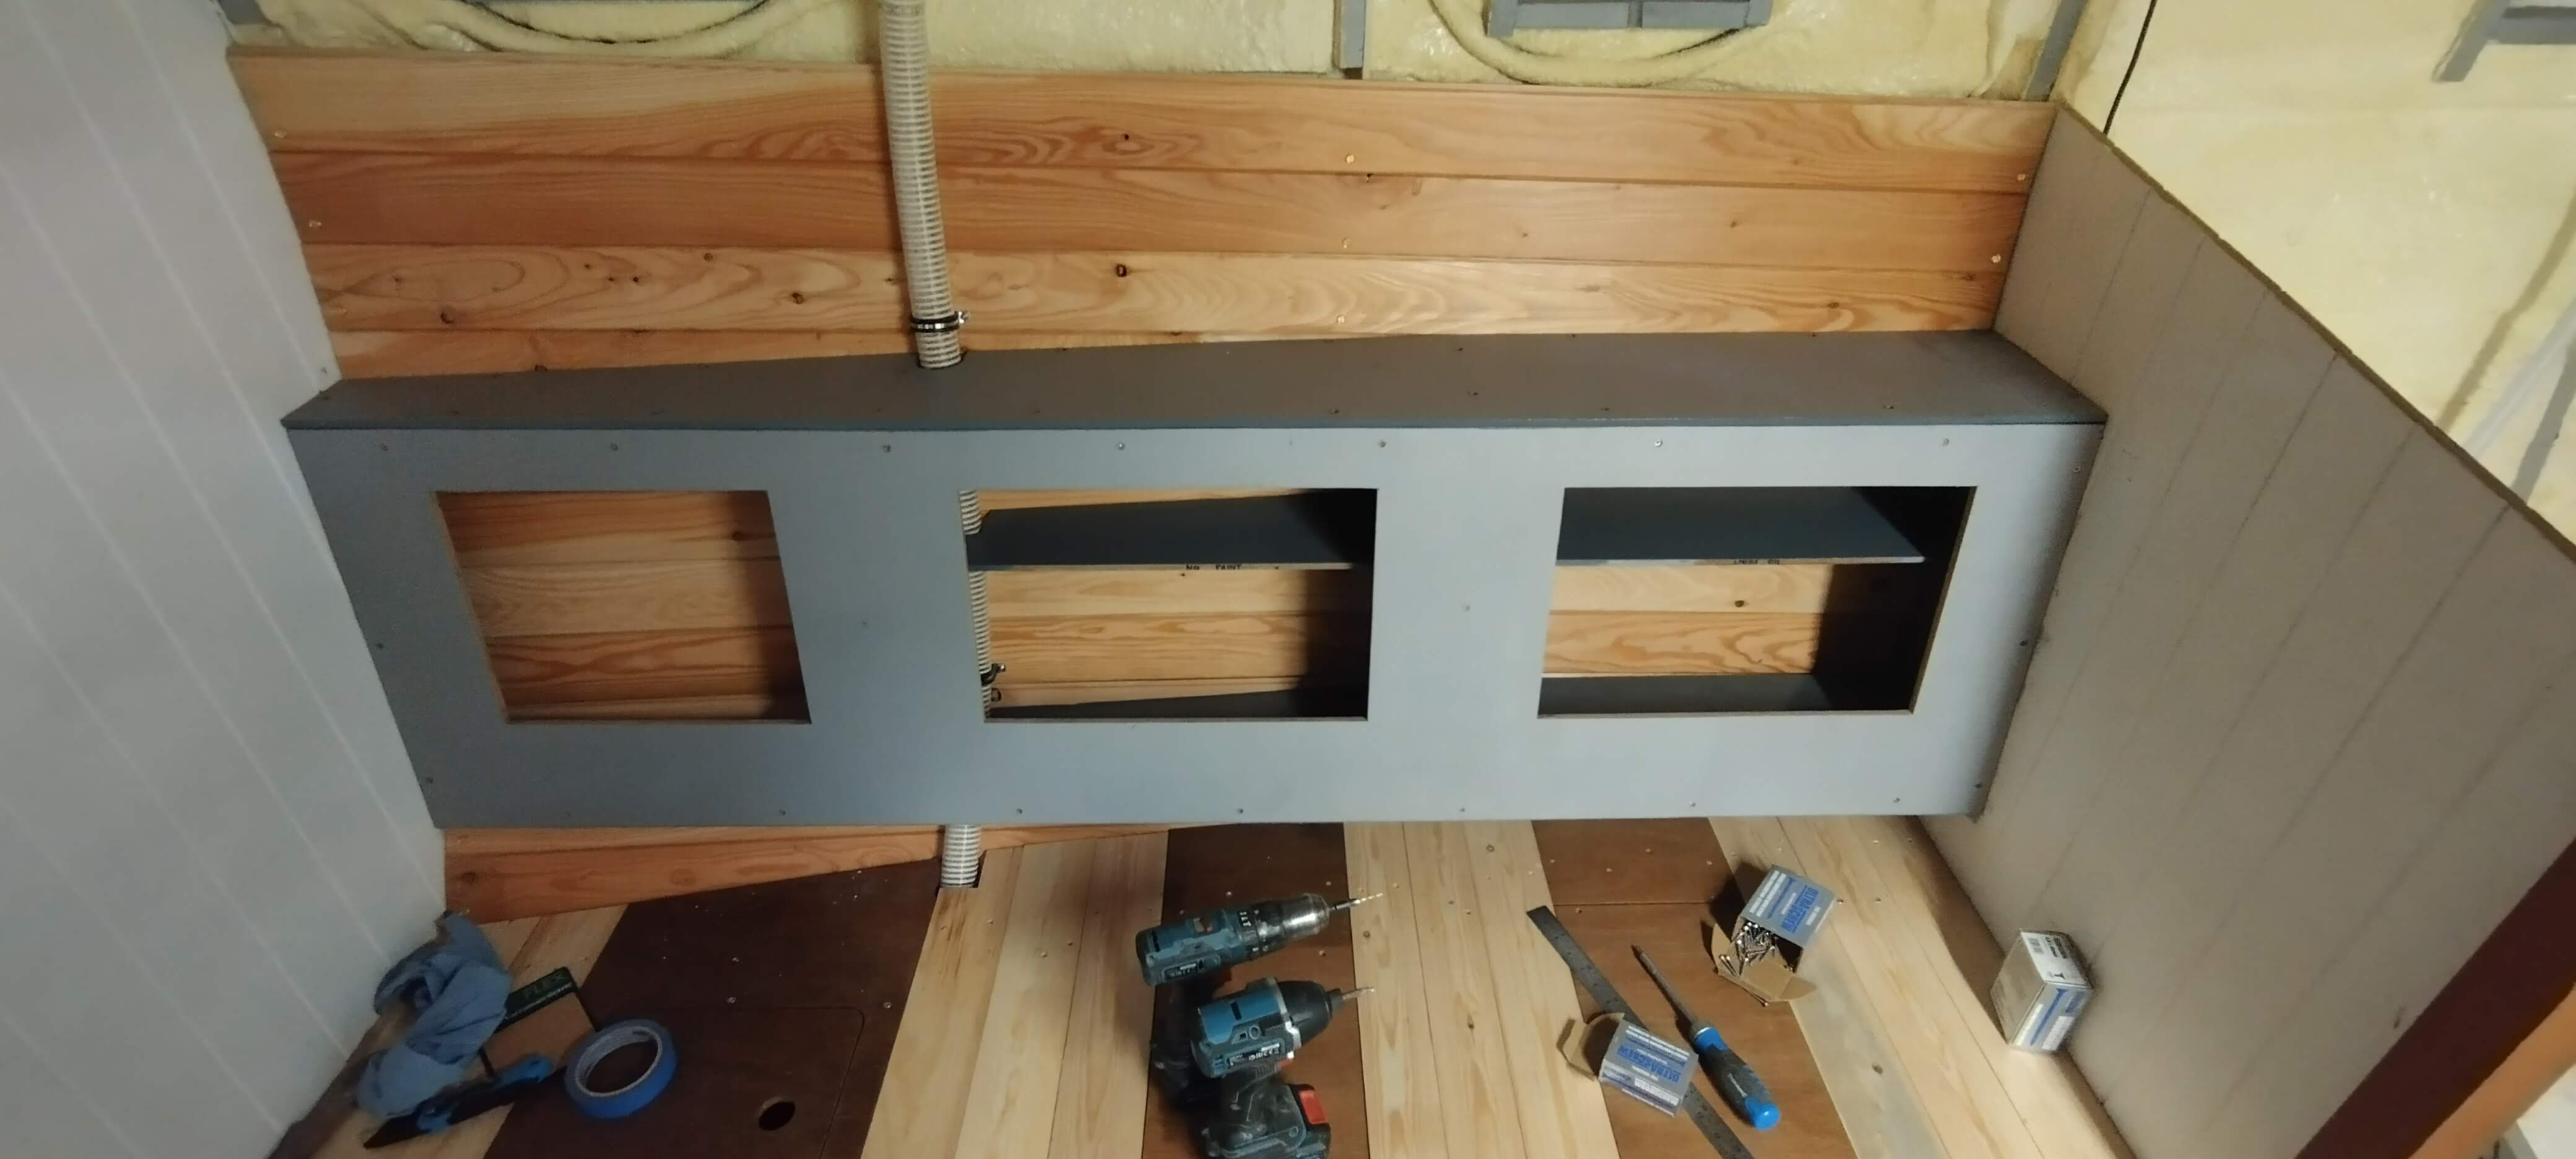
Next on the agenda was to measure and cut for the seat top for the port settee. This would be much simpler, and made from one piece of 12mm ply, as this settee is not required to be extendable – there are a few reasons for this: mainly to discourage the use of this settee as a berth, so there is still somewhere to sit, but also for safety – bedding close to a hot heater could cause problems – and also because I plan an extension pilot berth above the settee – more about this in due course. Measuring for this panel was relatively simple – I took the width of the top at regular intervals along its length, and, knowing the inboard side is straight and square to the bulkheads, was able then to mark the widths on the ply board and join the marks to make a pseudo-curved line – in fact once cut with a circular saw the slight angles joining the dots are smoothed out, so it ends up as a smooth curve. Whilst test fitting the panel, I measured for the access hatches – again I would need two occasional hatches for access to the water tank, and an easily-removable locker lid at the forward end. Each of these panels would have at least one edge resting on the settee framework, but the other edges would need support from strips of softwood glued and screwed around the hatch perimeters. Once these hatches were cut and lined with said strips, again the requisite four coats of paint were applied to the undersides (and two primer coats on top) before fitting.
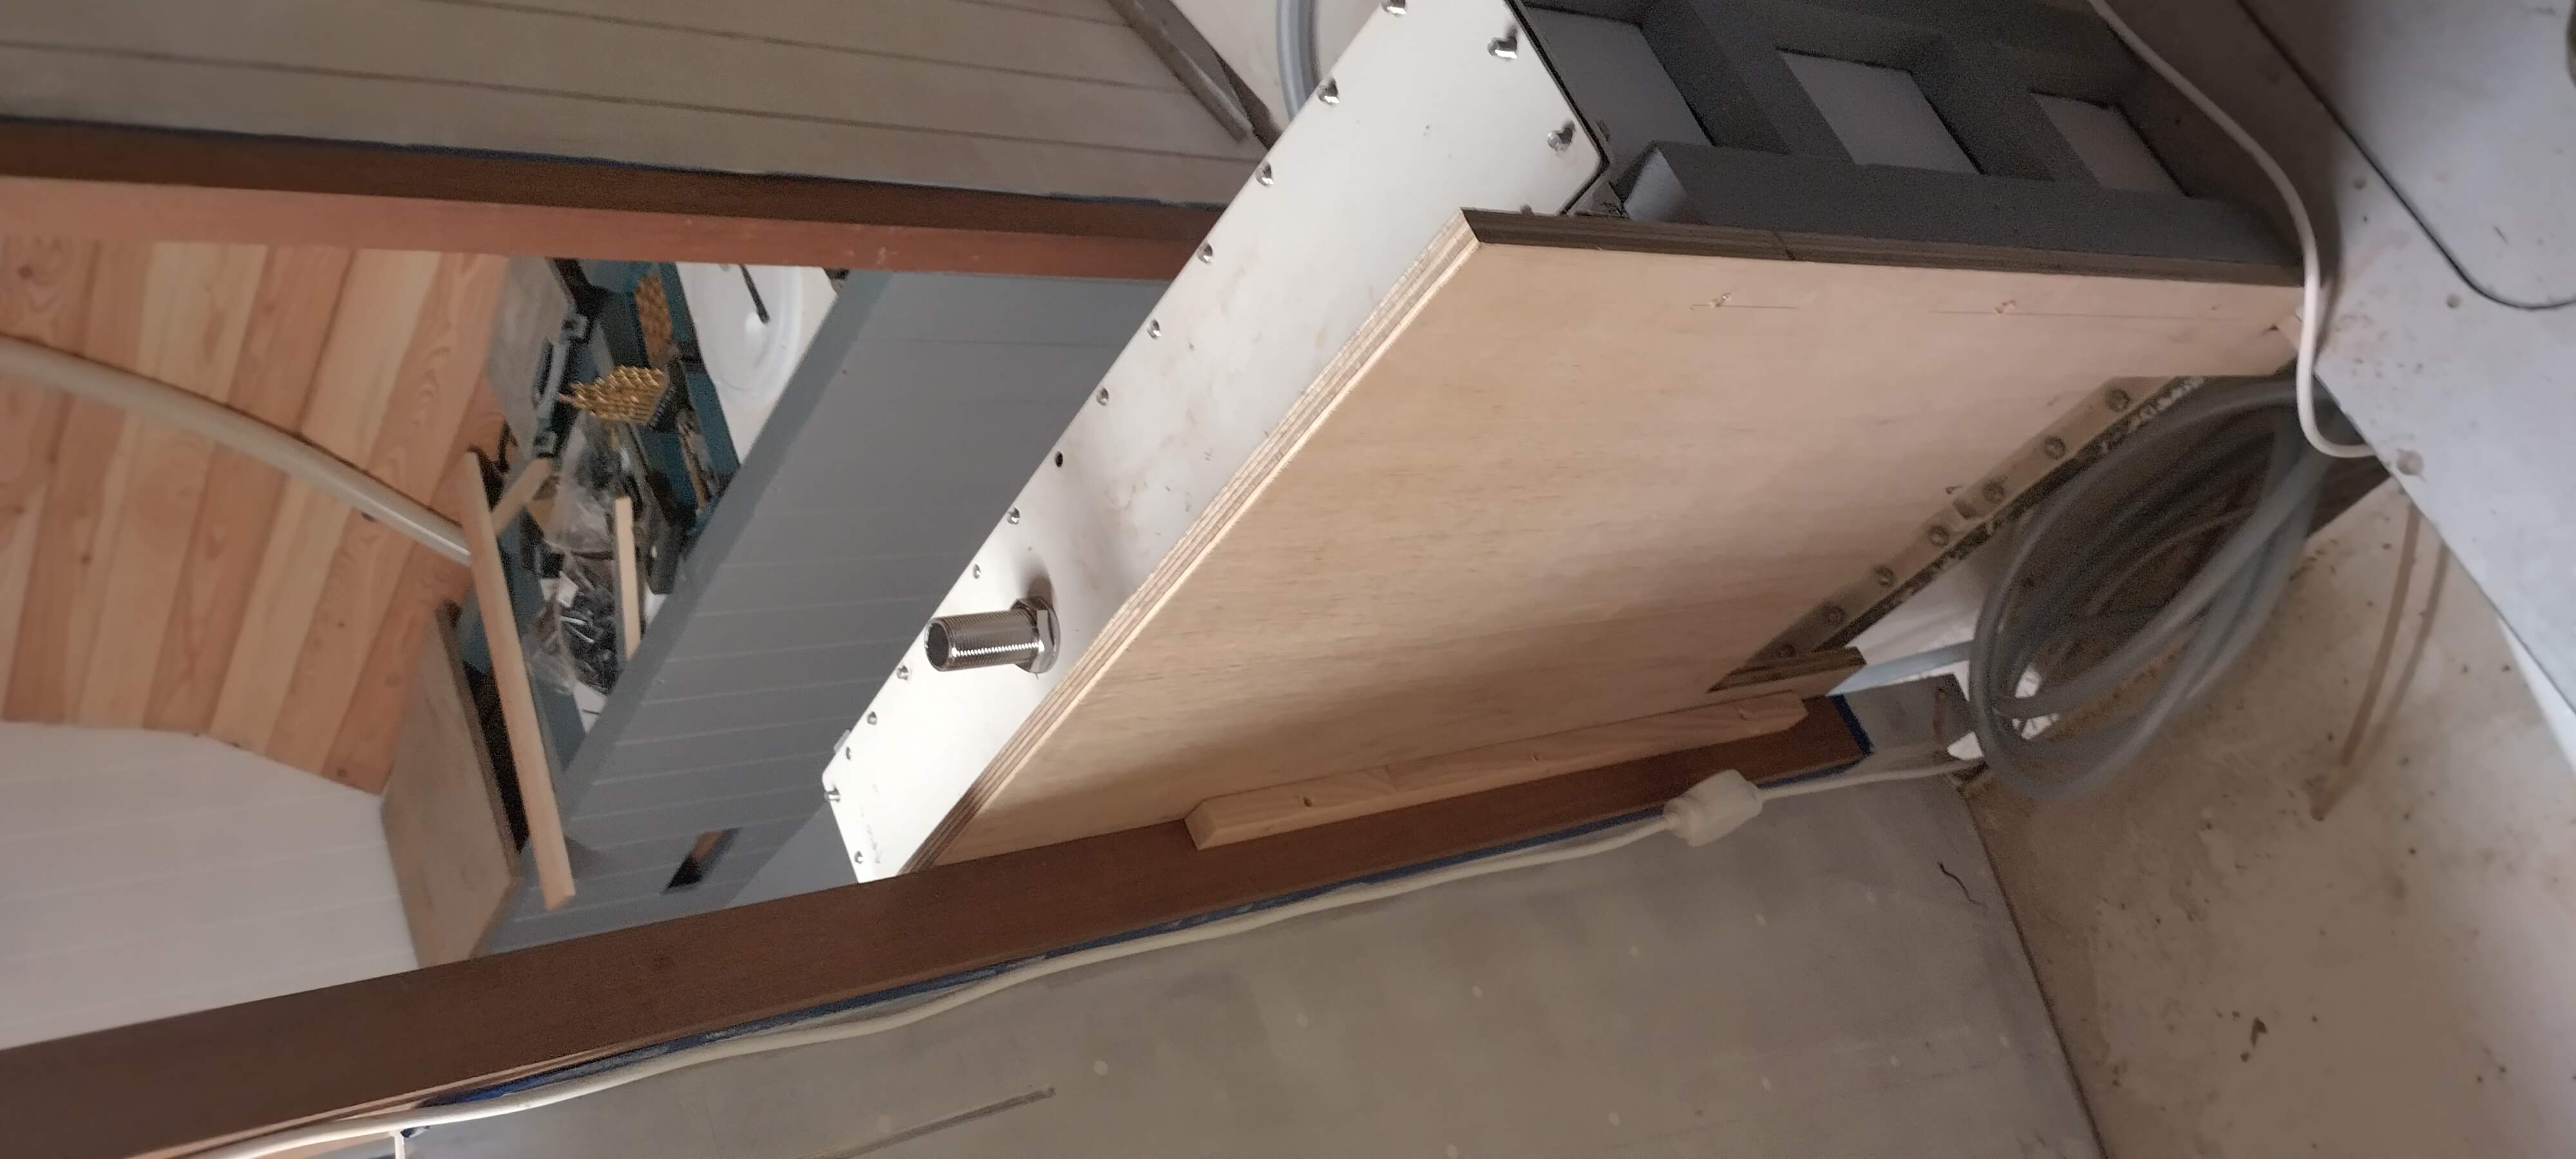
It was at about this point that I decided it would probably be a good idea, now the tanks were plumbed with their various hoses and into the manifold (see last post), and before boxing them both in completely, to fill the them with water and check for leaks at the various fittings. It is a good job I did, as the suction fitting on the port tank turned out to have a slight weep with the pressure of a full tank behind it, but all the others were tight. Fortunately the offending fitting is one which can be removed and refitted without having to move the tank, so it was a quick job (once I had pumped all the water out again – thank you Mike for the loan of your portable pump!) to remove the fitting, apply some polyurethane sealant and refit it. After giving it overnight to cure, I then repeated the exercise to double-check both tanks, and all six fittings were tight, so hopefully I will not need to repeat the exercise before I fill the tanks in anger on launch day!
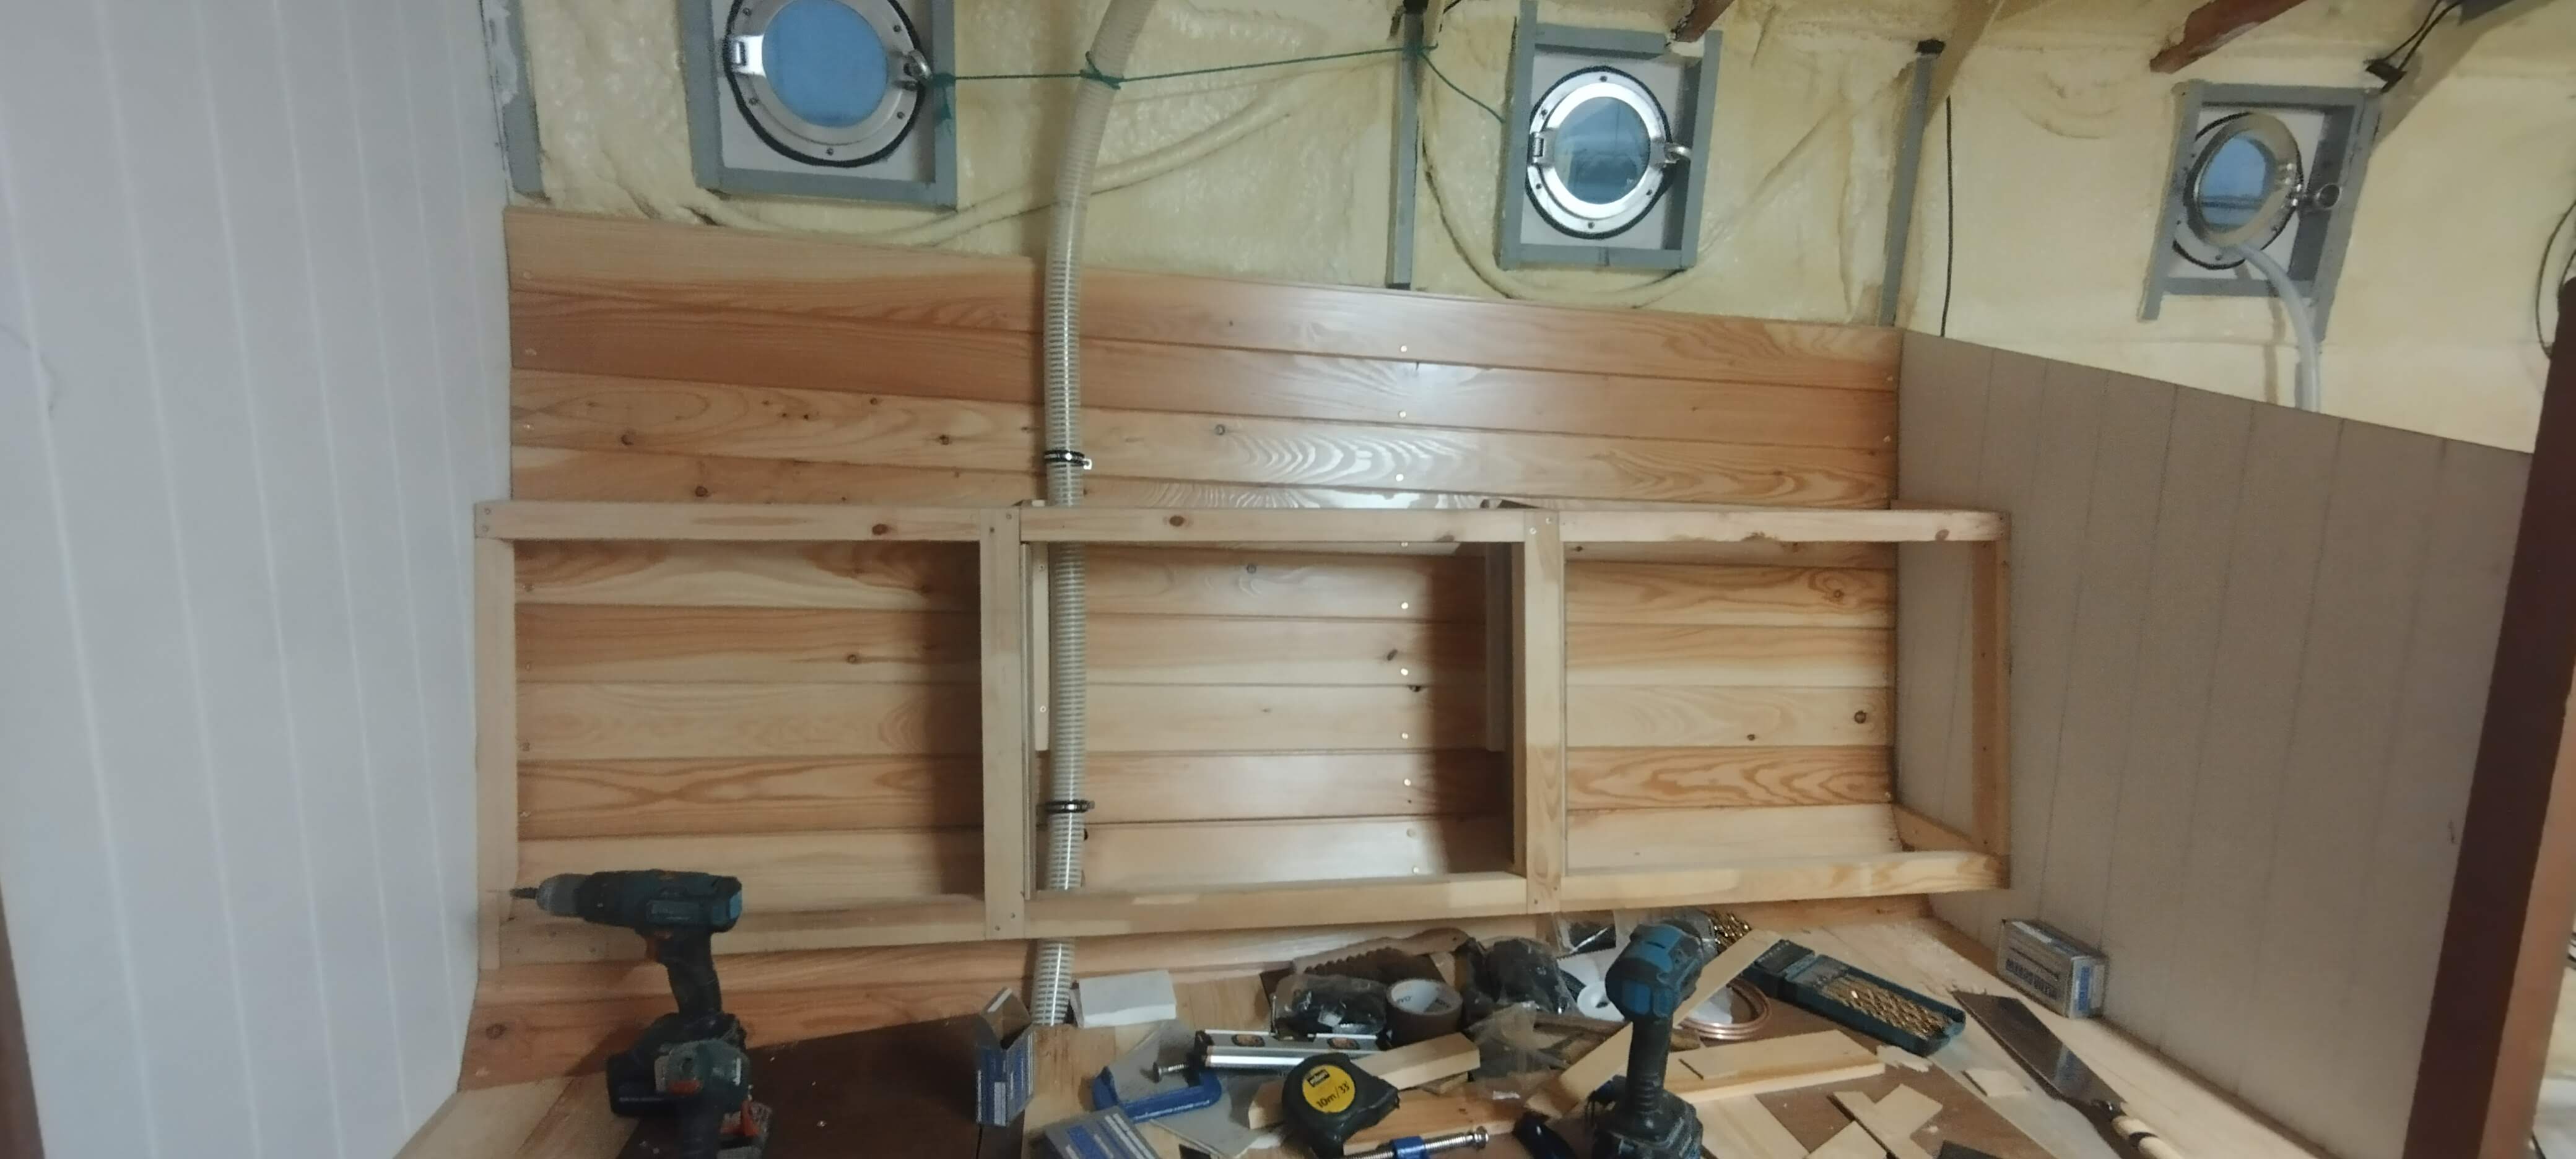
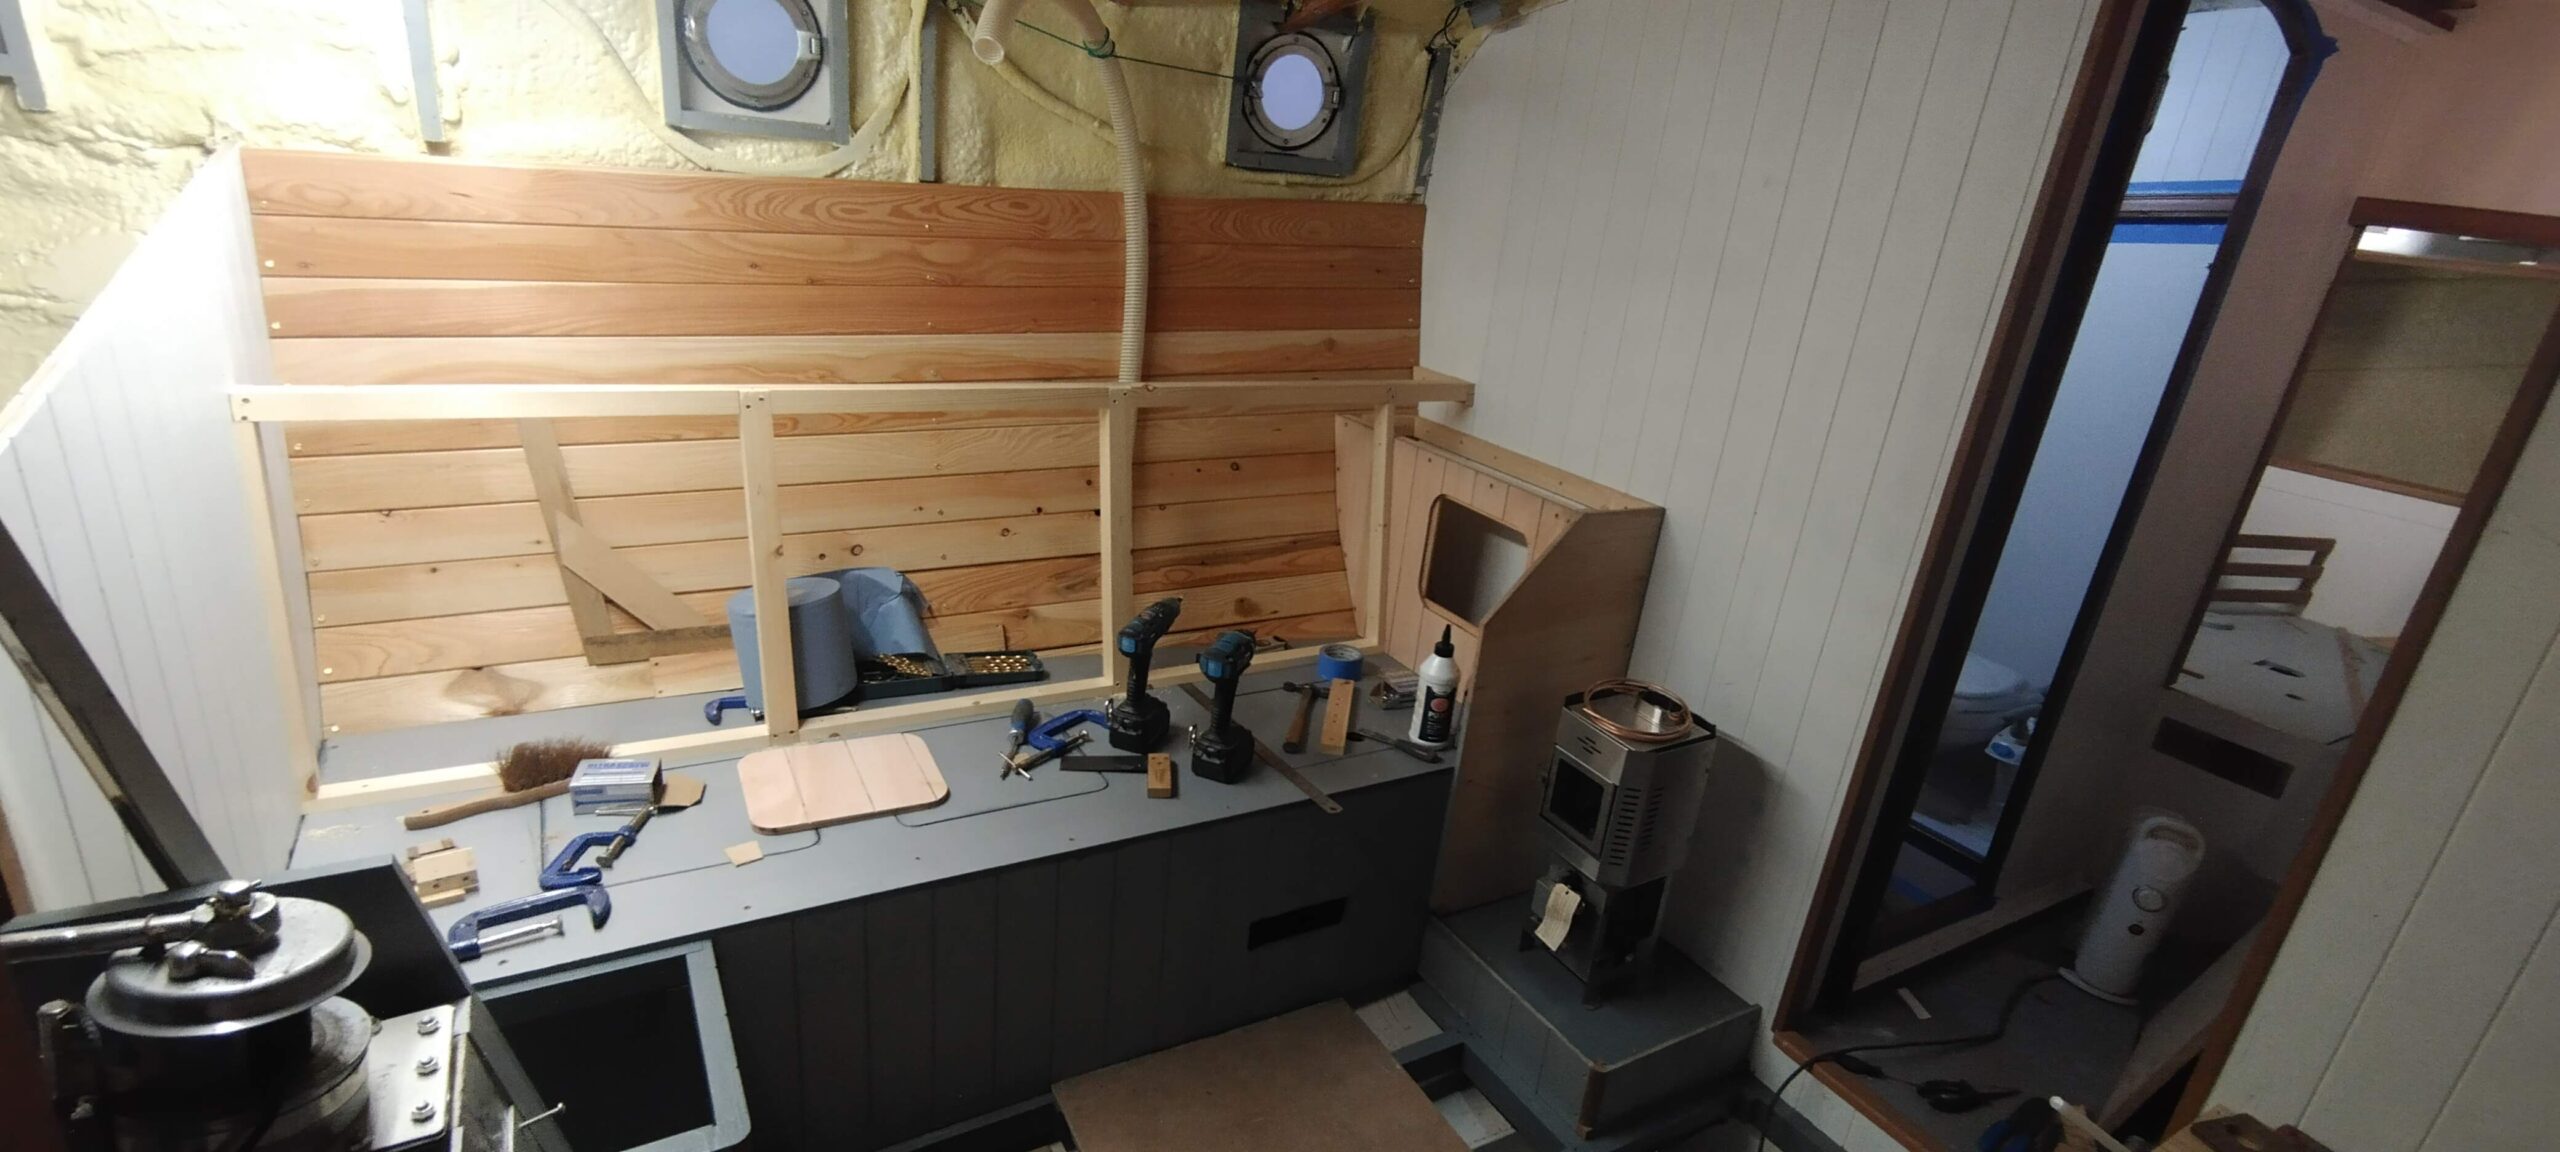
I might have fallen slightly out of the true sequence of events here, but somewhere along the way, I started building the framework for the starboard seat back lockers. Two factors made this more complicated than building a simple rectangular frame: firstly, the fact that the seat is an extension bunk meant that there needed to be 4″ gap underneath the lockers to make room for the extra section of cushion required when the seat is not extended; secondly, the fact that the hull is narrowing at the forward end, so the bottom forward corner needed to be shaped to fit the hull lining slightly. This does have the advantage that the forward end of the lower fore-and-aft rail can screw straight into the lining and therefore be nice and firmly fixed. The upper rail is supported at both ends on the bulkhead (as is the aft end of the lower rail), and mini-bulkheads support the middle of the frame and make sure it is solid and firmly fixed to the hull lining. I then attached cleats for three shelves – bottom, middle and top surface, and measured, cut and painted these shelves as well as painting the rest of the assembly. The front face was cut out of 12mm ply with three cut-outs for the lockers, which will each be covered by a hinged, upholstered back cushion.
It is worth noting here that currently all this furniture is in its untrimmed state. In due course, as I progress, I will be trimming all edges with hardwood so no bare edges of ply will be visible on exposed furniture (I am allowing myself some edges where they will be well-hidden in everyday use), and also on the starboard side there will be some “proper” joinery in a bookshelf (or shelf for glasses, not sure which yet) and a smaller locker built above the seat back.
The port seat back is also slightly complicated – this time by the fact that the settee base is actually longer on this side by 200mm (the half-bulkhead with the galley is 200mm further aft than the chart table bulkhead on the stbd side). This allows for a foot locker to be built in between the fireplace and the ship’s side, and the seat back will extend aft from this, making the actual usable length of the settee the same 1900mm as on the starboard side. The foot locker was constructed first, with a partition forming its inboard side to separate it from the stove, and a frame for the seat back screwed both to this box and the upper rail to a cleat on the main bulkhead. I have yet to decide how to finish this corner of the saloon exactly, but probably with another built-up box to contain the foot of the pilot berth mattress and bedding – I have thought it might look nice to make this a plinth for a table lamp in the forward corner of the saloon. The port seat back of course can be screwed to the settee top as well, making a nice sturdy structure and bigger lockers. These again were fitted with an intermediate shelf, but the top will be different to the other side, as it will be another extension bunk, this time of the more simple, alternately slatted type. The mattress for this will be split down the middle so when the bunk is not extended it will fold in half.
The final stage I undertook before returning to work was to build the six seat back locker lids, which will be upholstered and hinged to allow access to the lockerage behind. These are simply sheets of 9mm ply with a softwood frame glued and screwed to the back. Once assembled the edges will be rounded so the upholstery is less vulnerable to chafe before being sent for upholstery when I get all the boat’s cushions made in the future. In the meantime they will be temporarily fitted in place so I have functional, if hard, seats in the saloon. Now I have some seating I have already taken to having my lunch in the increasingly salubrious surroundings of the interior – if for no other reason than that it is marginally warmer down below!
In between all the other tasks I have also run the fuel line (part copper, part hose) for the heating stove from the day tank in the cockpit locker space. This was a fun evolution requiring some furious wrestling with copper pipe and interesting bending (both of pipe and my body). For this I acquired a cute little fuel filter which sits below the sole next to the heater, and once the tiling is done and the stove in place, I will just need to fit the last section of copper pipe between the filter and the stove itself.
When I am back home I will be continuing with the starboard seat back and will construct the extending pilot berth, and will probably then paint all the new furniture white, and trim it nicely with hardwood. I think it is also time, at least in the main section of the saloon, to cut some sole boards and have, for the first time, a solid floor to walk on! Once the bulk of the joinery is complete in this area I can then fit the final sole covering (cork, or corkoleum) and the edge trim on the sole boards to do the final fit. I’ll then have to varnish them of course, and cover them up to protect them until the boat is launched!
Anyway, enough for now. I hope you have enjoyed this update as much as I enjoyed my nice long period doing all the work!
Another comprehensive report Chris, which I thoroughly enjoyed reading.
Thank you. Enjoy your new job.
Thanks Colin!